More Life Health Blog - Discussing Seniors' Exercise, Health, Fitness, & More!
HOW TO WALK WITHOUT PAIN AND TO AVOID INJURY!
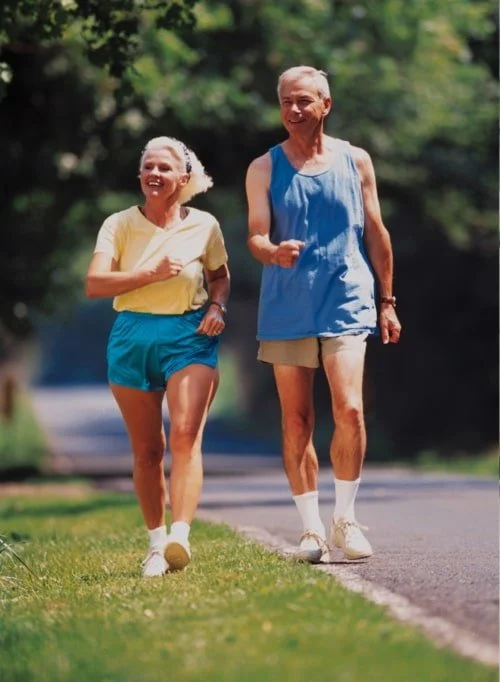
Whenever I meet a new patient for the first time who looks really healthy, moves well and has a sharp mind and is in their nineties or over a hundred, I always ask..
“What are your secrets to good health
And one of the common answers I get is variations of “I walked a lot”
With walking comes many benefits…
Whenever I have a new patient who is thriving in their nineties (or over a hundred), I always ask: "What is your secret to good health?"
I commonly get variations of: "I walk a lot. Always have!"
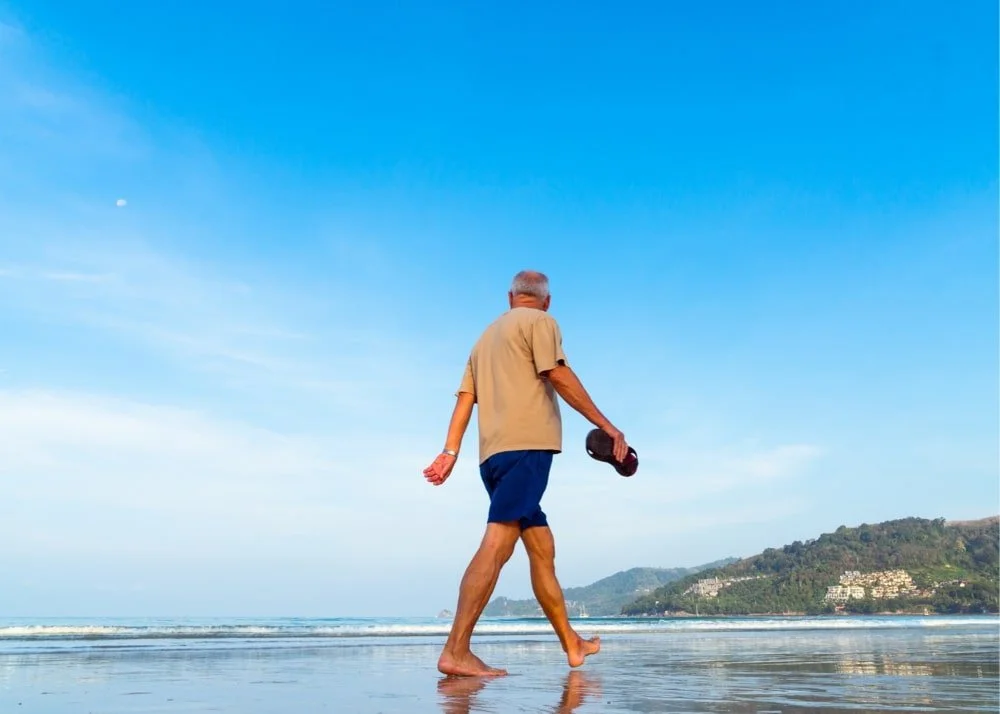
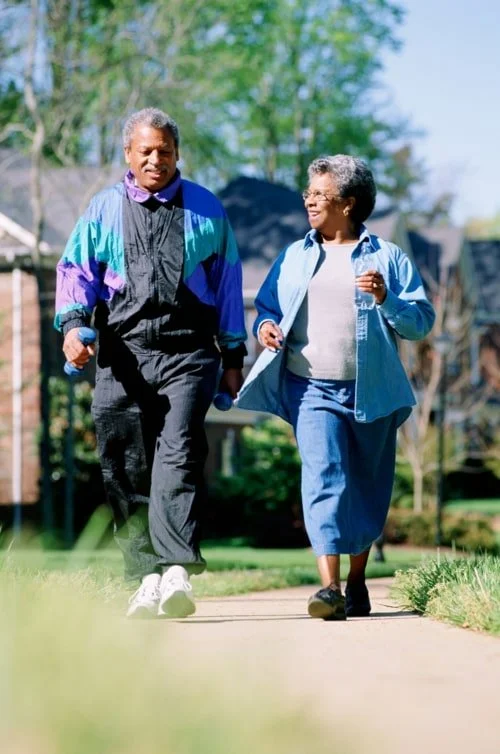
I believe walking to be one of the best types of exercise for people, especially seniors, to do to improve health and fitness.
Actually, I could go even further and say it IS the best type of exercise for seniors to improve health and fitness.
Why do I say this?
Because it is a type of exercise that almost everyone can do and comes with many health benefits. Not to mention little-to-no strain on our body!
Whether it's taking a longer walking route to the grocery store, walking (rather than driving) to visit a nearby friend, taking the stairs versus the elevator, or going on regular walks around your town (or in nature).
Whichever way you choose to get more walking into your life, one thing is for sure - more walking will bring many, many health benefits and could be the key to excellent health and fitness later in life.
This somewhat simple and straightforward activity can have a significant impact on your overall health - both physical and mental. I know whenever I am feeling overwhelmed, walking can do wonders for clearing my head and helping me to reset.
In this article, we will cover all you need to be a good walker. We'll cover the benefits of walking, how to make walking easier, how many steps you should be taking each day for good health and fitness (and how to track them). I'll also give a sample program, which if you are new to walking can help you get to 10,000 steps per day, without any hassles.
And, finally, I'll go through tips on how to get more walking into your life if you have knee pain.
Article Contents:
Is Walking Good For Seniors?
When it comes to exercise, especially when it’s all new, it can be met with some trepidation.
Am I going to be doing my body damage? Will walking wear out my joints? Will it make my arthritis worse? Will it cause me pain? Isn’t it better to rest?
These are some of the common thoughts that may arise for some people when thinking about walking more.
Yes! There are times that walking may aggravate symptoms. For example, knee pain (whether arthritis related or not). Or, weakness in other areas of the body, causing pain.
And there are times when you do need to rest!
However, you are born to move! The more movement you do, the better!
And walking IS GREAT EXERCISE FOR SENIORS!
Not doing exercise in some way is never the answer, even with arthritis.
There are ways to make walking comfortable and to decrease or prevent pain when doing it. At the end of this article, I will cover tips for walking for those who get knee pain.
Top 7 Benefits of Walking For Seniors
Walking is a great way to improve strength, endurance, mobility/flexibility and leads to many other health benefits.
Let’s now look at the benefits of walking:
Helps Build A Stronger, Fitter Body in a Safe Way
Gradually adding more walking into your day and making a conscious effort to spend less time sitting, is an effective way to get exercising more, each day, for the long run.
Although you also want to be doing specific exercises weekly to ensure you cover all components of fitness, walking alone will help you build a body of strong foundations and get you fit.
When you stay consistent, you will get a more conditioned body, able to withstand the stresses of daily life.
Yes, you may not get as fit or as strong in a short amount of time as someone who goes all out in the gym or begins running. But these types of higher-intensity exercises should only be done on a body able to withstand this.
High-intensity exercise on a weak body, not conditioned for this exercise, can lead to many problems. This is how your body can start breaking down, and pain and injuries occur.
Walking is a great way to get you stronger and build health and fitness while causing less harm.
If you do decide to do more strenuous/higher-intensity exercise or activity after some time of walking, you'll be more equipped to deal with it.
Weight Loss/Weight Maintenance
If you’re looking to maintain your weight or perhaps even lose some weight, then why not add daily walks into your schedule.
Contrary to popular belief, walking can be just as effective as running when it comes to burning those calories. Depending on your weight and walking speed, you can easily burn around 100 calories for every kilometre you pass.
Walking is one of the best ways to keep your weight in check, and it’s safer and less stressful on the joints than running and other forms of exercise.
Strengthens Bones, Improves mobility and Decreases pain
Walking for 30 minutes every day can reduce the risk of hip fractures. Studies have shown that regular walking can prevent loss of bone mass and reduce pain, which is important for those suffering from arthritis and osteoporosis.
Walking can also be beneficial for strengthening muscles, increasing mobility in the process and alleviating pain and pressure on the joints.
Walking is also another great way to improve overall flexibility and stability.
Improves Cardiovascular Health and Muscular Endurance
Older adults are at a higher risk of experiencing health issues relating to high blood pressure, high levels of cholesterol and heart disease in general.
Numerous studies have linked walking to improved cardiovascular health.
A 30-minute walk each day can improve circulation and lower blood sugar levels, leading to lower risks of diabetes, strokes and cardiac arrest.
Boosts Immune System
Want to help avoid the sniffles, sore throats and even the flu?
Put on some good shoes and let’s get walking!
Certain studies suggest that low and moderate exercise, including walking, can help fight off the flu, can help fight off infections and boost your immune system. [1, 2]
Promotes Better Mental Health and Cognition
Regular long walks can do wonders for mental wellbeing! They can help relieve symptoms of stress, anxiety and even depression.
Cardiovascular exercises such as walking are known to release endorphins - the feel-good chemicals in your body, helping you to feel good!
Staying active can also improve attention, memory, processing speed and cognitive function and can also reduce the risk of cognitive decline and dementia.
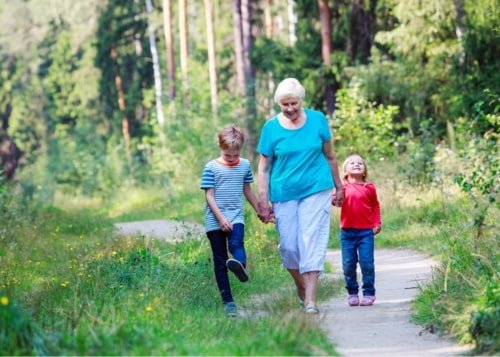
Another amazing thing about walking is that it works as a group activity as well! This is a great way to socialise, spend time with friends and family or even meet some new people. Why not search for a walking group you can join in your local area!
Improves Quality Of Sleep
If you have insomnia or lack of sleep, in general, you could find that walking more helps you get better quality and quantity of sleep.
Not only will walking exert your strength and tire out your body, but breathing in the fresh air can also help clear your head and put you straight into that sleep mode.
For more sleep tips, click here.
Top 5 Walking Tips For Seniors
Sometimes just putting your shoes on and taking off on a walk isn’t the best strategy when you decide to get walking more. Especially when it’s something you haven’t done in a long time.
Follow these tips below to help prevent any pain or injuries, to get the most out of your walking and help you keep it up for life!
EASE INTO IT
Although walking is considered low-impact exercise, I don’t recommend you just dive straight into it and go for gold.
If it has been a while since you’ve gone for a walk, don’t do too much too soon, and don’t do what you used to do.
It doesn’t matter if an activity is high or low in intensity, what matters is to ease your way into it.
If it has been some time since you’ve last walked, do half the distance you used to do and gradually build back to where you once were.
Give your body adequate rest, build up the distance and intensity (plus the number of walks) you do each week, over time.
Another aspect to keep in mind is preparation. The best way to avoid injuries and make the most out of your walking routines is to properly warm-up (click for a warm-up videos). Especially in colder weather and when doing brisk walks.
Yes even with walking, doing a light warm-up is a good idea. This will help loosen up your muscles and joints and get you ready for the exercise.
MAKE IT A GROUP ACTIVITY
Unlike most exercises, walking can be more fun when done with a friend or friends!
If you’re someone who enjoys the company of others or likes to make their workouts more engaging, then it might be a good idea to find a walking partner(s) or even join a walking group in your local area.
EQUIP YOURSELF
One of the best parts about walking is that it’s free of charge! There’s no monthly fees, pricey memberships or expensive gear - it’s just you and the world around you.
Of course, to make this experience safer and more pleasant, you do want to invest in a nice pair of comfortable walking shoes. Walking shoes are designed to offer good support and traction, as well as ultimate comfort for those lengthy strolls.
While it’s always a good idea to wear some breathable, moisture-wicking garments, wear whatever feels most comfortable for you.
Step tracking devices may be something that interests you if you want to get more serious with your walking. I cover step tracking devices below.
And, make sure you always have a bottle of water at your fingertips if going on long walks! Keeping hydrated is essential while staying active, so make sure to have some water handy at all times.
CHOOSE YOUR ENVIRONMENT
Thinking about where you walk (the terrains) can bring many individual benefits, helping you to get the most out of your walking, but it’s a good idea to be wary of the risks each pose.
Harder surfaces like sidewalks and roads can put a heavy strain on your knees and joints, but the even ground poses less of a falls risk.
Earth, beach or grass surfaces are generally softer and more comfortable on the joints than harder surfaces, however, ensure to keep an eye out for holes or any potential trip hazards.
You can also find out whether the city you live in has specialised tracks for walkers and runners. These tracks are made from rubber-like material and are much softer and springier than their concrete counterparts.
Natural walking trails can help improve your stability, strength and balance more than a flat surface due to the different movements required with the changes in terrain. Again, however, these surfaces pose a greater risk of falling than an even, flat surface. So ensure you're alert throughout your walk.
Adding in hills and stairs during your walks can help further increase your strength and fitness.
LISTEN TO YOUR BODY
Finally, listen to what your body is telling you. Your capabilities can change daily.
If your muscles are too sore or you’re feeling off, it may be time to have a rest, rather than push through it.
The best way to exercise safely is to consult with your Doctor or Physiotherapist before venturing into any new activity.
You can always shoot me a message if you have any questions or concerns about your routine! Alternatively, join the Facebook Support Community.
Walking is a great way to improve your health and fitness, and it is something that can be thoroughly enjoyable.
How Many Steps Should Seniors Take Each Day?
So we’ve established walking is good for health, but you’re probably thinking how many steps should you be getting to get in your daily activity requirements to help improve health and fitness.
Public health guidelines recommend 150 minutes of moderate-intensity physical activity each week to improve fitness (both cardiorespiratory and muscular) and for bone health, functional health, mental health and to decrease the risk of certain diseases.
But how many steps does this equate to each day? One study has done the fantastic work of working this all out for us.
This study rightly noted that steps walked must be taken over and above activities of daily living and must be done at least of moderate intensity. (For an easy way to track intensity. An RPE (Rating Of Perceived Exertion) Scale can be used- click to access).
Moderate intensity walking would be 11-14 on the RPE scale, meaning taking the steps at a pace that feels “Light” to “Somewhat Hard”.
Vigorous-intensity walking would be 15 - 16 or “Hard”.
This study concluded that taking 7,000-10,000 steps/day of at least moderate intensity and including activities of daily life, would provide the equivalent exercise to that recommended by the public health guidelines.
Another study concluded that more walking was associated with decreased risk of functional decline over two years in older adults. This study also recommended that greater than 6,000 steps/day gives a basic estimate of the amount of walking required to protect against functional decline in people with, or at risk of, knee osteoarthritis.
Tools To Track Your Walking
Tracking your steps is a great way to keep you motivated, and there are some simple and cost-effective ways you can track your steps taken.
Smartphone Tracking
Almost all of us have smartphones, which have built-in health applications (or that can be downloaded). These apps can track your steps.
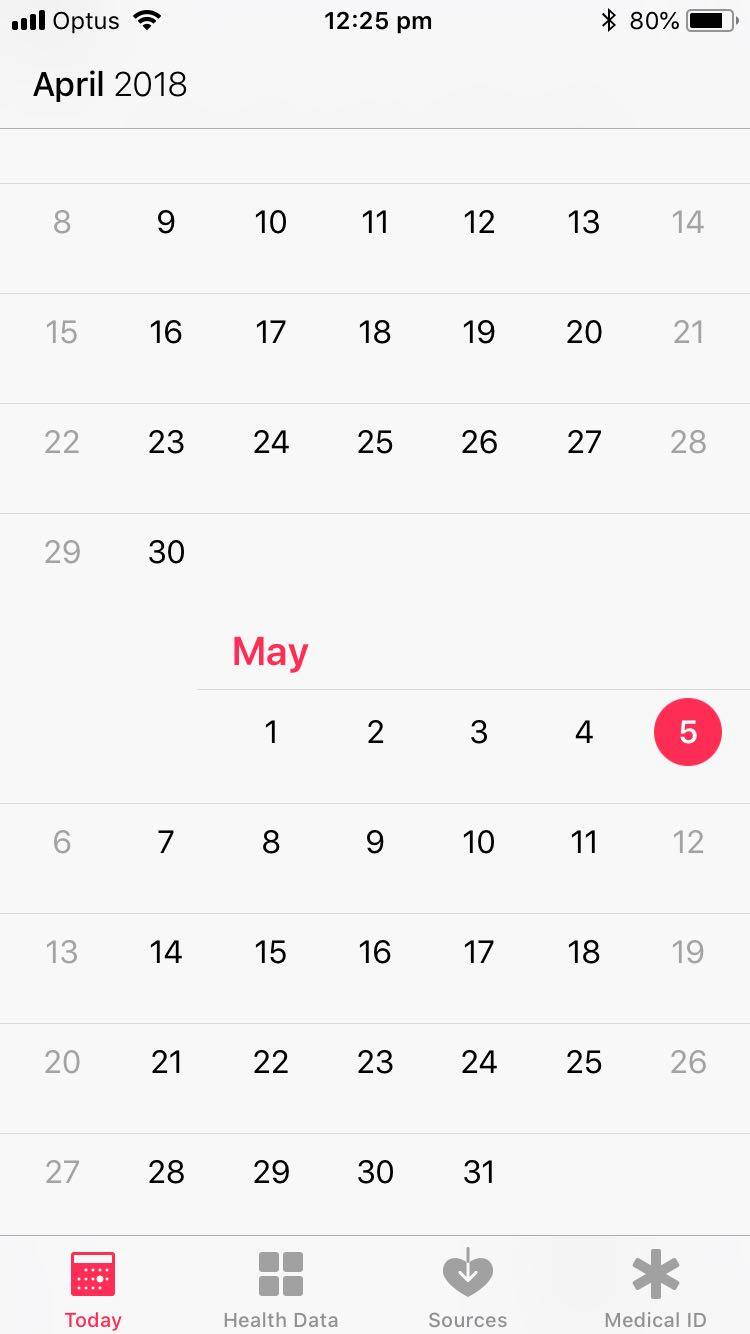
Here is how to track your steps using your smartphone.
The Apple iPhone
The Apple iPhone (the most commonly used phone, and the phone I use) has one built-in. Here is how you access it:
1. Turn your phone on and look for an application called “health” - Usually anywhere on the first page.
2. Open the app and click on the date you want.
3. See the steps you’ve completed for that day. (Here you can also see any mindful minutes if you have relaxation apps connected).
Note - Steps taken will start collecting automatically in the background. You do not have to activate anything.
1. Find the “Health” App
2. Click on your date you walked.
3. View your steps taken.
Android Devices
Samsung or other smartphones, using android software, have similar capabilities also.
To track your steps, download “Google Fit” from the Google Play store on your smartphone.
Activity Trackers
Another way to help track your steps are activity trackers (or fitness trackers) that can be worn on your wrist.
Activity trackers can monitor an array of activity measures including walking, swimming or running, sleep and heart rate.
A common type of activity tracker you may have heard of is the “Fitbit”.
If you’re wanting to take your fitness to the next level and are super keen on tracking your activity levels, an activity tracker may be for you!
Activity trackers range in price for very basic models and increase in price depending on brands and features.
A great starting activity tracker is the Fitbit Inspire. This tracker will track your all-day activity, including steps, distance, hourly activity, active minutes, calories burned and your sleep. This model is also affordable and lightweight. Keep in mind these trackers have very small font size, so may be difficult to read.
Pedometers
A pedometer is simple device to help track your steps.
Although some pedometers track calories burned and distance covered; usually they only track steps taken.
If you want to track your steps and you’re not after the bells and whistles of an activity tracker and don't use a smartphone, a pedometer might be a cost-effective solution for you.
Remember, exercise should be fun! Getting moving more is what's most important, and tracking your steps may not be for you! So if you don't want to track your steps, you don't need to track your steps - just get walking, and enjoy it!
Here is a pedometer I recommend (click link) and is one of the most accurate pedometers.
COUCH POTATO TO 10,000 STEPS: A Sample Walking Program For Seniors
I’m sure you may have heard the goal of getting to 10,000 steps a day!
What about you? Would you love to be able to walk 10,000 steps yourself?
Do you think it is out of reach?
Well.... It doesn’t have to be!
Although it is not necessary to be getting in this many steps each day to improve your health and fitness, if this is a goal you would love to achieve, I say go for it!
With the right walking plan, you too can be walking 10,000 steps a day!
And.. I want to help you get there safely!
If you are new to walking or haven’t walked in some time one of the biggest mistakes you can make, and one commonly made, is doing too much too soon.
To achieve a goal like this, the key is to build it up over time.
Build your foundation, allow your body to adapt to the new stresses placed upon it, let your body to get stronger and fitter over time. Don’t do too much, too soon.
Attempting to do too much too soon could lead to pain, injury and frustration. Take your time. Do it properly. Give your body the rest and recovery it needs. There is no rush.
This goes for everyone. Put your ego aside; don’t rush it - build your foundation!
Now, here is a sample walking program:
[Note - I have made this program starting for a person who currently gets minimal amounts of walking in each day (hence the couch part) - If your fitness is beyond this, go straight to the 5,000-10,000 program below]
couch-5,000 Steps Per day
Week 1:
Monday, Wednesday, Friday - Walk 1000 steps on each of these days.
Week 2:
Monday, Wednesday, Friday - Walk 2000 steps on each of these days.
Week 3:
Monday, Wednesday, Friday - Walk 3000 steps on each of these days.
Week 4:
Monday, Wednesday, Friday - Walk 4000 steps on each of these days.
Week 5:
Monday, Wednesday, Friday - Walk 5000 steps on each of these days.
Week 6:
Monday, Wednesday, Friday - Walk 5000 steps on each of these days.
Tuesday, Thursday - Walk 2500 steps on each of these days.
Week 7:
Monday, Tuesday, Wednesday, Thursday, Friday - Walk 5000 steps on each of these days.
Tuesday, Thursday, Saturday - Walk 2500 steps on each of these days.
Week 8:
Monday, Wednesday, Friday - Walk 5000 steps on each of these days.
Tuesday, Thursday, Saturday - Walk 5000 steps on each of these days.
Sunday - Is Fun Day (Rest and forget about getting your steps in).
Do this walking plan as set out. The first couple of weeks may seem too easy, but it gradually gets more challenging, and you will feel it as the weeks progress.
Remember to always listen to your body and never push into pain. If you find the plan above is too challenging and ramping up too fast, do it over three or four months (rather than two).
Breaking up the steps throughout your day (e.g. in 10-minute bouts) will make it all more manageable.
If you are still getting pain with your walking even by following a walking program like the above, it's best to see a Physiotherapist in person to get an individualised program to help work through your pain issues.
Now you've comfortably reached 5,000 steps per day, and only when you can comfortably do 5,000 steps per day, it's time you can set your sights on the 10,000 steps/day goal.
5,000 - 10,000 Steps Per day
Week 1:
Monday, Wednesday, Friday - Walk 5000 steps on each of these days.
Tuesday, Thursday, Saturday- Walk 2500 steps on each of these days.
Sunday - Is still Fun Day (Rest and forget about getting your steps in for the rest of this program)
Week 2:
Monday, Wednesday, Friday - Walk 6000 steps on each of these days.
Tuesday, Thursday, Saturday - Walk 3000 steps on each of these days.
Week 3:
Monday, Wednesday, Friday - Walk 7000 steps on each of these days.
Tuesday, Thursday, Saturday - Walk 3500 steps on each of these days.
Week 4:
Monday, Wednesday, Friday - Walk 8000 steps on each of these days.
Tuesday, Thursday, Saturday - Walk 4000 steps on each of these days.
Week 5:
Monday, Wednesday, Friday - Walk 9000 steps on each of these days.
Tuesday, Thursday, Saturday - Walk 4500 steps on each of these days.
Week 6:
Monday, Wednesday, Friday - Walk 10000 steps on each of these days.
Tuesday, Thursday, Saturday - Walk 5000 steps on each of these days.
Week 7:
Monday, Wednesday, Friday - Walk 10000 steps on each of these days.
Tuesday, Thursday, Saturday - Walk 7500 steps on each of these days.
Week 8:
Monday, Wednesday, Friday - Walk 10000 steps on each of these days.
Tuesday, Thursday, Saturday - Walk 10000 steps on each of these days.
There are many ways to build up your walking volume to 10,000 steps over time, ensuring you allow your body to adapt to the activity. This sample program is just one of many ways you can do this.
As mentioned above, keep listening to your body and never push into pain. If you find the plan above is too challenging and ramping up too fast, take your time and do it over twelve or sixteen weeks rather than eight weeks.
Keep it up, stay consistent, and before you know it, you'll have hit your 10,000 steps goal!
10 TIPS FOR WALKING WITH ARTHRITIC/PAINFUL KNEES
For some of you, knee pain can make it challenging to get in your walking; and avoiding walking or exercise (in chronic pain conditions), is not the answer! It's about finding what works for you, to help keep you mobile and those legs strong.
Here are ten tips that can help ease the pain and allow more walking.
1. Wear The Right Footwear: Avoid toes with pointed ends, high heels, heavy shoes, or shoes with worn soles. Get a comfortable pair of walking shoes with good shock absorption to help decrease impact and pain through your knees.
2. Warm-Up: Start at a slow pace to allow your muscles to wake up and to help lubricate your joints prior to the walking and build into a faster pace. Also completing one of the warm-up videos will help get you ready for movement.
3. Build Up Your Walking Over Time: As with any exercise, if you are new to walking, or it has been some time since you have started walking, always, I'll repeat.... ALWAYS, ease your way into it. Start with less duration (or distance) at lower speed (e.g. ten minute blocks) and work your way up to longer duration and faster speeds. If you find yourself sore after a walk, a rest day in between may be required. Start small, and gradually progress, even if it seems too small. You want to be avoiding pain. Do not work into pain.
Choose the softer surface.
4. Choose Softer Surfaces: When walking on concrete surfaces, more shock goes through the knees. Jogging and running on concrete surfaces increases these impact forces.
Walking on softer surfaces such as sand, grass and dirt place less strain on your joints. Softer athletic tracks even more so.
5. Start By Walking In a Pool: If you find you have pain walking on the ground, a simple way to build your muscle strength while taking the pain out of walking by reducing weight is to start walking in water.
The deeper the water (while still able to stand) the less strain on the knees (and other joints).
Once you have spent some weeks walking in a pool, your legs will be better suited to handle land-based walking.
6. Walk When Your Pain is Lowest: If you get pain in the morning, or at night, for example, avoid these times and walk during the times of day where your pain levels are decreased.
7. Lose Excess Weight: Carrying extra weight puts extra stress and strain on your knees. Even just losing a few kilos, if overweight, can help reduce pain symptoms. Remember, 90% of weight loss is diet, so to lose weight faster, make sure you’re eating the right amount and types of food.
8. Build Your Leg Strength - Performing knee strengthening exercises to help strengthen your knees or adding in cycling or stationary bike work can help improve leg strength. When the muscles surrounding your knee joints are strong, the strain on your joints will be reduced.
9. Walking Aid/Poles May Help: Depending on your condition, a walking stick, or a wheeled walking aid may help reduce the strain on your knees. These devices will help decrease fatigue and also help with stability. Trekking poles may also help when going on longer walks.
10. Movement is Medicine: Get stronger, get more flexible, build your fitness. Stop sitting so much. Aim to get more movement and exercises in your life each day.
Walking is a great way to improve your health and fitness and something that can be thoroughly enjoyable.
Get more walking in your life and start improving your health today!
A VERY QUICK INTRODUCTION TO NUTRITION FOR SENIORS: LEARNING THE BASICS
Healthy eating keeps our muscles strong and our minds alert and gives our bones the nutrients they need to stay strong.
When we increase our physical activity and exercise, our metabolic demands increase. What this means is we should ensure we are getting adequate nutrition.
We want the nutrients required to keep us healthy and the energy to fuel our body, to not only undertake the activity but to assist in the recovery process to make us stronger and healthier versions of ourselves.
To understand how to do this, a short nutrition lesson is required. Nutrition is a big topic, so I’m going to break it down in a simple way to understand and give some guidelines to help you keep healthy.
FIRST PUBLISHED: 11/11/2019. LAST UPDATED: 11/7/2022
GETTING STARTED EATING HEALTHY
Healthy eating keeps our muscles strong and our minds alert and gives our bones the nutrients they need to stay strong.
When we increase our physical activity and exercise, our metabolic demands increase. What this means is we should ensure we are getting adequate nutrition.
We want the nutrients required to keep us healthy and the energy to fuel our body, to not only undertake the activity but to assist in the recovery process to make us stronger and healthier versions of ourselves.
To understand how to do this, a short nutrition lesson is required. Nutrition is a big and complex topic, so I’m going to break it down in a simple way to understand and give some guidelines to help you keep healthy.
NUTRITION BASICS
All the food we eat is made up of both macronutrients and micronutrients.
Macronutrients are the nutrients that supply us with energy. There are three macronutrients: Protein, carbohydrates and fats. Macronutrients make up most of the food, whatever it is (hence macro).
The micronutrients, on the other hand, are the nutrients only needed in small amounts yet are vital for the proper functioning of our body to maintain health. (These are the vitamins and minerals.)
To maintain good health, we must ensure adequate energy from protein, carbohydrates, and fats daily from healthy foods.
These foods should also contain plenty of micronutrients to ensure our body is functioning optimally and is in good health. Some foods are more nutrient-dense than others.
We also want to stay properly hydrated. Our body is 70% water, after all.
THE MACRONUTRIENTS
So now, let’s dive into the macronutrients that make up most of our food.
Starting with the one I feel older adults do not get enough of:
PROTEIN
When thinking of protein, think of meats, fish, cheese, eggs, milk, beans, nuts and seeds.
Protein is vital for every cell in our body. Its main job is to build and repair tissues.
It’s the building block for muscles, cartilage, skin, bones and blood. It is used to make enzymes, hormones and other body chemicals.
Protein will increase our metabolism. Make us feel fuller after eating. It will help us lose weight, build muscle and give us a fitter/more toned appearance (by helping us lose weight and build muscle).
Protein is an essential nutrient, and we must ensure we get adequate amounts daily.
HOW MUCH PROTEIN SHOULD SENIORS EAT?
The Australian Dietary Guidelines recommends that 15-25% of our total energy intake should come from protein, with a daily intake of the following:
The RDI of protein for women aged 19–70 is 46 grams daily.
The RDI of protein for men aged 19-70 is 64 grams daily.
Women over 70 should have at least 57g per day.
Men over 70 should have over 81g per day.
Do you feel you are getting enough?
To learn more about protein and get tips to get more protein daily, click here to learn more.
The next macro nutrient is our fats.
FATS
Healthy fats are our oils, cheeses, butter, nuts, avocados and oily fish.
Fats are vital nutrients that supply us with energy and allow the other nutrients to do their jobs. Fats are essential for healthy body function; without them, we can't live.
Although there may have been a time when you heard that fats are the enemy of health and our waistline, this is not true. Don't cut out fats.
But be mindful of the TYPE of fats you put into your body.
There are four types of dietary fats:
Saturated fats - beef, lamb, pork, whole milk, cream, butter, cheese.
Monounsaturated fats - olive oil, nuts (almonds, cashews, pecans etc.), avocados, nut butter, olives.
Polyunsaturated fats - walnuts, fish (salmon, mackerel, herring, trout), seeds
Trans fats - cakes, cookies, crackers, icings, margarine, and microwave popcorn. The bad fats.
The healthier fats are the top three fats. Trans fats are the fats we want to avoid!
Saturated fats get a bad rap also, but they are not to be feared.
Eat the natural sources of fats and stay away from anything that is processed!
CARBOHYDRATES
The next and final macronutrient of the food we eat is carbohydrates.
Carbohydrates are your starches (your bread, pasta, rice, potatoes, breakfast cereals etc.), sugars and fibres found in grains, vegetables, fruits and dairy products (which contain fats and protein).
Carbohydrates are our fruits and other sugars, our vegetables (our starches and fibre), and our dairy products.
Like fats have in the past (and still do among some people today), carbohydrates now get a bad rap for our health and waistline.
This is where everything gets very confusing. If fats are bad, carbohydrates are bad, red meats are bad, dairy is bad, ….. (I could go on with what is supposedly bad). What are we meant to eat?
In short, my answer is... There will always be nutrient-dense healthy sources and highly processed, unhealthy sources with fats, carbohydrates and even proteins.
The best way to get adequate amounts of the above macronutrients (protein, carbohydrates and fats) and micronutrients (vitamins and minerals) is to choose natural food sources over packaged and processed food and eat a diet filled with fruit and vegetables, grains, quality meat sources and dairy.
Carbohydrates are one of the primary food groups and are essential to living a healthy life.
The majority of your calories should come from carbohydrates. This includes healthy grains, dairy products, fruit and vegetables.
The Australian Dietary Guidelines recommends 5-6 serves of vegetables a day for people 65+ and 2 serves of fruit. Where it can get confusing is how much a serve is. See the diagram below to see what a serving of fruit and vegetables looks like.
The equivalent of a serving of fruit and vegetables.
Aim to get three healthy meals daily filled with adequate protein, healthy fats and carbohydrates.
When eating healthy, these natural food sources take care of our macronutrient needs and are filled with our micronutrients (the vitamins and minerals) needed to maintain optimal bodily function.
So now you have a basic understanding of nutrition, to continue on your journey of healthy eating:
Simple Seniors Strength workout - 8 Minutes
In this video, I show you how to use just three exercises to get stronger. We cover the whole body.
I change the exercises up to show how you can target the same areas with different variations.
Simple strength workout for seniors - 8 minutes
In this video, I show you how to use just three exercises to get stronger. We cover the whole body.
I change the exercises up to show how you can target the same areas with different variations.
If you find them too easy, add in more resistance, do more rounds or decrease the rest time.
Before beginning make sure you do one of the warm-up videos.
Standing Warm-Up: https://youtu.be/b2DYU7ZQgN0
Seated Warm-Up: https://youtu.be/nfGWaRoKr7k
To get straight into the exercises go to 1:32.
Super Simple Strength Workout
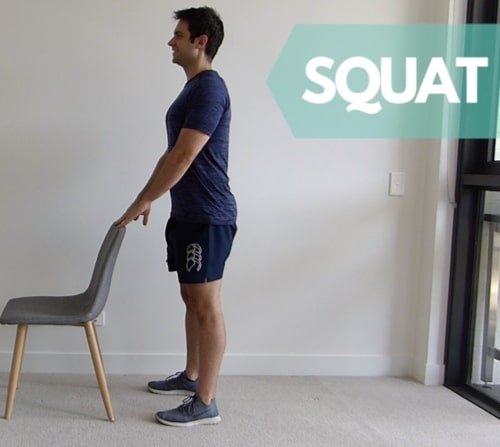
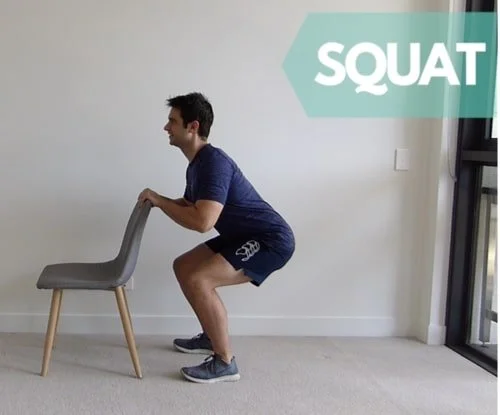
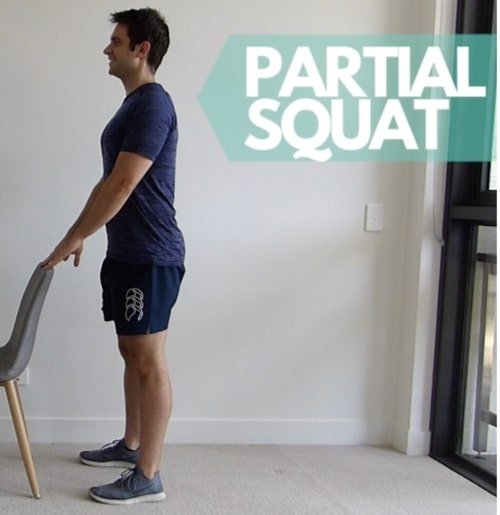
1. SQUAT x 12
2. ONE ARM ROW x 12 each arm
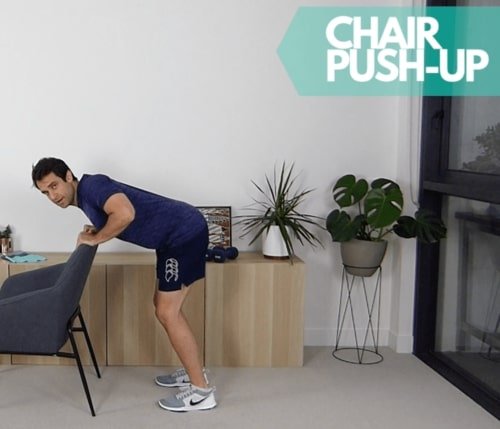
3. CHEST CHAIR PRESS
60 Seconds Rest
4. SIT TO STAND x 12
5. SEATED ROW x 12
6. CHAIR TRICEPS PUSH x 12
For more have another 60-second break and do again.
Do your best and any questions ask below!
- Mike
HOW TO MAKE EGGSHELL CALCIUM: A SIMPLE, NATURAL, EFFECTIVE CALCIUM SUPPLEMENT FOR STRONGER BONES
Eggshells are comprised of calcium carbonate, which is the most common type of calcium found in nature.
The abundance of calcium makes eggshells an excellent, although fairly under-appreciated, source of this essential mineral.
Calcium plays a significant role in preventing conditions commonly seen in older adults, particularly osteoporosis and osteopenia.
What is Eggshell Calcium Powder?
Ever wondered what to do with those leftover eggshells from your brekkie? Well, here's a bit of a surprise – those eggshells can be turned into something quite beneficial. Say hello to eggshell calcium powder, a nifty way to up your calcium intake naturally.
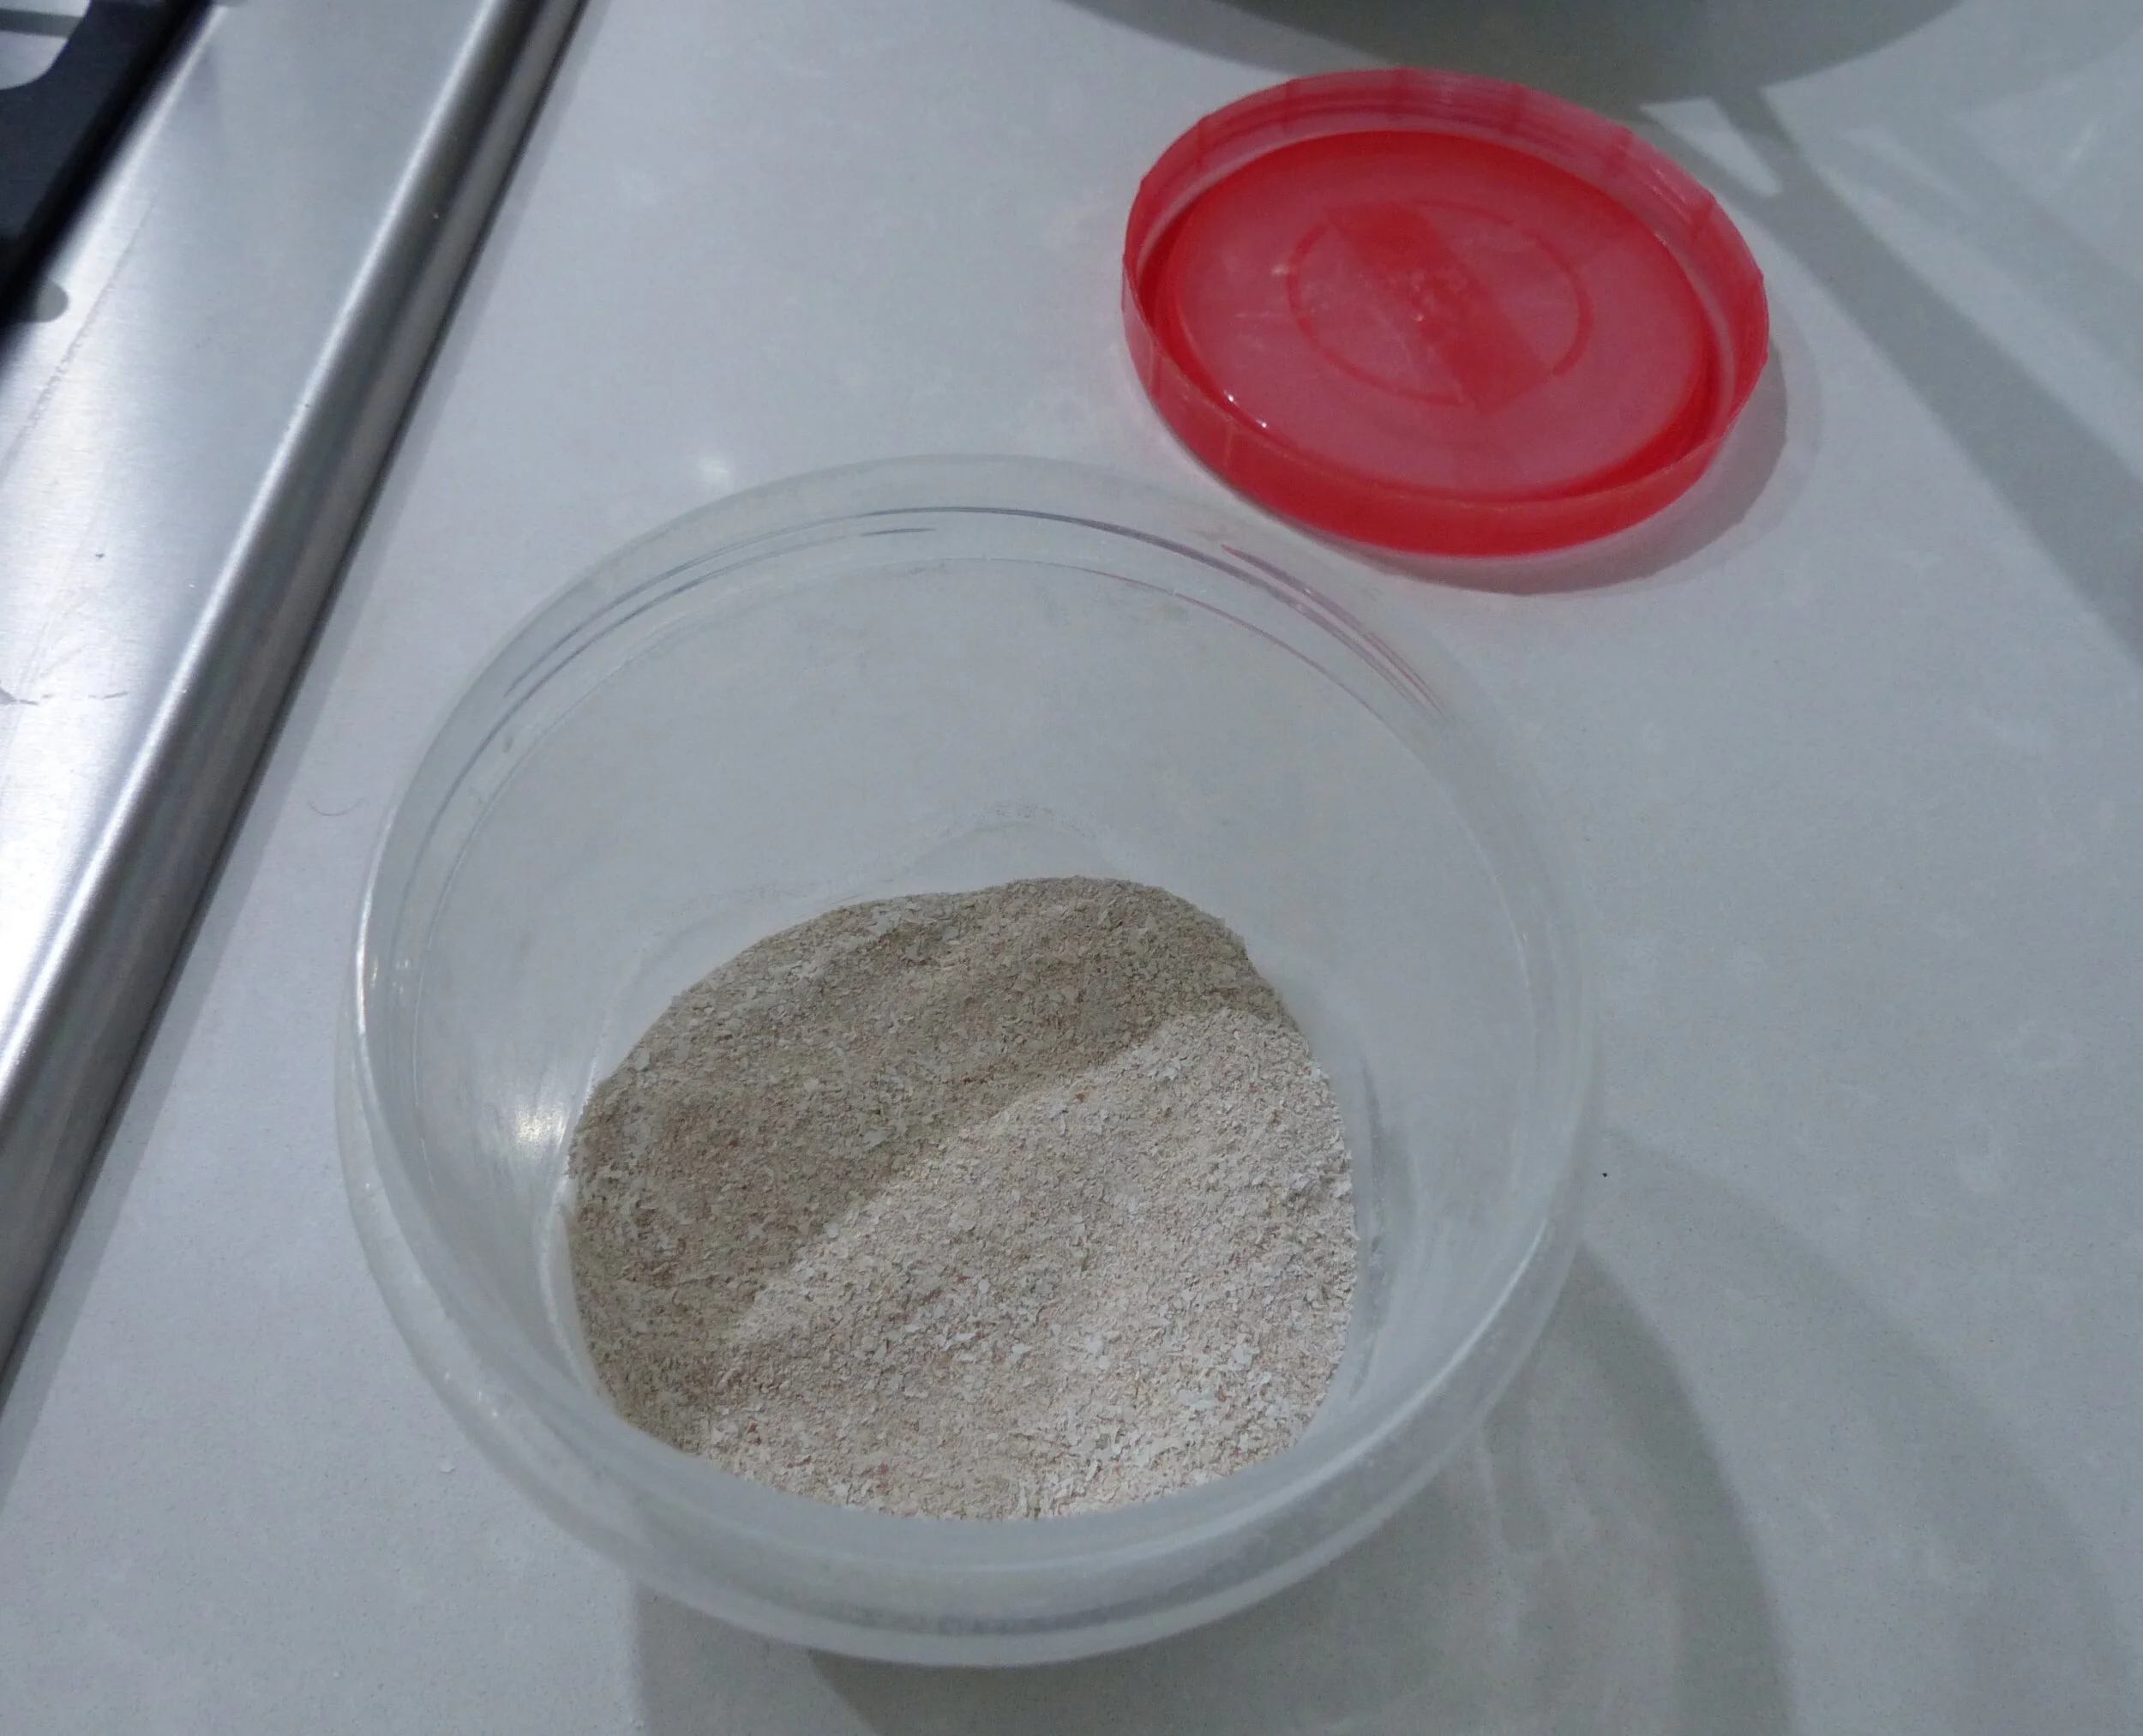
So, what's in this powder? It's mostly made up of calcium carbonate, the same stuff you find in limestone and chalk. Here's the interesting bit: to make this powder, eggshells are first boiled to get rid of any nasties, then baked to dry out, and finally ground into a fine powder. Simple, yet brilliant!
Now, let's have a chinwag about how it stacks up against other calcium sources. Compared to over-the-counter supplements, eggshell calcium is more natural and just as effective. Plus, it's a win for the environment, turning waste into something wonderful!
HOW TO MAKE EGGSHELL CALCIUM POWDER
You may remember a time when eggs were deemed unhealthy due to their cholesterol content.
Nowadays, and many years of research later, this criticism has now been proven wrong! Eggs have since been shown to have almost NO effect on blood cholesterol levels.
The Heart Foundation agrees that eggs are healthy and DO NOT increase the risk of heart disease.
In fact, eggs are known now as nature’s multivitamin and for good reason.
Eggs are abundant in vitamins, minerals and other healthy nutrients. Including, quality protein, omega-3 fatty acids, vitamins A, D, E and B12, antioxidants and choline. All essential for health.
But the health benefits of eggs don’t stop with the whites and yolks. You’d be surprised to learn how nutritious and beneficial the shell can be.
Now, the thought of consuming eggshells probably doesn’t appeal to you. However, they are an effective (and inexpensive) source of calcium to make your bones stronger and further improve health. And, when made into a powder, it is very easy to consume, and flavourless!
In this article, I’ll explain how consuming eggshell powder can benefit you and show how you can make eggshell calcium powder in a few simple steps.
So the next time you decide to crack a few eggs to make a delicious omelette or bake a cake, make sure you don’t scrap those eggshells! Save them for later use!
The Benefits Of Consuming Eggshells!
Eggshells are comprised of calcium carbonate, which is the most common type of calcium found in nature.
The abundance of calcium makes eggshells an excellent, although fairly under-appreciated, source of this essential mineral.
Calcium plays a significant role in preventing conditions commonly seen in older adults, particularly osteoporosis and osteopenia.
A study conducted at The National Institute of Rheumatic Diseases shows the benefits of eggshells on improving bone metabolism. The research suggests that eggshell powder, being rich in calcium and other organic compounds such as strontium and fluorine, can have a positive effect on improving bone density.
This study further notes that eggshell powder can stimulate cartilage growth and in postmenopausal women and women with senile osteoporosis, eggshell powder increases bone density and mobility and reduces pain and bone resorption.
This study concluded that eggshell powder is suitable in preventing and treating osteoporosis.
Another study notes that eggshell powder is a great source of bioavailable calcium, increases bone mineral density and can delay bone demineralisation when consumed regularly. The participants in the study also reported experiencing less pain when consuming eggshell powder for longer periods.
Moreover, eggshell membrane, the substance found between the eggshells and egg whites, is mostly comprised of collagen, which is known to promote joint health among other benefits (to find out more about the benefits of collagen - click here).
Eggshell membrane supplements are used to treat pain and discomfort in joints, something that often affects older adults.
How Much Calcium Do I Need
According to Osteoporosis Australia, the recommended daily intake of calcium, through diet, should be around 1,300 mg per day. (To find out more about calcium click here).
However, plenty of people, especially seniors suffering from calcium deficiency, resort to calcium supplements enriched with vitamin D3. Vitamin D is often used alongside calcium supplements, as it helps the body absorb the mineral.
Research suggests a daily supplement dose of 1,000 mg of calcium and 600 mg of vitamin D can counteract the effects of osteoporosis. However, it is said that older adults might benefit from a slightly higher dose to reduce the risks of fractures and falls.
Of course, supplements are only advised to those who aren’t able to get sufficient amounts of calcium and vitamins from natural food sources.
Before resorting to supplementation of any kind, try to bump up your calcium intake by consuming calcium-rich foods such as dairy and eggs (or try this bone broth recipe).
A single teaspoon of the eggshell calcium powder contains roughly 800 - 1,000 mg of calcium. It’s best to divide this dose up into smaller doses throughout the day
There are many ways to consume the eggshell powder. You can mix it up with a small amount of water, or juice. Sprinkle it on your cereal on in spaghetti bolognese. Whatever works best for you
The process of making your calcium powder is pretty straightforward and simple; let's begin.
Different Uses of Eggshell Calcium Powder
This little gem has a few tricks up its sleeve. As a dietary supplement, it's a cracker. Just a pinch of this powder in your smoothie or sprinkled over your morning cereal, and you're sorted for your daily calcium needs.
But wait, there's more! Eggshell calcium isn't just for people; your plants love it too. Sprinkle it in your garden, and watch your greens grow with gusto. It's a top-notch natural fertiliser.
Precautions and Side Effects
Now, it's not all beer and Skittles. There are a few things to keep in mind. Firstly, moderation is key. Too much of this, and you might end up with more calcium than you bargained for. Also, if you're already on calcium supplements or other medications, have a yarn with your doctor first. It's essential to make sure everything works together harmoniously.
So, there you have it – eggshell calcium powder in a nutshell. Whether it's in your breakfast bowl or helping your petunias perk up, it's a versatile little number. Just remember, like with anything, to use it wisely.
HOW TO MAKE EGGSHELL CALCIUM
INGREDIENTS AND EQUIPMENT
To make your powder you will need a few easy to source things that you probably already have lying around the house.
You will need:
A carton of eggs (stick to organic, pasture raised eggs if you can)
A medium to large sized pot
An electric coffee grinder - One can be purchased for $20-30 online. (I bought mine from K-Mart for $30 AUD).
A fine strainer
An airtight container to store your eggshell powder
DIRECTIONS
The entire procedure of making eggshell powder is relatively quick and painless, so it shouldn’t take much of your time.
The best part is that once you’re done, you can easily store the powder for future use and you now have an inexpensive, effective source of calcium to help get your daily calcium requirements and keep your bones strong.
Step 1
Next time you are eating your eggs, preparing a meal or baking a cake, rinse your eggs in water to remove any excess and save your eggshells. I kept mine in the carton. Make sure not to dispose of the egg membranes as they are also healthy.
Step 2
Repeat step 1 until you have a carton full of eggshells!
Step 3
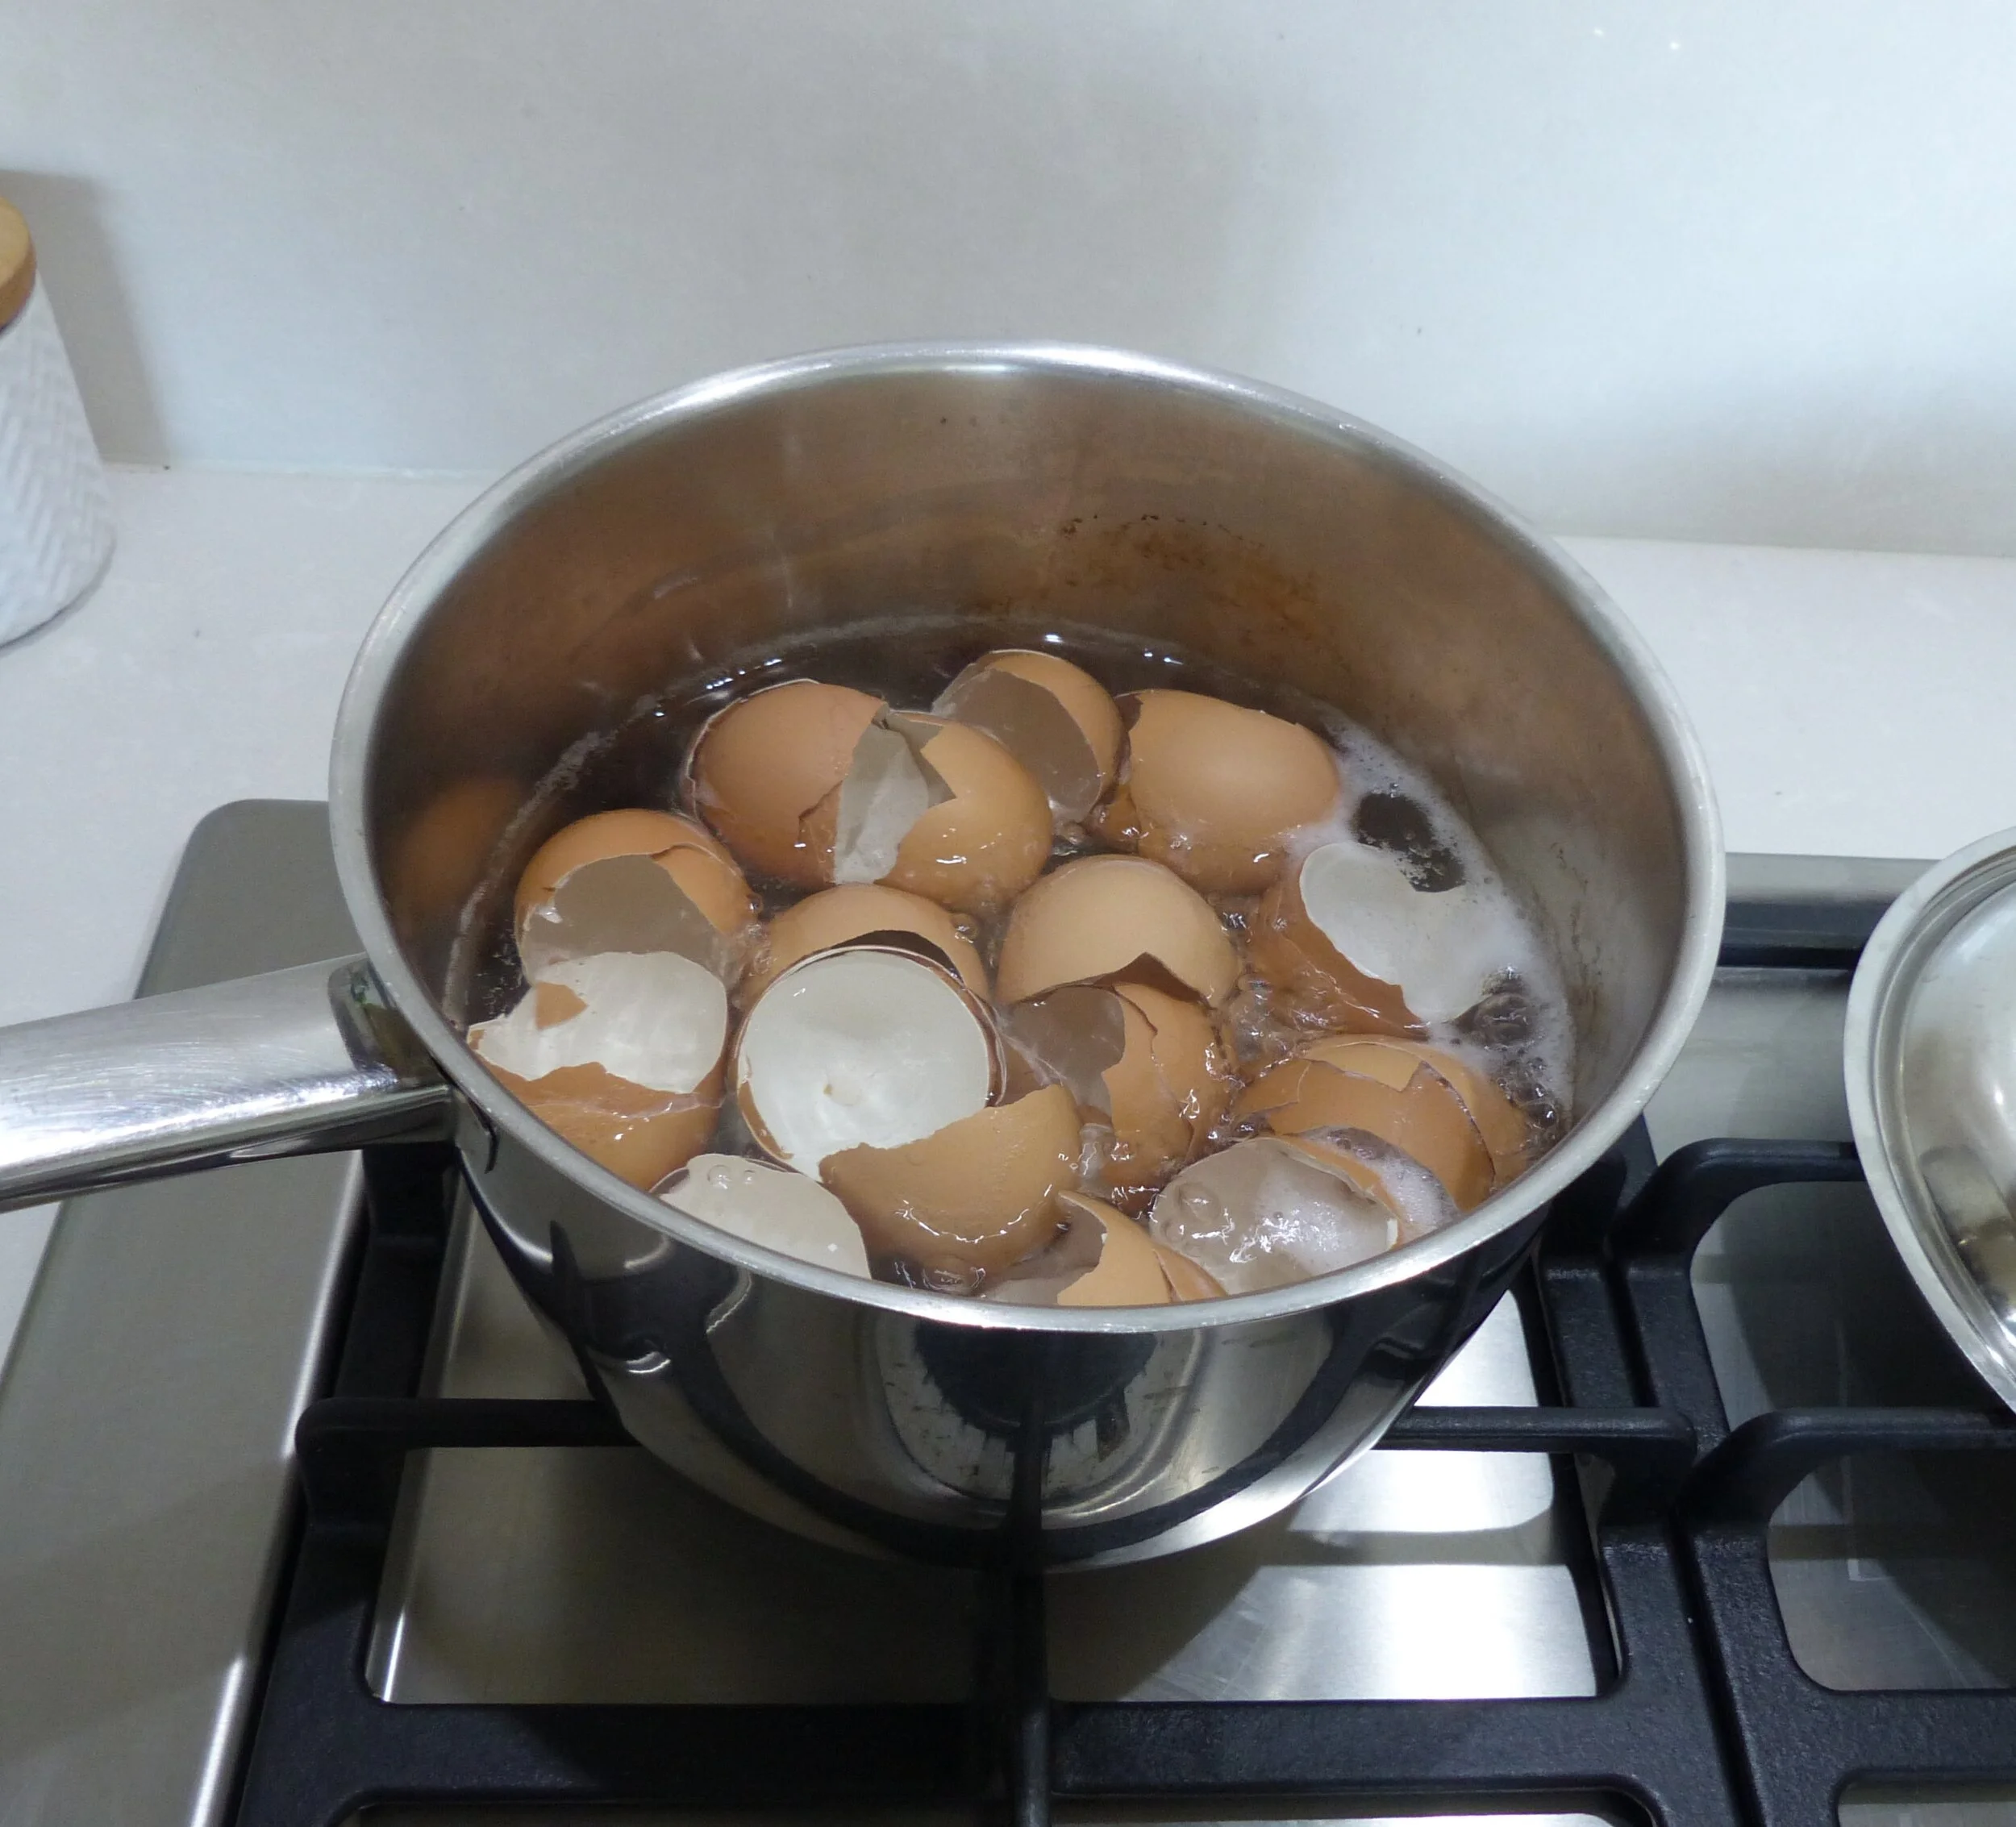
Fill a pot with water, bring to the boil and carefully place the eggshells inside.
Step 4
Boil the eggshells for about 5-10 minutes to help kill off any nasties.
Step 5
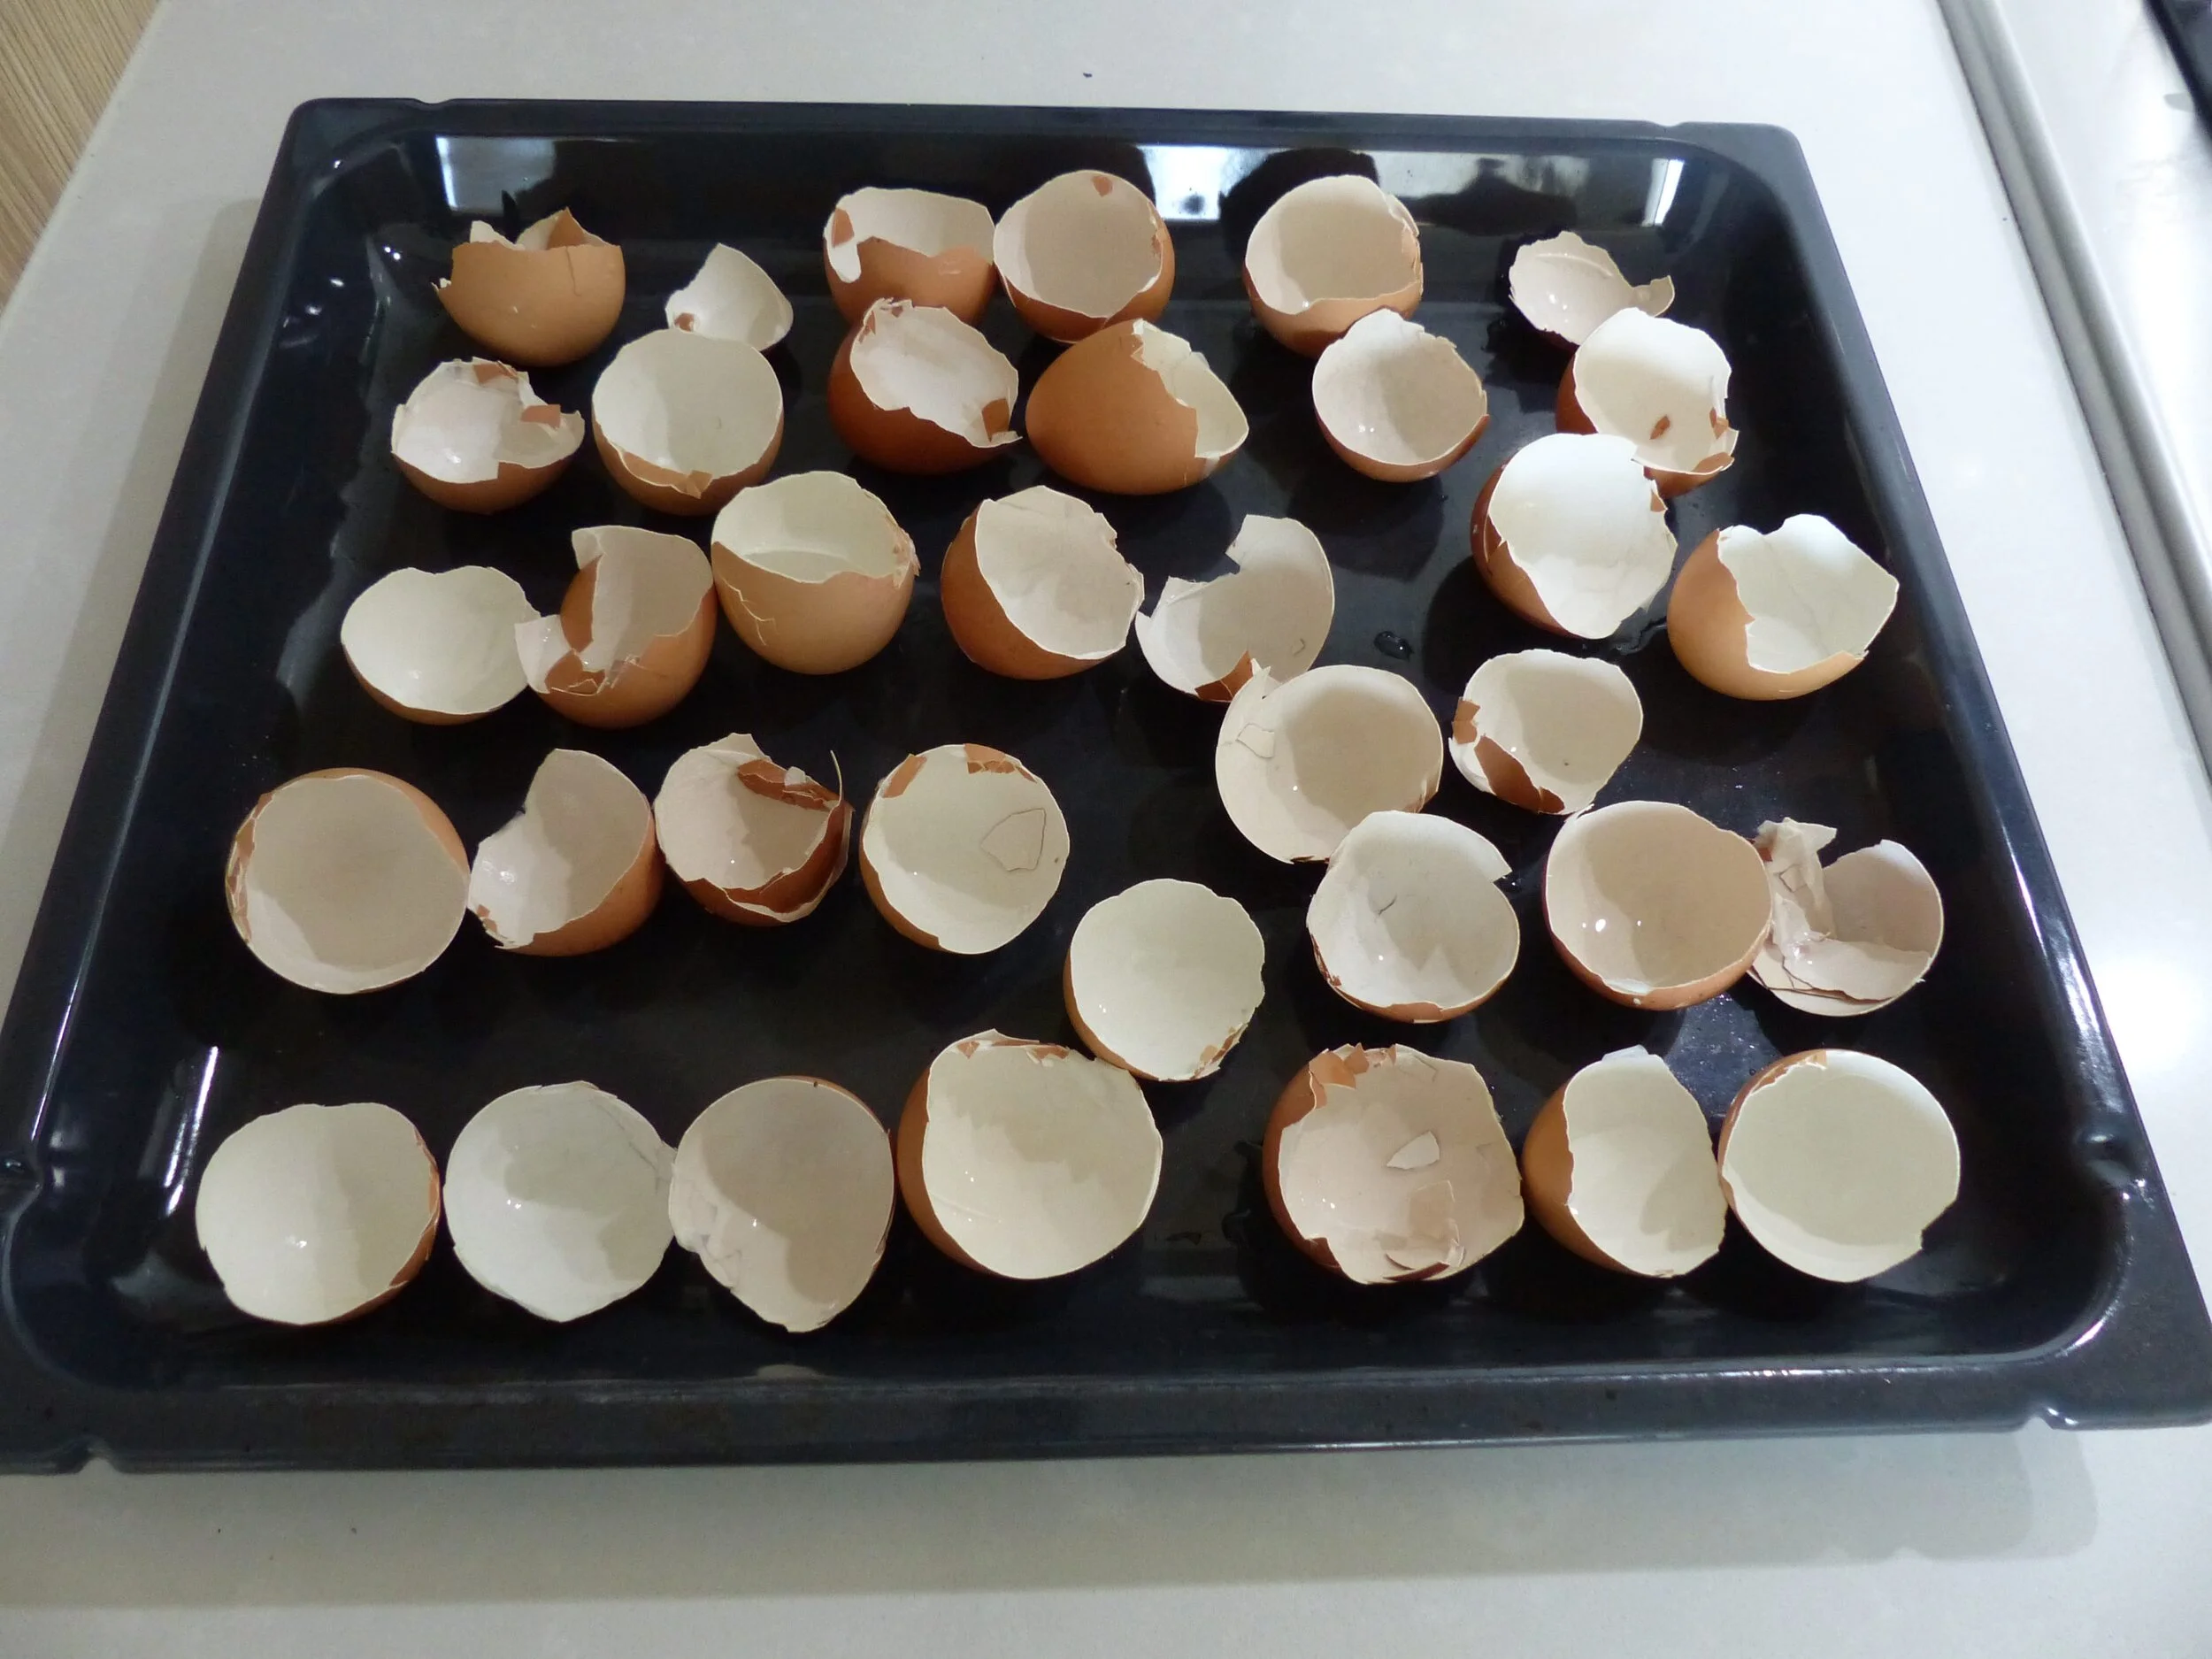
Drain the eggshells and place them on a baking tray and allow to dry all day or overnight.
Step 6
Preheat an oven to 90 degrees Celcius (195 Fahrenheit) and place the eggshells in the oven for 12 minutes to allow them to dry out entirely
Step 7
Remove the tray from the oven and place the shells in your coffee grinder. Grind until the eggshells become a finely ground powder. Continue until you’ve used up all the eggshells.
Step 8
Sift the powder through a strainer to ensure any larger shells are removed.
Step 9
Pour the eggshell powder into an airtight container and seal tightly. Store the jar in a cold and dry place for up to 2 months.
Step 10
Enjoy your homemade eggshell calcium powder!
And that’s all it takes to get an effective, inexpensive calcium supplement which will help you get stronger bones!
Enjoy! and Keep Moving
Mike
Do you need more calcium in your diet? Are you currently supplementing? How do you get more calcium?
The Strong Senior: The Complete Guide to Getting Strong And Staying Strong Over 60
With good strength, EVERYTHING we do is much easier!
Life is much easier!
When you undertake strength training (aka resistance training), in whatever form - (for example with weights, resistance bands or just doing bodyweight exercises), and do it properly, you WILL get stronger, regardless your age!
In this guide, I'll show you exactly how to get stronger, and show just how simple it can be, even in the comfort of your own home.
HOW TO GET STRONG AND STAY STRONG OVER 60
With good strength, EVERYTHING we do is much easier!
Life is much easier!
As time goes on, we are all going to get weaker, and our muscles are going to get smaller. [1, 2]
This loss begins in our thirties and accelerates each decade after that. [2]
This is NOT an inevitable part of ageing, however!
This is an inevitable part of doing less and less activity over time. [1, 2, 3, 4]
In this day and age, it's much easier to do less. It's much easier to be lazy!
When we don't HAVE to do activities that keep our muscles strong, we are going to get weaker.
It's that simple!
Loss of muscle mass and strength to do the things you want and need to do, IS AVOIDABLE!
AND …. If you have already noticed you have lost strength and muscle….
It is REVERSIBLE also!
When you undertake strength training (aka resistance training), in whatever form - (for example with weights, resistance bands or just doing bodyweight exercises), and do it properly, you WILL get stronger, regardless of your age!
That's right every person over 60 can, at a minimum, maintain their strength and get even stronger than a younger version of themselves.
And, with greater strength comes effortless movement and getting more out of life each day!
Furthermore, you will also build muscle, get stronger bones, decrease your risk of falls, have less pain, improve your fitness, lose fat, gain confidence and look and feel better.
Sounds good, doesn't it!
Strength training is arguably the most important type of exercise that anyone over 60 can do AND in my opinion, the most fun!
On the other hand, I know, getting started with strength training, especially with weights (or with resistance bands), can be a little hard and even scary.
If new to exercise, it's difficult to know where to start, and many questions may arise.
There are also many variables you must take into account and implement to ensure you get the results you want and aren't just wasting your time and putting yourself at risk.
With a bit of knowledge, however, strength training is VERY, VERY SIMPLE for anyone to get into, and get amazing results. And that includes YOU!
In this guide, I'll show you exactly how to get stronger, and show just how simple it can be, even in the comfort of your own home.
By following this guide, and staying consistent, it won't be long before you're the stronger version of yourself going about life with ease!
So without further ado, let's get stronger!
- Mike
WHAT WE’LL BE COVERING IN THIS GUIDE:
WHY SENIORS SHOULD DO STRENGTH TRAINING/EXERCISES & COMMON QUESTIONS
The Benefits of Strength Training for Seniors - Can Seniors Build Muscle?
Should Seniors Lift Weights? Do I Need To lift Weights, or Use Resistance Bands, To Get Stronger?
I Am A Woman and Don’t Want To Get ‘bulky’! Will I Get Bulky If I Lift Weights?
STRENGTH TRAINING 101 FOR SENIORS
How Many Times Per Week Should Seniors Do Strength Workouts?
How Many Repetitions and Sets Should Seniors Do To Get Stronger?
What Resistance Bands Do You Recommend? The Best Resistance Bands For Seniors
NUTRITION: EATING TO GET YOU HEALTHY & STRONG
GET STRONGER NOW - STRENGTHENING EXERCISES FOR SENIORS (INCLUDES VIDEOS + PICTURES)
The 5 Best Strengthening Exercises For Seniors (Must do Exercises)
Body Weight Exercises For Seniors: A Complete Program (VIDEO ROUTINE)
Weights & Resistance Band Exercises For Seniors: A Complete Seated Program (VIDEO ROUTINE)
Resistance Band Exercises For Seniors: A Complete Program (VIDEO ROUTINE)
The Most Simple Strength Workout For Seniors To Get Amazing Results
WHY SENIORS SHOULD DO STRENGTH TRAINING/EXERCISES & COMMON QUESTIONS
The Benefits of Strength Training for Seniors
Along with the benefits touched on briefly already, there are many more benefits of strength training, and this is why I feel it's the most important type of exercise that anyone over 60 can do.
Here are FIVE AMAZING BENEFITS of strength training:
1. YOUNGER, STRONGER & MORE EFFICIENT MUSCLES
As time goes on and we get older, we lose strength, and we lose muscle mass.
This process of our muscles getting smaller and weaker with age, is known as sarcopenia.
There are many possible causes of sarcopenia. However, the good news is, in the vast majority, sarcopenia is caused only by doing less physical activity over the years.
Sarcopenia is NOT just an inevitable symptom of ageing.
It is an inevitable symptom of lack of use. [1, 2, 3, 4]
When we do less physical activity, our muscle cells become smaller and weaker.
By undertaking MORE physical activity, and doing strength exercises, you can reverse the effects of sarcopenia, essentially reversing the ageing process of your muscles and improving their efficiency. [3, 4, 5]
2. LOOK BETTER - LOSE WEIGHT & IMPROVE POSTURE
We ALL want to look better!
I'm sure it's safe to say that all of us, both men and women, regardless of age, look healthier with a healthy amount of muscle on our frames.
We also look healthier with good posture.
With consistent strength training (combined with a healthy diet) you will increase muscle mass, improve your posture (by fixing muscular imbalances), and decrease body fat.
When you increase muscle mass and decrease fat, you get what's commonly referred to as that "toned" look, which I know many of you reading this are after.
Cardiovascular exercise (jogging, running, riding a bike, boxing, skipping, and so on) is the type of activity commonly believed to be best for fat loss.
However, I'd go as far as to say that proper strength training can do just as much, if not more, for weight loss and weight management than cardiovascular exercise can.
Research shows that strength training results in reductions of abdominal fat in both older men and women. [6, 7, 8, 9]
And further research shows, undertaking strength training resulted in only one-third as much fat gain over two years compared to those not doing strength training. Demonstrating the effectiveness of strength training on managing weight. [10]
Now I am not saying to stop doing cardiovascular exercise, especially if you enjoy it.
There are benefits in doing cardiovascular exercise for everyone over 60. However, if you don't want to, you can get healthy, strong and look your best by doing only proper strength training.
3. IMPROVE PHYSICAL & MENTAL HEALTH & GET MORE, QUALITY SLEEP
Along with getting stronger, building muscle, losing fat and improving posture, strength training can improve physical and mental health.
For improvements in our physical health, strength training can decrease the risk factors of metabolic syndrome, reducing blood pressure [11, 12, 13] and reducing the risk of cardiovascular disease.
It has beneficial effects on cholesterol levels and body fat percentage.
Strength training may play a role in improving insulin resistance associated with ageing and prevent the onset of diabetes.
Strength training can also lead to many mental health benefits.
After consistent strength training, you will feel improved confidence, self-esteem and have more energy. And, it is an effective tool for decreasing stress and reducing anxiety, depression and fatigue. [15, 16]
Moreover, if you want to keep your memory in top shape strength training can improve several aspects of cognition, memory and memory-related tasks in healthy older adults. [17, 18]
And we all know the health benefits of getting a good night's sleep. Resistance training can improve sleep quality and quantity. [19, 20]
4. DECREASE JOINT & OTHER PAIN. STRENGTHEN & AVOID BRITTLE BONES (HELP WITH ARTHRITIS & OSTEOPOROSIS)
Strength training can prevent and decrease pain. Studies have shown improvement in pain in those who have fibromyalgia, lower back pain and arthritis.
With painful joints conditions such as arthritis, by strengthening the muscles, ligaments and tendons surrounding an affected joint, we can reduce the stress placed on the joint, decreasing pain symptoms.
Strength training may also be helpful to prevent, and reverse osteoporosis. Studies have shown improvements in bone mineral density, helping to avoid and strengthen brittle bones. [21, 22]
Furthermore, stronger people are inclined to have higher bone mineral density compared to those who are weaker. [23, 24]
5. PREVENT FALLS, DECREASE FALL RELATED INJURIES & IMPROVE BALANCE
Increased strength and muscle mass can decrease one’s risk of falls [25, 26] and combined with higher bone mineral density, dramatically reduces the risk of fractures and other injuries related to falls.
Strength training has also been shown to be effective in improving balance and reversing age-related changes in gait speed (how fast you walk), stride length (the size of your step), cadence (the speed of your walk) and toe clearance (clearing your toes off the floor with each step) [26]. All factors that when impaired, can put one at risk of falling.
As you can see, there are many, many long term benefits of strength training and I hope by now I've got you over the line to begin strength training and start improving your life, and health.
Certainly, to reap all the benefits and do strength training correctly, it is important you do strength training right by following a few steps which we will go through in the next section.
Before we get into that, however, let's cover some questions that you may have in regards to strength training.
Am I Too Old To Lift Weights?
AGE IS NO BARRIER!
AGE IS JUST A NUMBER!
IT IS NOT THE END OF THE ROAD!
You are never too old to do something you want to do, and there are seniors all over the world, showing just this!
Take Irene O’ shea who at 102 years old became the world’s oldest skydiver.
Fauja Singh at 104 was running marathons.
Johanna Quaas at 92 - competing in gymnastics.
Ernestine Shepherd who is a Personal Trainer and still bodybuilding at 83 years old.
You are DEFINITELY not too old to do any form of strength training.
I have helped thousands of people improve their strength and build muscle from the ages of 54 (even younger), all the way up to 104. 104 and thriving!
You are also not too old to do anything else you want to do.
So, if you have the belief that age is a reason not to do something. Then throw it out!
If someone tries to kill your aspirations with the “you’re too old” line, throw them out too!
‘Age’ is never a reason to not do something. Especially weights!
Whatever age you are, do whatever you want to do, and have fun doing it!
Won't I hurt Myself If I Lift Weights?
If you have this worry, you are not alone!
This is a common worry experienced by those new to strength training, especially when it comes to lifting weights.
YES!….. There IS a chance you could hurt or injure yourself doing strength exercises!
And, our chances of injuring ourself DOES increase as we get older, and we DO increase our risk by exercising with weights.
However…. This worry is unwarranted!
“I’ve had a lot of worries in my life, most of which never happened.”
The benefits of strength training hugely outweigh the small risk of injuring yourself.
I can assure you, If you undertake strength training correctly (as outlined in this guide), strength training is entirely safe and the chances of you hurting yourself are close to zilch!
As you continue strength training, with your now stronger, steadier body, you’ll have much less chance of injuring yourself in general.
You’ll also find that strength training wasn’t anything to fear and it becomes easy and fun once you get the hang of it.
Ok! Some of you may never find strength training fun, but, you’ll see and feel the benefits eventually and want to to keep it up!
Based on your current capabilities, strength levels or health status, you may need to modify the exercises or your program in some way so that you can do them safely. (This, and more will be covered within this article).
But correct strength training is excellent for everyone, and safe, no matter your age!
You’re just as capable as anyone else!
Should Seniors Lift Weights? Do I Need To lift Weights, or Use Resistance Bands, To Get Stronger?
Strength training is the most effective way to improve physical function, increase muscle mass and strength, and comes with all the other benefits we discussed above, like getting healthier and looking your best.
So if you want these results, you should do strength training.
But…. Lifting weights, or using resistance bands, is not the only type of strength training you can do.
Seniors training with Kettlebells.
There are many different ways to get stronger, including; bodyweight exercises, yoga, pilates, Zumba, suspension systems (TRX), kettlebells or gym machines.
With so many options available, you do not have to lift weights or use resistance bands, specifically, to get the strength results you are after.
It does not matter which type of strength training you do! Choose whichever type of strength training you want.
If you work your muscles correctly and most importantly, stay consistent... You will get stronger.
However, if you start with bodyweight exercises, there will come a time when the exercises are no longer challenging you, and you stop making progress with your strength.
This is when it is important you start challenging yourself with more challenging exercises, or add in equipment, to continue to get stronger.
Weights and resistance bands are easy to use and get a hold of, and, an inexpensive way to get stronger in the comfort of your own home.
For these reasons, I do recommend all seniors lift weights and use resistance bands to get stronger, and why I focus on them in this guide.
If you're new to weights or bands, it won't be long before you've got the hang of them and finding them simple to use.
Should I Exercise Differently to Someone Younger?
No! To get stronger, the same strength rules apply for both young and old. There is no reason to exercise any differently to anyone else based on your age.
Although goals change as we get older, and some exercises may need to be modified, with precautions taken, depending on your health status and current capabilities, to improve strength, the same principles apply for everyone.
Additionally, you can build muscle and recover from strength training just as well as college-age students.
In a study, active college-aged women were compared to active women over 60, looking at how differently the body responds and adapts to resistance training in these groups. Similar response and adaptability patterns, as a result of the resistance training, was seen in both the young and old. The same would go for men.
Should Women & Men Train Differently?
Again, No! To build strength for both women and men, the same rules apply.
There is no reason for gender-specific training to get the strength results you are after.
If you want to train with your spouse, you can both do the same training.
The only difference is that men, the majority of the time, have higher strength levels and more muscle mass. Meaning heavier weights, or increased resistance will be required to challenge oneself and build strength and muscle.
I Am A Woman & don’t want to get ‘bulky’! Will I Get Bulky If I Lift Weights?
So you've seen the photos of very muscly ladies (usually competitive female bodybuilders) and have decided that lifting weights is not for you.
No disrespect to these women who work really hard to obtain these physiques, but I can understand, with a lot of these photos, why lifting weights has been a no go!
Although there is a very high chance, you could wake up one morning, bodybuilder size after doing weights a few times, there is no need for this to turn you off doing weights.
I am just kidding! The chances of this ever happening is slim to none. I can promise you that you won't ever look bulky!
Unless of course you want to and are willing to work very, very, very hard to obtain it.
These muscly women have been doing weights for a long time (years and years), have strict diets, AND they are usually taking many supplements.
You are not going to get bulky like these women! There is no reason to fear doing strength training.
And in the impossible case, you do somehow, suddenly wake up with bulky muscles, congratulate yourself! You have done what most can't, especially at your age. Now to get rid of these muscles that have almost magically appeared, just go easier on the weights (and eat less) for a little while. You'll be back to not bulky in no time.
As you can see, this is no reason for this to stop you doing strength training.
Naturally, it takes A LOT of work for both women, AND men, to look very muscular and get 'bulky'.
What you will get with strength training, however, (and eating a healthy diet) is increased muscle mass and decreased fat over your muscles, leading to that 'toned' look women usually prefer.
How Many Times Per Week Should Seniors Do Strength Workouts?
To get stronger and build muscle, you need to be training at least twice a week and for better results aiming for three to four days a week. [33]
Three days per week allows one day in between to rest and recover from the exercises.
This is a great way to get your body used to this type of exercise without pushing yourself over the limit.
One strength workout per week will not get as good results and is suitable only for maintaining strength and muscle mass.
Consistency is the key to getting great results.
If performing bodyweight exercises, or using very light weights, it's fine to workout each day. However, I suggest progressing to heavier weights/resistance to increase the effectiveness of your strength training, when these exercises no longer challenge you.
An example of a strength training workout schedule, for beginners, could be:
2-days per week, performing workouts on Monday and Thursday and completing this for 4-6 weeks.
Once completed 4-6 weeks of training, you can move to 3-days a week, training Monday, Wednesday and Thursday. Allowing a day in between workouts.
I recommend exercising both your lower and upper body each workout.
How Many Repetitions & Sets Should Seniors Do To Get Stronger?
Once you've decided how frequently you are going to do the workouts each week, the next step is knowing how many times to do each exercise during the workout.
More specifically, how many repetitions, and sets are required of each exercise to get stronger.
For those not familiar with these terms, repetition (commonly known as "reps") means how many times you complete the exercise.
Performing a bicep curl, for example, for one repetition (rep) means taking your arm from a fully straightened position to a fully bent position and returning back to the start position.
'10 reps' would mean performing ten complete movements of the exercise. So using the bicep curl example again, we take our arm from a fully straightened position to a fully bent position and then back to the start position and repeat this ten times.
A set means how many times we do those particular number of repetitions.
Let's use "2 sets of 10 repetitions" of the bicep curl as another example. This means we do ten biceps curls at a time, have a short rest and then do another ten biceps curls. Equaling two sets and 20 repetitions in total.
To get stronger, there I.S. a specific repetition AND set range you should stick to for best results with strength.
Changing the repetitions and the sets are going to target different components of fitness.
REPETITIONS
For Muscle Strength
If you find you have difficulty performing tasks like standing up, lifting objects, or climbing a few stairs, your muscle strength has likely decreased.
Lower repetitions, (1-6 repetitions) is the most beneficial for improving strength. Heavier weights/resistance are required for this repetition range.
I do not recommend doing this low of reps, however, unless you have a high level of training OR you have a professional helping you.
Keeping it simpler and safer, I recommend 5-10 repetitions for seniors, and moderate weight.
This will improve strength and also help build muscle mass more effectively.
For Larger Muscles
If you find your muscles have started losing size, (i.e. gotten smaller) this is known as muscle atrophy.
When muscle mass increases (size of the muscle), this is known as muscle hypertrophy.
To increase muscle mass, moderate repetitions are best, between 6-12 Repetitions.
I've found repetitions higher than this, up to 15 (sometimes more) can also work for building muscle.
For Muscular Endurance
If you find you can stand up quite easily, can lift objects easily and even walk stairs easily, it means your strength is doing ok. But, after a short time of carrying an object, doing exercises, or walking around (either on the flat, upstairs or up hills) you start fatiguing, it could mean your muscular endurance has decreased.
Your muscles have the adequate strength to do most of your activities but can't maintain this strength/power for a prolonged time.
An example of decreased muscular endurance would be walking around a shopping centre and feeling your legs fatiguing and having to sit down to rest.
To improve muscular endurance, high repetitions 15-20 repetitions and upwards will do this. And, lighter weights are necessary. This repetition range also improves cardiovascular fitness and is beneficial for endurance exercise such as cycling, running or swimming.
Strength, hypertrophy and endurance are all equally important.
SETS
When it comes to the sets of each exercise to build strength and muscle mass, even for endurance, the evidence shows multiple sets are superior to a single set.
Evidence also shows that 2-5 sets are optimal for strength, muscle mass and also endurance.
So to build strength, hypertrophy and also work some muscular endurance, I recommend 5-12 repetitions.
And 2-5 sets.
To start, you could choose two sets of 12, or 3 sets of 10, or 4 of 8.. All of these ranges will help build strength. If getting started, start with less. E.g. 2 sets of 8 and slowly build up the reps and sets over time. (and the weight).
If you stick to these parameters, and strength train consistently (at least two days each week), and progress the exercises by continuing to challenge yourself, you ARE going to get stronger.
How Heavy Should My Weights or Resistance Bands be?
There is no magic number I can give you for how heavy your weight or how thick your resistance band should be.
Everyone is different with different capabilities.
When beginning strength training, the most important step is learning the exercises first, with bodyweight or light weights.
As your strength begins to build, you can gradually increase the weight, ensuring you avoid any injury and are getting the most out of your strength training program.
I do not recommend lifting too heavy and training to full failure. Ever! Training to failure means, lifting a weight where your muscles are completely exhausted. This is unnecessary! So make sure the weight you choose doesn't completely tire your muscles.
Instead, choose a weight/resistance that is not too light that the exercise is a breeze, but heavy enough that your muscles are very close to being completely fatigued (getting near failure, but not failure) by the last repetition of the last set.
When exercising different areas of your body, you are going to have different levels of strength. Leg exercises usually require heavier weight compared to arm exercises — a reason why it's a good idea to have a selection of weights and bands.
It's up to you to determine how heavy your weights or resistance bands should be, and it gets easier as you become familiar with the exercises (and the weights).
What Resistance Bands Do You Recommend? The Best Resistance Bands For Seniors
Resistance bands purchased off the internet will work fine to do most exercises with.
I recommend going with ribbon type, and longer bands over shorter ones as this will allow you to do more exercises and you can double them over or adjust the size yourself.
If they are too short, you are limited in the exercises you can do.
I suggest getting a few strengths from light to heavy to allow for progression.
If you outgrow the resistance bands, you can purchase thicker bands.
I am currently in the process of sourcing the best resistance bands for seniors - This is in progress and to stay updated, make sure you're signed up to the More Life Health mailing list.
What Weights Do You Recommend? The Best Weights For Seniors
For weights, I also suggest purchasing a small set to save money and to allow for progression as your strength improves.
For beginners, I suggest starting with 1-5kg (2-11lbs) weights these are a perfect beginning weight which will allow you to learn the exercises, and they give room for progression.
When you outgrow these weights (a good problem to have), you can look at purchasing heavier weights.
Additionally, for those who have a good level of strength, you may need to start with heavier weights.
If you continue with the same light weights, your body will not get any stronger.
Progress the weight, by lifting heavier, and your body will adapt and get stronger.
If you head to your local department store, you can easily pick up a set of dumbbells.
However, to make it easier, I have found some perfect starter weight kits to help get you started.
CLICK HERE TO SEE WHAT EQUIPMENT I RECOMMEND.
Don't want to purchase weights?
If you don't want to purchase weights or resistance bands, that is absolutely fine.
Although I do recommend eventually purchasing equipment to make continual progress, you can stick to the bodyweight exercises and progress by adding in more repetitions as you get stronger over time.
Or, you can also use items you have around the house, like water bottles or cans of food, which will work just fine in the beginning.
When Do I Progress The Exercises? - (Use Heavier Weights)
As I've touched on throughout this article already when getting started with weight training, the most important step is that you learn correct exercise technique and use lightweight, OR no weight at all. Keeping you safe and injury-free.
Once you are performing the exercise correctly, increase the weight. Use weights that your muscles are being worked and get very close to tiring in the repetition range chosen (5-12) and set range (2-5).
With consistency each week, your body will adapt to the exercise by getting stronger. When the weights or resistance bands become too light, it is now time to increase them in small increments. Choosing a heavier weight or resistance, that now achieves the goal of your muscles tiring within the repetition and set range.
If at any time you get through the repetition and set range easily, using perfect exercise technique, and you're not close to tiring, it's time to lift heavier weights/or use thicker resistance bands.
Other ways to progress the exercises:
Do more repetitions (for bodyweight exercises)- Remember, however, if you do too many repetitions, you will move into working muscle endurance rather than your strength.
Do more challenging exercises - There are many ways to vary the exercises to make them more challenging. Take, for example, a wall push-up versus a push-up on the ground.
Decrease your rest time between sets. For example, slowly decrease by 5 seconds each week.
Or add in another set after some time. If you start with two sets, move to 3 sets and so on.
How Long Until I Start Seeing Results?
With proper strength training and adequate, healthy nutrition, you can expect to see and feel, yourself getting stronger and small changes in your physique quite quickly. From 1-2 weeks.
For beginners, as your body is learning the exercise, new neural (nerve) patterns are laid down between your brain and your muscles.
Our muscles are made up of different types of muscles fibres. Groups of these muscle fibres and a motor neuron (nerve cell) make up what's known as a motor unit.
Each motor unit contains large amounts of muscle fibres that if we don't use, they go to sleep. They sit dormant until they are called into action again.
When you begin strength training and stay consistent, your brain responds to the exercise by recruiting more motor units, waking up these previously dormant muscle fibres, to coordinate the contraction of the muscle(s).
This increase in the, once asleep, muscle fibres that are now activated to generate the force required to lift the weight, explains why we can increase our strength quite quickly.
Basically, when you perform strength exercises, your body is saying "I can't be weak anymore, I need to be stronger to do this", and your brain then wakes up your muscles to make it happen!
Increasing muscle mass (hypertrophy), on the other hand, will take a little longer.
New biceps from strength training.
After consistent strength training each week, for up to 4-6 weeks or more, you'll start to notice your muscles growing. Like your biceps (see photo).
Your muscle fibres are getting larger (hypertrophy), which will further improve your strength.
If you have done strength training before, even if it was a long time ago, your body will usually regain strength and muscle mass back fast (something known as muscle memory).
NUTRITION: EATING TO GET YOU HEALTHY & STRONG
Eating well is essential for health and wellness, and is also important for building muscle and improving strength. AND shrinking the waistline.
To get stronger and build muscle effectively, we need to be eating enough calories/energy from good quality protein, fat and carbohydrate sources.
We also need to get adequate micronutrients (vitamins and minerals) to support our body's biological processes and keep ourselves healthy.
When we are taking in too little calories, or eating just junk foods, we don't get in all our required nutrients, leading to poorer health and loss of muscle and strength.
Nutrition is a vast topic, difficult to cover in this guide. I could write a whole new guide on it. I'll save that for a later date, however.
For now, improve your diet by doing your best to avoid junk foods, and start getting the optimal amount of calories from nutrient-rich foods.
There are certain nutrients you want to be getting adequate amounts of to help increase your strength (and health) also. That being protein, vitamin D, magnesium and calcium, as low-level intake of these nutrients has been linked to decreased strength, muscle mass and physical performance in seniors.
Let's take a long at these nutrients:
PROTEIN
Protein is essential for maintaining muscle mass, and strength, as one gets older, and it's very common not to be getting enough.
The Australian Dietary Guidelines recommend that 15-25% of our total energy intake should come from protein, with a daily intake of the following:
The RDI of protein for women aged 19–70 years is 46 grams per day.
The RDI of protein for men aged 19-70 years is 64 grams per day.
Women over 70 should have at least 57g per day.
Men over 70 should have over 81g per day.
However, recent literature has argued that protein intake higher than this may be required to help sustain muscle strength and function into older age. [29, 30]
The European Society for Clinical Nutrition and Metabolism (ESPEN) gives the following recommendations, based on research gathered:
1 - For healthy seniors - at least 1.0 to 1.2 g protein/kg body weight/day is recommended.
2- For seniors who are at risk of malnutrition because they have an acute or chronic illness, the diet should provide 1.2 to 1.5 g protein/kg body weight/day.
3 - For seniors with severe illness or injury - even higher intake of 1.2 to 1.5 g protein/kg body weight/day may be required.
ESPEN also recommend daily exercise and resistance training to maintain health and muscle strength and function.
To learn more about protein and get ideas on how to get more protein in your diet, click here.
VITAMIN D
We make vitamin D when our skin is exposed to the sun. As we get older, we tend to spend less time in the sun, especially in the winter months, making vitamin D deficiencies very common.
Vitamin D is essential in older age for bone strength, muscle function, and to prevent falls.
Low vitamin D levels are associated with reduced muscle mass and impaired physical performance.
Aim to get 20 minutes’ direct sunlight daily, avoiding the hottest part of the day. This keeps your vitamin D levels topped up, helping you remain healthy and strong. Make sure not to overdo it and burn your skin.
MAGNESIUM
Magnesium is another nutrient we require for good health.
Magnesium is vital for many of our body's biological processes, including making energy, for nerve and muscle function, making DNA, bone and protein, and for a healthy heart and strong immune system.
Decreased magnesium intakes have been shown in seniors who have lower muscle mass and strength.
Furthermore, supplementation of magnesium has been linked to improved physical function and strength in seniors.
I'll be writing an article soon to help you learn more about magnesium and get ideas on how to get more magnesium in your diet. (stay tuned for this).
CALCIUM
Calcium is essential for healthy bones and healthy teeth. It also plays a crucial role in other bodily systems, such as our nervous system and the proper functioning of our muscles.
Our average weight is made up of about two per cent calcium. This calcium is mostly found in our bones and teeth — the rest stored in our blood and tissues.
Low calcium intake has been linked to osteoporosis, a low bone density condition most commonly seen in post-menopausal women.
Research has shown that seniors with low calcium levels, had 3-4 times higher risk of sarcopenia and slower gait speed, compared to those with a higher calcium level
To learn more about calcium and get ideas on how to get more calcium in your diet. Click here.
Strength training coupled with a healthy diet, of adequate calories, macronutrients (especially protein) and micronutrients (including vitamin D, magnesium and calcium), is a sure strategy of avoiding sarcopenia, and living a strong and healthy life.
GET STRONGER NOW - STRENGTHENING EXERCISES FOR SENIORS
If you're brand new to any training... Start with bodyweight exercises first or light weights, or resistance.
As mentioned throughout this article, get used to the exercises first. You still WILL get stronger by doing this and later you can change it up.
Now, let's look at the best exercises you should do in your workouts to get you stronger and make them more effective
THE 5 BEST, MUST-DO, STRENGTH EXERCISES FOR SENIORS
There are many exercises that can be done to build strength and muscle mass. However, there are some exercises which are better than others, and give more functional benefit in your daily life.
The exercises that should be the focus of every program involve many joints and work many muscle groups. These exercises are known as compound exercises. An example of a compound exercise is the squat, as it works the ankles, knees and hip joints and many muscle groups in your lower body.
Exercises that involve only one joint and isolate specific muscle groups are known as isolation exercises. An example of an isolation exercise is the bicep curl as the only joint moved during the bicep curl is the elbow joint.
Isolation exercises still have their place in an exercise program, but compound exercises can target these areas and are more effective and functional, leading to greater benefits.
Here are five of the best strengthening exercises which I feel are essential exercises for you to do to improve strength and physical function.
You can do these exercises in your own home as bodyweight exercises, or with resistance bands and/or dumbbells.
For those that go to the gym, they can also be part of a gym program, and barbells can be used with them.
If you have difficulty with the exercises below, start with seated strengthening exercises.
1) THE SQUAT
There are not too many other exercises that give you the best bang for your buck, like the squat.
The squat is a great exercise as it works all the muscles in the legs and the core.
The squat is a functional exercise and works the muscles required to move around with ease each day.
MUSCLES WORKED
Buttocks (glutes), thighs (quads), hips, calves, core and back.
DIFFICULTY: Moderate
HOW TO:
Standing up tall with your feet shoulder-width apart.
Holding onto your chair with both hands.
Hinging at the hips and sitting back as if you were sitting on a chair.
As you sit back, go no deeper than 90 degrees and as you stand back up.
Put equal weight through both legs.
Make sure your knees don't go over the line of your toes, and they aren't moving inward throughout the exercise.
Repeat for the set repetitions.
For Video Demonstration of the Squat: CLICK HERE
EASIER VARIATION: If you find the squat too difficult, you can start with a PARTIAL SQUAT or the SIT-TO-STAND.
PROGRESSING THE EXERCISE: This exercise can be made more challenging by using no hands, resistance bands, dumbbells, barbell.
2) THE DEADLIFT
The deadlift is similar to the squat in the way it works all the muscles in our lower body (with more hip involvement), but with the addition of holding onto the weight/resistance band. With the deadlift, we also work more of the back
This exercise is more difficult, so if you have trouble with this, set a goal, begin with easier strength exercises and work your way up to it.
MUSCLES WORKED
Buttocks (glutes), thighs (quads), hips, calves, core and back.
DIFFICULTY: Harder
HOW TO:
Place your resistance band flat on the floor.
Sitting up tall towards the front of your chair.
Place your feet shoulder-width apart on the resistance band and face your toes slightly outwards and keep your knees in line with your toes.
Reach down and grab hold of your resistance band and maintain your upright posture with your shoulders back and down and your chest up.
Also maintain straight arms whilst holding onto the resistance band, and keep your shoulders back and down in good posture whilst holding onto the resistance band.
Loosen or tighten the resistance band as needed to work your strength.
From this position, whilst only holding onto the resistance, stand up, just like the sit to stand exercise now holding onto the resistance band.
Ensure you completely straighten your knees and hips and squeezing your buttocks when you come to the top of the movement.
Now slowly sit back down.
Keep equal weight through both legs throughout the exercise and make sure your knees aren't moving inward throughout the exercise.
Repeat for the set repetitions.
For Video Demonstration of the Chair Deadlift: CLICK HERE
EASIER VARIATION: Lighter weight/resistance.
PROGRESSING THE EXERCISE: Using heavier resistance bands, using no chair, using a barbell.
3) The Row
The row is another great compound exercise working the muscles of the upper back. Another great functional exercise for daily tasks and helps a great deal in improving posture.
This exercise is easy to do, regardless of your capabilities. It can be done both seated or standing and still works the same muscles.
MUSCLES WORKED
Back, Arms, Shoulders & Core
DIFFICULTY: Easy to Moderate
HOW TO:
Stand up tall next to your chair and place one hand on the chair
Now take a step back from the chair, with a slight bend in the knees, hinge at the hips, bend forward with your back straight and place one arm by your side, keeping it straight.
Now bending at the elbow, pull your arm up behind your back and return to the start position.
Squeeze your shoulder blades together when lifting your arm up.
Repeat for the set repetitions and change arms.
For Video Demonstration of the Bent Over Row: CLICK HERE
EASIER VARIATION: Lighter weight/resistance. Seated row.
PROGRESSING THE EXERCISE: Using heavier resistance bands or dumbbells, using a barbell. If doing seated rows (a variation of this exercise), there is a machine at the gyms which weight can be increased.
4) THE CHAIR PUSH-UP
In the last exercise, we worked the muscles involved in the action of pulling. This next exercise we are going to work the muscles involved when we do a pushing movement.
I have chosen the chair push-up for this due to its ease of use in the house and being a little more challenging that a wall push-up.
A regular push-up is difficult for most, but if you can do a regular push-up, go for it! Same goes with the modified push-up, with knees on the ground.
There are other exercises you can substitute for this depending on your capabilities, for example, if the push-up is too easy, you can do a bench press (or a press machine) at a gym.
Note: We tend to do more movements at the front of the body in our daily life, which can lead to over-worked muscles at the front, and weaker muscles at the back of our body. This can lead to shoulder issues and poor posture. It's important we do pull movements (for example, exercise #3) more frequently than pushing movements (this exercise) to balance the body and improve posture.
MUSCLES WORKED
Chest, Arms, Shoulders, and Core
DIFFICULTY: Easy to Moderate
HOW TO:
Stand up tall, facing your chair
Place your hands on the chair, bringing your feet out about 1-2 feet from the chair.
Bend forward at the hips keeping the back straight and the core tight.
With a slight bend in the knees, bend your elbows, bringing your chest towards the chair.
Now straighten your arms bringing your chest away from the chair and repeat for the set repetitions.
Make sure your chair is secure throughout.
To make the exercise harder, you can bring your feet further away from the chair.
For Video Demonstration of the Chair Push-Up: CLICK HERE
For Video Demonstration of the Wall Push-Up: CLICK HERE
EASIER VARIATION: Wall Push-up. Seated push-press with a resistance band. Bench-press at gym with light weights.
PROGRESSING THE EXERCISE: Change the angle of the push-up to the chair or wall. Do a floor push-up (modified or full). Use a chest press machine at the gym (and increase weight). Or do the bench press (and increase weight).
5) THE BRIDGE
The bridge is a great functional exercise which works the midsection.
By getting stronger in this area, tasks such as moving around in bed, getting up off the floor and the couch will be easier.
If you have difficulty getting up or down off the floor, stick to seated core strengthening exercises
MUSCLES WORKED
Core, Lower Back, Glutes, Hamstrings
DIFFICULTY: Moderate
HOW TO:
Lying on your floor, facing up, with your knees bent and feet flat on the floor.
With your palms facing down, place your arms by your side.
Lift your hips off the ground until your knees, hips and shoulders form a straight line, making sure your hips are balanced.
Squeeze your buttocks and hold this position for a few seconds.
In a slow, controlled manner lower hips back down to the start position.
Repeat for the set repetitions.
EEASIER VARIATION: Seated core strengthening exercises
PROGRESSING THE EXERCISE: Single leg bridge.
There you have 5 of the best strengthening exercises that you should be doing to improve your strength.
If you have difficulty with these exercises, start with seated strengthening exercises first, and as you make improvements, you can progress to these exercises.
The Best Strength Exercises For Seniors - A Complete Program
Here is a strengthening exercise video routine not using any equipment of the best strength exercises for seniors.
It is a complete program, utilising bodyweight exercises to work your whole body.
A great video to get started and get you stronger.
Weights & Resistance Band Exercises For Seniors: A Complete Seated Program
Here is a weights (dumbbell) and resistance band seated exercise program to help get you stronger using resistance
This is a great strength workout you can do in the comfort of your own home.
Resistance Band Exercises For Seniors: A Complete Program
In this video, we go through a strength workout with resistance bands, both seated and standing to help get you stronger.
You can continue to improve your strength by using thicker resistance bands.
The 10 Best leg Strengthening Exercises For Seniors
The legs are the most important area of the body to strengthen to ensure you are moving around at your best (and also decrease chances of having a fall).
The legs should be the main focus of any strength training for seniors.
Here are the ten best leg strengthening exercises for seniors to improve leg strength.
CLICK HERE FOR THE 10 BEST LEG STRENGTHENING EXERCISES FOR SENIORS
Leg exercises, performed consistently will bring significant benefits. Many of your everyday activities will start feeling easier, and you'll move about with much greater ease. You'll also feel much steadier on your feet!
THE MOST SIMPLE STRENGTH WORKOUT FOR SENIORS TO GET AMAZING RESULTS
For those of you who lack the motivation to get started and continue with exercise, I'm going to make it as easy as possible to work your whole body and make significant increases in your strength.
All I ask of you is that you do a simple workout with only three exercises and do them every second day.
If you stick to these exercises, and continually progress, by adding in more repetitions, doing a more challenging exercise or add in more weight. You will continue to get stronger and stronger.
Although other exercises have their place too, these three exercises alone will get your whole body stronger.
Strength training doesn't have to be complicated; keep it simple!
These exercises I have chosen work all the muscles in your legs, work your core and the whole of the upper body.
Here is the very simple workout:
SIMPLE STRENGTH WORKOUT
EXERCISE 1: SQUAT
EXERCISE 2: CHAIR PUSH UP
EXERCISE 3: ROW
REPETITIONS - 12
SETS - 2-3
REST - 60 seconds
Note: If these exercises are too easy, add in weights and/or decrease the rest time.
Stick to this simple workout consistently, and you will get great improvements in strength!
You can do it!
ADDITIONAL STRENGTHENING EXERCISES FOR SENIORS
I have created many, many strengthening videos over the past couple of years, which are all available online. You have many to choose from.
Click below for more strength workout videos.
TAKING YOUR STRENGTH TRAINING FURTHER
Should I Join A Gym?
If you have made good progress with your in-home strength training and want to take your strength training further, joining a gym would be the next step.
The advantages of joining a gym are the wide selection of weights, machines and other equipment, allowing you to your strength training to the next level and make progress in all aspects of your fitness.
If you are thinking about joining a gym, I say go for it!
There are also seniors gyms so do a search of your area, and you may find one.
However, if you feel the gym is not something for you, then you don't have to.
I understand that gyms aren't everyone's cup of tea, and when I first got into the gym myself a while back, it took me months to get comfortable going there.
You can improve your strength significantly in the comfort of your own home as long as you are continually progressing over time by increasing the weight and doing more challenging exercises.
Free Weights Vs Machines - Which Is better For Seniors?
This is a question I commonly get asked from those who love their exercise.
For those not familiar with the terminology, free weights refer to barbells or dumbbells (see photo below). With free weights, the person doing the exercise controls the weight entirely.
Free Weights - Barbells and Dumbbells
Machine weights refer to the devices at gyms that are usually pin-loaded.
Both free weights and machines have their place in a gym program for seniors, and both have their advantages and disadvantages.
Both types are easy to use and safe when correctly used.
The big advantage of free weight training over machines is the greater use of our stabilising muscles when performing the exercise. Additionally, free weights are more functional, replicating our daily movements more so. This leads to greater benefit in our everyday life, making life much easier.
Machine Squat
Machines, on the other hand, are easier to learn, are usually more comfortable and can make it easier to target specific muscles if free-weight exercises are too difficult.
Take, for example, this man in the photo doing machine squats. He may have difficulty doing squats with free weights but can do a variation of the squat quite easily on this machine. This allows him to work his leg muscles still, and effectively.
Regardless of the type of strength training, It is always best to have someone teach you how to do the gym exercises correctly, especially with free weights, rather than jumping in on your own.
Always start with lighter weight and progress the weight over time.
ENDING NOTE
So we've come to the end of this comprehensive strength training guide.
You now have ALL required to get stronger and stay stronger after 60.
There is a lot here to take in and do, but keep it simple as best you can, choose a workout, stay consistent and always keep progressing. Oh! And eat well also!
When you follow the basic strength formula, your body I.S. going to get stronger. And, It won't be long before you feel this.
You'll feel yourself moving around much easier.
You'll start to see all of the many benefits that come with improved strength and more muscle mass.
You'll start feeling, and looking, like a younger version of you!
Enjoy the journey to a fitter, healthier and stronger you.
Stay happy!
And keep on challenging yourself!!
Mike
[Note: If you have any questions about this article jump on facebook and join the More Life Health Facebook Support Group or you can email me any time at mike@morelifehealth.com]
STRENGTH TRAINING FOR SENIORS SUMMARY
Here is a summary of the strength guidelines to follow get stronger:
WARM-UP
Always complete a warm-up before training.
FREQUENCY
Minimum dose to maintain 1 session /week
Minimum dose to get stronger 2 sessions /week
Ideal 3-4/week
REPETITIONS
5-12 repetitions to help build strength, muscle mass and endurance. Plus also improve cardiovascular fitness.
SETS
2-5 sets.
Mikes Suggestion - 3 sets of 10 is a good place to start. Progress the reps and sets over time.
EXERCISES
Both lower and upper body each workout, with focus on compound exercises.
REST
60 - 180 seconds depending on training goals and fitness levels.
One day in-between workouts for proper recovery.
STAY CONSISTENT, SUPPORT WITH PROPER NUTRITION & CONTINUE TO CHALLENGE YOURSELF WEEKLY.
Further References:
32. Adams, Kent J., P. O'shea and Katie L. O'Shea. “Aging: Its Effects on Strength, Power, Flexibility, and Bone Density.” (1999).33. Narici, Marco V, Neil D Reeves, Carolyn Morse and C. N. Maganaris. “Muscular adaptations to resistance exercise in the elderly.” Journal of musculoskeletal & neuronal interactions 4 2 (2004): 161-4.34. Tieland M, Trouwborst I, Clark BC. "Skeletal muscle performance and ageing." J Cachexia Sarcopenia Muscle. (2018).The 10 Best Leg Strengthening Exercises For Seniors
Here are the 10 best legs exercises for seniors, to improve strength.
Perform 10-12 repetitions of each of these exercises (at least three times per week) after a warm up.
Remember to take take your time and slowly progress.
THE BEST LEG EXERCISES FOR SENIORS
Here are the 10 best legs strengthening exercises for seniors.
Perform 10-12 repetitions of each of these exercises (at least three times per week) after a warm up.
Remember to take take your time and slowly progress.
If needed, start with 1 set of 10-12 (or less) repetitions and work up to 3 sets of 10-12 repetitions for exercises.
If these exercise are too easy, or they become too easy with the repetitions and sets, add in dumbbells and/or resistance bands.
Always be challenging yourself by progressing the exercises.
Once performed and performed consistently you'll notice big differences in your leg strength, many of your everyday activities feeling a whole lot easier with your newly strengthened legs.
STRENGTH EXERCISE 1: SQUAT
MUSCLES WORKED
Buttocks (glutes), thighs (quads), hips, calves, core and back.
DIFFICULTY: Moderate
HOW TO:
Standing up tall with your feet shoulder-width apart.
Holding onto your chair with both hands.
Hinging at the hips and sitting back as if you were sitting on a chair.
As you sit back, go no deeper than 90 degrees and as you stand back up.
Put equal weight through both legs.
Make sure your knees don’t go over the line of your toes and they aren’t moving inward throughout the exercise.
Repeat for the set repetitions.
For Video Demonstration of the Squat: Click Here
PROGRESSING THE EXERCISE: This exercise can be made more challenging by using no hands, resistance bands, dumbbells, barbell.
EASIER VARIATION - PARTIAL SQUAT
Perform this variation if you have difficulty or get pain with the standard squat.
DIFFICULTY: Easy
HOW TO:
Standing up tall with your feet shoulder width apart.
Holding onto your chair with both hands.
Hinging at the hips and sitting back as if you were sitting on a chair.
Only go to a depth of about 45 degrees before you come back up.
Put equal weight through both legs.
Make sure your knees don’t go over the line of your toes and the aren’t moving inward throughout the exercise.
Repeat for the set repetitions.
For Video Demonstration of the Partial Squat: Click Here
STRENGTH EXERCISE 2: SIT-TO-STAND
MUSCLES WORKED
Buttocks (glutes), thighs (quads), hips, calves, core and back.
DIFFICULTY: Easy to Moderate (depending on hand use)
HOW TO:
Sitting up tall in your chair, with your feet shoulder-width apart.
Shuffle forward to the front of your chair.
From this position, bringing your feet back, so your heels are behind your knees.
With your hands on the chair, on the arm-rests of the chair, or on your thighs, you’re going to lean forward at the hips so your nose comes over your toes.
Now stand up putting equal weight through both feet/legs.
Make sure you fully extend your legs at the knees and the hips.
And to sit down, hinging at the hips, reaching for the chair and sitting down.
Make sure to keep your chest up throughout the exercise.
Repeat for the set repetitions.
Also, make sure that your knees remain in line with your toes, and they don’t move inwards when you sit down and stand up.
For Video Demonstration of the Sit-To-Stand: Click Here
EASIER VARIATION: This exercise can be made easier by using arms to assist or using a higher chair.
PROGRESSING THE EXERCISE: This exercise can be made more challenging by using no hands, using a lower chair or adding in in dumbbells or resistance bands.
STRENGTH EXERCISE 3: CHAIR DEADLIFT
MUSCLES WORKED
Buttocks (glutes), thighs (quads), hips, calves, core and back.
DIFFICULTY: Harder
HOW TO:
Place your resistance band flat on the floor.
Sitting up tall towards the front of your chair.
Place your feet shoulder-width apart on the resistance band and face your toes slightly outwards and keep your knees in line with your toes.
Reach down and grab hold of your resistance band and maintain your upright posture with your shoulders back and down and your chest up.
Also maintain straight arms whilst holding onto the resistance band, and keep your shoulders back and down in good posture whilst holding onto the resistance band.
Loosen or tighten the resistance band as needed to work your strength.
From this position, whilst only holding onto the resistance, stand up, just like the sit to stand exercise now holding onto the resistance band.
Ensure you completely straighten your knees and hips and squeezing your buttocks when you come to the top of the movement.
Now slowly sit back down.
Keep equal weight through both legs throughout the exercise and make sure your knees aren’t moving inward throughout the exercise.
Repeat for the set repetitions.
For Video Demonstration of the Deadlift: Click Here
EASIER VARIATION: Lighter weight/resistance.
PROGRESSING THE EXERCISE: Using Heavier resistance bands, Using no chair, using a barbell.
STRENGTH EXERCISE 4: REVERSE LUNGE
The Reverse Lunge is a great exercise as it trains single leg strength. We are exercising one leg at a time, helping to ensure both our legs are getting stronger. This is good for activities such as walking stairs.
MUSCLES WORKED
Buttocks (glutes), thighs (quads), hips, calves, core and back.
DIFFICULTY: Harder
HOW TO:
Standing up tall, with both hands on the chair.
Take a large step directly backwards and drop down just before the floor.
Come back up and repeat for the opposite leg.
Keep your body upright throughout the exercise, ensuring the knee of your front foot does not come past the line of your toes.
Repeat for the set repetitions.
For Video Demonstration of the Reverse Lunge: Click Here
EASIER VARIATION: Don’t go as low to the floor
PROGRESSING THE EXERCISE: Using no chair, using dumbbells, using a light barbell.
STRENGTH EXERCISE 5: CALF RAISES (Up On Toes)
MUSCLES WORKED
Back of lower legs (Calves).
DIFFICULTY: Easy
HOW TO:
Standing up tall with your feet about hip width apart.
Keeping your knees straight and holding onto the chair with both hands.
Coming up on to the toes, raising your heels up off the floor, holding briefly and slowly lowering yourself back down.
Repeat for the set repetitions.
For Video Demonstration of Calf Raises: Click Here
EASIER VARIATION: Seated
PROGRESSING THE EXERCISE: Using no chair, using dumbbells.
STRENGTH EXERCISE 6: HIP ABDUCTIONS (Leg Sideways - Straight)
MUSCLES WORKED
Buttocks (glutes), thighs (TFL)
DIFFICULTY: Easy
HOW TO:
Standing tall with your feet close together and holding on to your chair.
Slowly bring your leg out to the side and in a controlled motion bringing your feet back together.
Ensure you keep your toes facing the front throughout this exercise, also make sure that you do not lean during this exercise or hitch your pelvis.
Repeat for the set repetitions and change legs.
For Video Demonstration of Hip Abductions: Click Here
EASIER VARIATION: Seated
PROGRESSING THE EXERCISE: Using no chair, using resistance bands
STRENGTH EXERCISE 7: HIP EXTENSIONS (Leg BACKWARDS - Straight)
DIFFICULTY: Easy
MUSCLES WORKED
Buttocks (glutes), and back of the thighs (hamstrings).
HOW TO:
Placing both hands on your chair and standing up tall.
Keeping your legs straight slowly bring it back behind you and then bring your feet back together.
Repeat for the set number of repetitions and do the same on the opposite leg.
For Video Demonstration of Hip Extensions: Click Here
PROGRESSING THE EXERCISE: Using resistance bands, ankle weights.
STRENGTH EXERCISE 8: KNEE FLEXIONS (KNEE BACK BENDS)
MUSCLES WORKED
Back of the thighs (Hamstrings).
DIFFICULTY: Easy
HOW TO:
Standing up tall, holding onto your chair, with your feet close together.
Bending your leg at the knee, lifting your foot up towards your buttocks, holding briefly and returning your foot back to the ground.
Repeat for the set repetitions and do the same on the opposite leg.
For Video Demonstration of Knee Flexions: Click Here
PROGRESSING THE EXERCISE: Using resistance bands, ankle weights.
STRENGTH EXERCISE 9: SEATED KNEE EXTENSIONS (Knee Straightens)
MUSCLES WORKED
Quadriceps (Thighs)
DIFFICULTY: Easy
HOW TO:
Sitting up tall with your shoulders back and down.
Lifting one leg up, extending at the knee.
Hold briefly at the top of the movement, squeezing the muscles at the front of the thigh before lowering your leg back down.
Ensure the movement is slow and controlled.
Alternate legs, ensuring full knee extension (leg completely straight).
Repeat for the set repetitions.
For Video Demonstration of Knee Extensions: Click Here
PROGRESSING THE EXERCISE: Using resistance bands, ankle weights.
STRENGTH EXERCISE 10: SEATED HIP ADDUCTIONS (Thigh Squeezes)
DIFFICULTY: Easy
MUSCLES WORKED
Groin/inner thighs (Hip Adductors)
HOW TO
Sitting up tall, in your chair, shuffle forward to the middle of the chair.
In this position, using a cushion or a rolled up towel, place the item between your knees.
Bring your feet in, ensuring they are in line with your knees.
Whilst holding the cushion lightly with your knees, you're now going to squeeze the cushion using your knees.
Hold this for 5 seconds and relax.
Repeat for the set repetitions.
For Video Demonstration of Seated Hip Abductions: Click Here
And there you have 10 of the best leg strengthening exercises for seniors.
Do these exercises consistently for strong, steady legs.
If you’d prefer just to do exercises with me through video, here are more leg strengthening videos (click below)
For More Leg Strengthening Exercise videos
Weights and Band Exercises For Seniors | Chair Exercises - Get Stronger at Home
In this video, we go through a completely seated, strength workout with resistance bands and dumbbells and we work the whole body.
Great exercises to get you stronger.
at home weights and band workout for seniors - get stronger
In this video, we go through a completely seated, strength workout with resistance bands and dumbbells, and we work the whole body.
Great exercises to get you stronger
Make sure you do the warm-up before beginning.
Seated Warm-Up: https://youtu.be/nfGWaRoKr7k
STRENGTH WORKOUT - SEATED
1. KNEE PRESS
2. PARTIAL SIT TO STANDS
3. KNEE EXTENSIONS - RBs
4. HIP ABDUCTIONS- RB
5. SEATED ROWS
6. CHEST PRESS - RBS
7. CALF RAISES - DBS
8. SHRUGS - DBS
9. BICEP CURLS- DBS
10. SHOULDER PRESS - DBS
11. PULL APARTS CORE - DB
12. TRICEPS EXTENSIONS - CHAIR
Do your best and any questions ask below!
- Mike
Strength Exercises For Seniors | Get Stronger at Home With Resistance Bands
In this video, we go through a strength workout with resistance bands and I teach you how to do strength exercises with resistance bands that you can do in the comfort of your own home. Once you learn these exercises, you can complete these exercises on your own.
These exercises are a little more difficult.
Great exercises to get you stronger.
at home resistance band workout for seniors - improve your strength
In this video, we go through a strength workout with resistance bands, and I teach you how to do strength exercises with resistance bands that you can do in the comfort of your own home. Once you learn these exercises, you can complete these exercises on your own.
These exercises are a little more difficult.
Great exercises to get you stronger
Make sure you do the warm-up before beginning.
Standing Warm-Up: https://youtu.be/b2DYU7ZQgN0
Seated Warm-Up: https://youtu.be/nfGWaRoKr7k
To get straight into the exercises go to 1:27.
Strength Workout For Seniors with Resistance Bands
1. SIT TO STAND SUMO DEADLIFT x 10-
2. SIT TO STAND - x 10
3. SEATED BICEP CURL DOUBLE ARM x 10
4. SEATED SHRUGS x 10
5. SEATED SHOULDER PRESS UNDER LEGS x 10
6. CHEST PRESS x 10
7. SEATED ROWS x 10
8. STANDING HIP EXTENSIONS - x 10
9. STANDING HIP ABDUCTIONS - x 10
10. STANDING KNEE FLEXIONS x 10
11. STANDING CALF RAISES x 10
Do your best and any questions ask below!
- Mike
Collagen: The Benefits For Seniors
Collagen is the most abundant protein found in mammals, making up for 25% to 35% of the whole-body protein content.
When we're young, our body naturally produces collagen. However, from our twenties and beyond, our collagen production slows, and our cell structures weaken.
Eating more collagen has been shown to help aid collagen production, leading to many health benefits.
UNDERSTANDING COLLAGEN
Let's break it down and get to know our friend, collagen.
Imagine collagen as the secret ingredient in your favourite superhero movie. It's the protein that's everywhere – in your skin, bones, muscles, tendons, you name it!
It's like the glue holding your body together.
Pretty cool, right?
Now, picture a busy construction site - that's your body constantly creating collagen.
This protein is a major building block, giving structure and strength to various parts of your body. Think of it as the body's natural scaffolding.
But, here's a fun fact: Collagen isn't just one thing.
It's like a family with different members, each with their own special role.
There are at least 16 types of collagen, but most of our body is made up of types I, II, and III.
Each type has its own superpower, from keeping our skin supple to supporting our joints and tendons.
Understanding collagen is like discovering a hidden treasure map inside your body.
It's fascinating how this one protein can do so much, right?
HOW EATING MORE COLLAGEN COULD BENEFIT YOU!
Eating collagen... Wait. What?
You may be thinking "isn't collagen that stuff some people inject into their lips to make them plump?"
And... Well... Technically, yes.
But, collagen is a whole lot more than just a lip plumper.
Collagen is the most abundant protein found in mammals, making up for 25 to 35% of the whole-body protein content.
We are all comprised of collagen. Our tendons, ligaments, joints, bones and skin, even our organs, teeth and eyes all have this essential protein in them.
Our body contains different types of collagen, and it has many different, essential functions, including, giving our body its structure and strength, and also elasticity to our skin.
When we're young, our body naturally produces collagen. However, from our twenties and beyond, our collagen production slows, and our cell structures weaken.
Unhealthy diet, stress and environmental factors (for example; U.V. rays, lack of sleep and smoking) also negatively affect collagen production.
Some of the visible signs of slowing collagen production include skin losing its firmness, wrinkles, muscle loss and weakening joints (cartilage).
SKIN ELASTICITY AND AGING
Now, let's talk about something we all notice – our skin and how it changes as we age.
Skin elasticity?
That's like the magic trick our skin does to stretch and bounce back.
Young skin is like a brand-new elastic band – snappy and resilient. But, as we get older, well, things start to change.
As we celebrate more birthdays, our body's collagen production starts to slow down.
It's like a once bustling city getting a bit quieter.
This slowdown means our skin loses some of that stretchy, bouncy quality.
The result?
Fine lines and wrinkles start gatecrashing the party. It's like your skin is telling the story of all the smiles and frowns over the years.
But here’s a silver lining – think of aging like fine wine.
Sure, we can't stop the clock, but we can age gracefully.
Protecting our skin from the sun, eating foods rich in antioxidants, and maintaining a healthy lifestyle can be our secret weapons.
They help preserve our skin’s elasticity and keep it looking as fabulous as possible.
Remember, aging is a natural process, and there's beauty in every stage of life.
It's all about embracing the changes and taking care of ourselves along the way.
Let's keep our skin happy and healthy, no matter how many candles are on our birthday cake!
HOW TO IMPROVE COLLAGEN PRODUCTION
Eating more collagen has been shown to help aid collagen production, leading to many health benefits.
The most collagen filled foods we can eat are our animal proteins.
However, eating the more popular cuts of meat is not going to assist you adequately in getting more collagen in your diet.
In past times, more boney cuts (or gelatinous cuts) of meat, rich in collagen was consumed. Every part of the animal, not just the muscle meat, was used. With none wasted.
Nowadays, we are much pickier about our eating habits, because we can be.
Consumption of collagen-rich meat has decreased in favour of other, more popular and accessible cuts. That being the muscle meat.
We are eating less of the boney cuts, we usually steer clear of organ meats, and most of us don't eat the chewy, fattier parts which contain many healthy nutrients.
The favoured cuts, our muscle meat (I.E. chicken breasts, thighs, sirloins, rumps, eye fillets, etc.), lack the collagen and certain amino acids necessary for our health.
Gelatinous (boney) cuts, on the other hand, contain these amino acids found in the collagen. More specifically, glycine, alanine, proline and hydroxyproline.
These four amino acids all play an important role in our body:
Glycine is vital to our health, well-being and also in the prevention of diseases and disorders. [1]
Alanine serves as a great source of energy for both our muscles and nervous system. It increases the endurance of our muscles, increases exercise capacity and decreases fatigue. [2]
Proline and Hydroxyproline aids in the structure and creation of protein in our body, aids wound healing, aids in antioxidant reactions and assists our immune responses. [3]
Getting more collagen (and these amino acids) brings many health benefits.
THE BENEFITS OF EATING COLLAGEN FOR SENIORS
STRONGER BONES AND HEALTHY JOINTS!
Many studies have concluded that increased collagen in diets has a positive therapeutic effect in osteoporosis, osteoarthritis & joint pain.
Our bones and joints are reliant on collagen for their strength, structure and proper function. (4)
As we age and collagen production slows, bone density decreases, and so does the quality of the cartilage in our joints.
STRONG BONES
Collagen supplementation has been shown to have a positive therapeutic effect on osteoporosis and osteoarthritis. (5).
One study in particular by the Department of Nutrition, Food and Exercise Sciences, links calcium and collagen to a reduced risk of bone loss in osteopenic, postmenopausal women, decreasing the risk of osteoporosis.
Another study on collagen supplementation in 131 women (average age 63 years) was "associated with a favourable shift in bone markers, indicating increased bone formation and reduced bone degradation."
HEALTHY JOINTS
Studies have shown protective effects on joint articular cartilage and the ability to possibly reduce the risk of deterioration in osteoarthritis. (5, 6)
Other studies link collagen to decreased joint pain and decreased osteoarthritis symptoms, helping to improve the quality of life of sufferers.
One study, in particular, concluded that collagen supplementation "can be considered a potential complement to current osteoarthritis therapies."
FOR YOUR MUSCLES - STRONGER MUSCLES AND IMPROVED FITNESS!
As we age, the strength and size of our muscles decrease — a condition known as sarcopenia.
Performing resistance (strength) training along with consuming adequate, quality protein can help reverse sarcopenia.
Research suggests that those who use collagen in their diet show a higher increase in muscle strength and endurance, compared to those who don't get enough protein.
A study of 27, sarcopenic, older men who supplemented with collagen and completed resistance training (three days a week, for 12 weeks), had a more pronounced improvement of body composition, compared to those who didn't supplement. An increase in muscle mass, strength and a decrease in fat mass were seen in the collagen supplementation group.
FOR YOUR SKIN - FEWER WRINKLES, FIRMER SKIN!
Further to the beneficial effects of collagen in our muscles, joints and bones, collagen can also benefit our skin.
Collagen is abundant in our skin, and it is what gives the elasticity and firmness to it.
As our collagen production decreases with age, our skin becomes less firm, and wrinkles start to develop.
While consuming collagen won't turn back the clock, it has undoubtedly been shown to aid in improving skin quality, helping you to maintain a smooth and silky complexion throughout the years.
Multiple studies have shown consuming collagen, in supplementary or natural form, can decrease skin aging - improving skin elasticity, reducing wrinkles and may also help in keeping your skin hydrated. [8, 9, 10, 11]
FOR YOUR SLEEP - GET RESTFUL SLEEP!
If you have trouble sleeping or insomnia, you may find comfort in none other than a cup of healthy, collagen-filled bone broth before bed!
As we all know, sleeping is just as vital for your well-being as exercising and eating healthy foods. An average person needs 7-9 hours of proper sleep to maintain a functional body and mind. [12]
Glycine, an amino acid abundant in collagen, is an inhibitory neurotransmitter, which helps regulate mood and promotes restful sleep.
A Japanese study shows that taking glycine before bed has positive effects on sleep quality. This study also found that glycine improved performance of memory recognition tasks and decreased sleepiness during the day.
FOR YOUR GRANDCHILDREN - SUPPORTS CHILDREN'S DEVELOPMENT
I'm sure you want all your grandchildren to grow up as healthy and robust as they can be. And, I'm sure when you were younger, you ate many collagen-rich foods, maybe even offal, which many of my patients tell me they ate (and still do).
Collagen has enormous benefits for growing bodies.
Gelatinous cuts of meat (such as chicken drumsticks or a nice cup of traditional soup) have plenty of protein in collagen form (not to mention healthy fats and other vitamins and minerals).
The nutrients help support the development of a growing child's tissues and organs and support other essential biological processes.
HOW TO GET MORE COLLAGEN IN YOUR DIET
So, I think by now you can see how beneficial getting more collagen in your diet can be. Let's look at how you can do this.
Here are some ways to get more collagen into your diet:
IN YOUR FOOD -
EAT GELATINOUS CUTS OF MEAT
These are the bonier cuts of meat, not the muscle meat.
Collagen-rich meat include beef cheeks, ribs, lamb necks, lamb shanks, Osso Bucco, chicken drumsticks, pork chops, pork skin, chicken feet, and oxtail.
DRINK BONE BROTHS AND SOUPS
The great thing about bone broth is that many healthy types are becoming readily available in stores.
You can easily make your own bone broth (see this recipe) or search around your local grocery store for an already made broth.
I'm sure you may even know a good chicken soup, maybe even a fish head soup recipe, you can make! Why not cook that for a nice bowl of health.
SUPPLEMENTING -
If you're not much of a cook, you can also supplement with certain products to get more in your diet.
COLLAGEN
Supplements such as Collagen Hydrolysate is another way to increase your collagen intake. By doing this, you will get the combination of important amino acids which help maintain a healthy body.
The best thing about collagen hydrolysate is that it is flavourless, colourless and easily dissolves, making it easy to add into your smoothies.
GELATIN
Gelatin is the cooked form of collagen. It is similar to the supplement I mentioned above, only gelatin does not dissolve, making the liquid thicker.
Gelatin can be used to get more collagen into your diet, by making fruit jelly (jello), healthy fruit gummies or thickening up smoothies or curries.
Although collagen supplementation has been proven to be effective and safe [13], If possible, always try to introduce more collagen naturally through your food, rather than in supplement form. This way, it is more effective, and you get more of the nutrients.
Also, keep in mind that you should never take any supplements before consulting with your doctor.
A COLLAGEN FILLED RECIPE - BONE BROTH
Bone Broth is one of my favourite ways to get more collagen in my diet and many other vitamins and minerals.
You can make bone broth easily on your own! It can be made using a slow cooker, but it's pretty simple to make by simmering a pot on the stove as well. Depending on your preferences, you can use beef, chicken or fish bones to make a homemade bone broth.
If possible, try to get ahold of organic bones from your local farmers. Pasture-raised/grass-fed meats are the healthiest option. They contain more vitamins and minerals without any harmful chemicals or toxins. The same goes for all other produce as well - meat, dairy, fruits and vegetables etc.
Back when I used to work in the aboriginal communities here in Australia, Kangaroo Tail Soup was a favourite to the locals and a way to get more collagen.
Calcium, magnesium, copper, iron, manganese, phosphorus, potassium, sodium and zinc are just some of the many minerals found in bones. The combination of these minerals are highly nutritious and promote plenty of health benefits both for your body and the mind.
Here is a HEALTHY BONE BROTH RECIPE for you!
Do you cook with gelatinous cuts of meat? What's your favourite lamb shank or soup recipe?
Healthy Bone Broth Recipe For Older Adults
Bone Broth is one of my favourite ways to get more collagen in my diet and many other vitamins and minerals.
You can make bone broth easily on your own! It can be made using a slow cooker, but it's pretty simple to make by simmering a pot on the stove as well. Depending on your preferences, you can use beef, chicken or fish bones to make a homemade bone broth.
Calcium, magnesium, copper, iron, manganese, phosphorus, potassium, sodium and zinc are just some of the many minerals found in bones.
Here is a bone broth recipe for you.. Enjoy!
Bone broth, a traditional health food that has been around for centuries, is making a significant comeback in the wellness world, especially for older adults. This nutrient-rich liquid, made by simmering bones over a long period, is packed with vitamins and minerals essential for maintaining good health in later years. Let’s explore what makes bone broth unique and how to incorporate it into your daily routine.
What is A Bone Broth
Bone broth is a type of soup made by simmering bones, often with vegetables and herbs, for an extended period. This slow cooking process extracts nutrients such as collagen, amino acids, and minerals from the bones, creating a nutrient-dense broth. Unlike quick-cooking soups, bone broth requires hours of simmering to release these beneficial compounds.
How is Bone Broth Different From Regular Broth or Stock?
While the terms broth, stock, and bone broth are often used interchangeably, there are differences. Regular broth and stock are typically cooked for a shorter period and may not always use bones, leading to a less nutrient-rich liquid. Bone broth, on the other hand, is simmered for much longer, sometimes over 24 hours, to ensure that the maximum amount of nutrients are extracted from the bones.
What are the Benefits of Bone Broth?
For older adults, the benefits of bone broth are particularly significant:
Joint Health: The collagen in bone broth can help maintain healthy joints.
Gut Health: Amino acids like glutamine support gut health and digestion.
Immune Support: The minerals and vitamins in bone broth can boost the immune system.
Bone Strength: Rich in calcium and magnesium, bone broth can support bone health.
Hydration and Nutrition: It's an excellent way to stay hydrated while getting essential nutrients.
Equipment Needed to Make Stock at Home
To make bone broth at home, you'll need:
A large stockpot or a slow cooker.
Basic kitchen tools like a knife, chopping board, and strainer.
Storage containers for refrigerating or freezing the broth.
What are the Best Bones for Bone Broth?
The best bones for bone broth are a mix of marrow bones, joints, and knuckles. These bones have a high concentration of collagen and marrow, essential for a nutrient-rich broth. You can use bones from beef, chicken, turkey, or fish.
A COLLAGEN FILLED RECIPE - BONE BROTH
Bone Broth is a great way to get more collagen and many other vitamins and minerals in your diet.
You can make bone broth easily on your own! It can be made using a slow cooker, but it's pretty simple to make by simmering a pot on the stove as well. Depending on your preferences, you can use beef, chicken or fish bones to make a homemade bone broth.
If possible, try to get ahold of organic bones from your local farmers. Pasture-raised/grass-fed meats are the healthiest option. They contain more vitamins and minerals without any harmful chemicals or toxins. The same goes for all other produce as well - meat, dairy, fruits and vegetables etc.
Back when I used to work in the aboriginal communities here in Australia, Kangaroo Tail Soup was a favourite to the locals and a way to get more collagen.
Calcium, magnesium, copper, iron, manganese, phosphorus, potassium, sodium and zinc are just some of the many minerals found in bones. The combination of these minerals are highly nutritious and promote plenty of health benefits both for your body and the mind.
Here is a bone broth recipe for you by my sister Lexie.
Enjoy!
CHICKEN/BEEF BONE BROTH RECIPE
Fig. 1
Fig. 2
Fig. 3
INGREDIENTS
A good range of chicken bones (E.g. 2 chicken carcasses, 4 chicken drumsticks, 6 chicken wings, 500g chicken necks). Organic bones from pasture-raised chickens are best.
OR
A good range of beef bones (E.g. 500g Oxtail, 1kg beef "soup bones" from the butcher - a mix of marrow, knuckle bones and thigh bones which the butcher has cut up into pieces). Grass-fed, organic bones from local farm are best.
1 tablespoon apple cider vinegar (optional)
2 carrots, cut in half
1 zucchini, cut in half
2 parsnips, cut in half
1 onion, cut in half (can leave skin on)
4 stalks of celery with leaves, cut in half
3 bay leafs
Whole peppercorns, about 1/2 teaspoon
Salt, about 1/2 teaspoon
A selection of fresh herbs (E.g. 1 handful of parsley, a few sprigs of rosemary, 1 handful of fresh sage, few sprigs of fresh thyme.)
METHOD:
Add chicken bones to slow cooker. Add water to slow cooker until 3/4 full. Add apple cider vinegar and let water and bones sit for 1 hour. (This step is optional. Apple cider vinegar is said to draw the minerals out of the bones. If you skip this step, it won't affect the broth in any way).
Add all vegetables, bay leaves, salt and pepper. Fill the slow cooker with more water until about 1 inch from the top. Turn the slow cooker to high and cook for 1-2 hours then turn it to low and let it cook for another 10 hours. (Fig. 1)
Add herbs and cook for a further 2 hours.
Let broth cool slightly (Fig.2) then carefully remove the larger bones and vegetables. Sit a large sieve over a bowl and using a small jug or ladle, pour the broth into the sieve. Refrigerate the bowl of broth for 24 hours.
Scrape off the layer of fat which has set on the surface of the broth (Fig. 3).
The broth can be divided up into smaller portions, if need be, and frozen for up to 3 months.
How to Store Bone Broth
After making the broth, let it cool down and strain it. You can store it in the refrigerator for up to 5 days or freeze it in smaller portions for up to 6 months. Freezing in ice cube trays and then transferring to freezer bags is a convenient way to use small amounts when needed.
How Much Bone Broth Can I Drink Each Day?
There's no hard and fast rule, but generally, one to two cups of bone broth daily is considered beneficial for health. It can be consumed on its own, used as a base for soups, or added to recipes for extra nutrition.
In conclusion, bone broth is a simple, delicious, and highly nutritious addition to the diet, particularly beneficial for older adults. Its rich composition supports overall health and can be easily made and incorporated into various dishes. Give it a try and experience the wholesome benefits of this age-old health elixir.
Keep Moving!,
Mike
Xo
Page 1/2
Page 2/2
Inspiring Seniors Health Stories: Pam’s Story - Reversal Of Heart Disease
I want to do this to give hope and inspiration to people going through any health battles and to highlight that by taking control of our health, we can prevent health issues from occurring.
In today's email, I want to get the 'Inspiring Stories' section started by sharing with you a short story I received from a reader/viewer named Pam.
Pam shares how, after following a heart attack leading to heart failure, she took control of her health and in the process, reversed the heart failure.
Here is the email:
"Hi Mike,
I just wanted to say how much I appreciate all of the work you do and the time you are giving to help us oldies to continue keeping fit and healthy.
I am 86 years young next month although my doctor says she always does a double-take when she sees me, expecting to see someone much older.
I joined a gym in 1991 and continued until last year (27 years), only giving up after damaging my shoulder and elbow needing two months of physio and was also becoming bored with the gym.
I had a heart attack in 2006, resulting in heart damage and consequent heart failure. I had six months of cardio rehab and then continued at the gym. After two years, I had another echocardiogram to discover I no longer had heart failure. My cardiologist was amazed. So continuous exercise for me was my saviour.
Exercising is what I have done all these years and wanting to carry on at home I did a Google search and found your videos on YouTube. I try to follow one each day.
So, Mike, thank you for all you do to help us oldies continue to live healthy, active lives.
Kind Regards
Pam"
As you can see from Pam's story when she had the cardiac event, she decided to make changes to turn her life around and reaped life-saving benefits.
For those going through a health battle of some sort, I hope you get some inspiration from Pam's story.
With the right mindset and attitude, and when we perform the right actions that are conducive to good health, we can make significant changes to our health and our life.
Think positive, choose the thoughts that feel best and take the right action, and you'll go a long way to improving your health. Don't limit yourself or let anyone place any limitations on you! Also remember, age is just a number!
FOLLOW UP QUESTIONS TO PAM:
What do you feel could have been the cause of the heart attack? (if you feel it was something(s) in particular)
I am not sure of the cause of the heart attack, but my cholesterol was discovered to be very high at the time. I had known for years that it was above normal and so had then changed my diet, cutting out animals fats etc. Another cause could have been a long period of stress two months prior to the attack, or perhaps it was a combination of both.
What were your health habits like prior to the heart attack?
I had always been healthy prior to the attack apart from developing osteoarthritis and was a good weight.
I decided to take early retirement from a very stressful job in 1991 and after losing my partner to cancer. I joined a gym 3 or 4 months later. It was very unusual at that time for people of my age (58), so I was a bit of a curiosity!!
Can you explain your typical exercise routine? (e.g. cardio, weights, stretching etc.)
From 1991 until my attack in 2006, my exercising started with varied gym classes, which included step, pump and stretching etc. and then after a few months started doing my own thing, 30 minutes of cardio, 30 minutes resistance machines and weights. I included yoga classes also for about a year and In 2003 joined a Tai Chi class, but always continued with cardio and resistance machines until my attack in 2006. I exercised three times a week.
After 5/6 months of cardiac rehab at the hospital, I returned to the gym again doing cardio, resistance machines and weights as before and also continued with Tai Chi for a short while, until last year.
I still mow my lawns and keep busy with my garden.
What dietary changes did you make following the heart attack?
The only dietary change made since the attack was cutting out salt where possible and in the past few years have cut out sugar except for the odd Tim Tam now and again.
How do you eat nowadays?
I believe I eat healthily. Mostly chicken and fish, no red meat, lots of fruit and vegetables. I include a homemade curry once a week and pasta once or twice a week.
Is there anything else you do, or feel is helpful for your health along with the diet and exercise? (e.g. stress reduction techniques, etc.)
I keep my mind active, read quite a lot, am a sudoku addict. I believe a healthy brain means a healthy heart. I do get stressed at times and if it is during the day, depending on the weather, I will get outside into the garden or will try reading. I have been told that reading a book can eliminate 30% of stress. If the stress keeps me awake at night, I try the breathing and relaxation techniques. It works sometimes.
For anyone going through something similar, what advice or message would you give them? Anything else that you would like to add.
I think we have to try and stay positive. Just keep moving, don't give in, don't become invalid and try to enjoy the things you did before.
I was sent home from the hospital with a booklet on "How to live with Heart Failure". That was really scary. It took several days for it to really sink in. Then I decided that if I had only a couple of years then I didn't want to sit around feeling miserable.13 years have now gone by, and I'm still here
Pam, (Originally from England, now living in New Zealand since 1964)
Simple Bodyweight Strength Exercises For Seniors | Get Stronger at Home With No Equipment
Today we are going to do a strength workout, working the whole body without any equipment.
Great exercises to get you stronger.
simple At home strength workout for seniors (no equipment) - get stronger
Today we are going to do a strength workout, working the whole body without any equipment.
Great exercises to get you stronger
Make sure you do the warm-up before beginning.
Standing Warm-Up: https://youtu.be/b2DYU7ZQgN0
Seated Warm-Up: https://youtu.be/nfGWaRoKr7k
COMPLETE SEATED BODY WORKOUT FOR SENIORS (25 Mins)
SIT TO STAND x 12
GOOD MORNINGS x 12
CALF RAISES x 12
HIP EXTENSIONS x12
HIP ABDUCTIONS x12
SQUATS x12
WALL/CHAIR PUSH UP x 12
SHOULDER PRESS x 12
BENT OVER ROW x 12
BICEP CURLS x 12
SHRUG x 12
TRICEPS EXTENSIONS x 12
SEATED CORE EXERCISE x 5
Do your best and any questions ask below!
- Mike
Upper and Lower Body Exercises For Seniors (15-minutes)
In today’s exercise video we work our upper and lower body using isometric holds to help strengthen those legs.
exercises for seniors - strengthen upper and lower body
In today’s exercise video, we work our upper and lower body using isometric holds to help strengthen those legs.
For the Warm-Up Videos:
Standing Warm-Up: https://youtu.be/b2DYU7ZQgN0
Seated Warm-Up: https://youtu.be/nfGWaRoKr7k
UPPER AND LOWER BODY EXERCISES FOR SENIORS:
Resisted Hip Abductions - 5 x 8 Second Holds
Resisted Hip Adductions - 5 x 8 Second Holds
Resisted Knee Extensions - 5 x 8 Second Holds
Double Leg Knee Flexions - x 8
Resisted Calf Raises - 5 x 8 Second Holds
Toe Raises - 5 x 8 Second Holds
Bicep Curls - x 8
Shoulder Flexions - 5 x 8 Second Holds (to 90 degrees)
Shoulder Flexions x 8 (Full Range of Motion)
Seated Rows x 8
Neck Extensions into Flexions x 8
Shoulder Rolls x 5
Finger Spreads - 5 x 8 Seconds
Reaction Time Exercise - 60 Seconds
Marching on The Spot w/ Arm Movements - 60 Seconds
Do your best and any questions ask below!
- Mike
You Are Never Too Old!
“ YOU ARE NEVER TOO OLD TO SET ANOTHER GOAL OR TO DREAM A NEW DREAM” ~C.S Lewis
What are you looking forward to?
What are your goals?
What do you dream?
WHAT ARE YOUR GOALS AND DREAMS?
What are you looking forward to?
What are your goals?
What do you dream?
Whether it's walking a certain amount of steps, travelling to a new place, learning a new skill, the birth of a new grandchild, seeing a long lost friend, or doing something you've always wanted to do!
Whatever it is....
Create that excitement for the future. Set those goals, for this chapter in your life.
Being excited about the future is healthy.
Have Fun and Keep Moving This Week! 😄
- Mike
Why We Get Sore After Exercising (or Doing Physical Activity)
Have you ever completed a new workout, or a new activity for the first time, gone to sleep maybe just a little tired all over from the workout and then woken up the next day to feel your muscles aching?
Maybe this has happened during an activity you haven’t done in a while (like getting out in the backyard to the garden)?
Sometimes it can happen when you didn’t think you worked that hard at all! But the soreness lets you know it.
DELAYED ONSET MUSCLE SORENESS (DOMS) IN SENIORS
Have you ever completed a new workout, or a new activity for the first time, gone to sleep maybe just a little tired all over from the workout and then woken up the next day to feel your muscles aching?
Maybe this has happened during an activity you haven’t done in a while (like getting out in the backyard to the garden)?
Sometimes it can happen when you didn’t think you worked that hard at all! But the soreness lets you know it.
I’m sure we’ve all felt this soreness at some point!
This after exercise/activity soreness is known as DOMS or Delayed Onset Muscle Soreness.
DOMS is thought to be caused by little micro-traumas to the muscles when they lengthen during the exercise/activity.
This soreness usually starts the next day after the exercise/activity, peaks at 48 hours and can continue up to 72 hours (and beyond) depending on how hard you have worked your untrained muscles.
As some of you know, I used to work remotely in indigenous communities here in the outback of Australia. This was where my most rememberable story about DOMS occurred.
My job was to get the towns exercising more and eating better to help prevent and treat chronic disease. With the change in lifestyle, these diseases are now rampant in the indigenous populations.
It was a job I absolutely loved! It was a great adventure, and I fell in love with the people and their culture.
One of the towns (known as Lajamanu) where fish apparently fall out of the sky, was where I spent most my time. It had a small population, and not much there. There was a school, a community hall, a medical clinic, a shop, their houses, an Australian football field, an airstrip (the field and the airstrip were just cleared land of red dirt). And there were a few other buildings.
There was surprisingly a gym in this little remote town. By chance, the school principal who used to work there had happened to be a bodybuilder and put a lot of money the School had into one of the best gyms I have ever seen. (That no-one really used).
One day I decided to take a couple to the gym. It was the first time they had ever done specific exercises, and they had a great time. However, I forgot to mention to them the next day they may be a little sore.
The next day when I rocked up to the clinic, I had one of the nurses tell me the couple I had been exercising with came into the clinic worried they might have caught a disease due to pains all their body. The nurse let them know it was from the exercise and after hearing this, I went to their home to reassure them, and they were back the next day ready to exercise again!
Unless you’ve really, really worked your muscles too hard to the point of a condition called Rhabdomyolysis (not uncommon in military-style boot camps and Cross-Fit Workouts)- DOMS is nothing to worry about.
Your body is regenerating stronger, more resilient muscles as a result of the stress from the exercise. Once recovered, it is now better equipped to deal with it again.
When you get back into the exercise/activity once your muscles are feeling better, you’re not going to experience that soreness again (unless of course, you leave it too long between the workouts/activity).
DOMS can be avoided to a great extent by easing your way back into activity or exercise.
When getting back into exercise after some time of inactivity, don’t overdo it… Do less and progress your way back into it. Do half the distance you are walking, lift less weight/resistance, go at a slower pace, have more rest.
Exercise/Physical activity is medicine and something we should regularly be doing.
So when we are in this for the long run, why wouldn’t we ease back into it?
This will help decrease DOMS and also help prevent any injuries.
Take it slow, allow your body to adapt and most importantly, have fun!! :)
What To Do For DOMS (When in Pain)
As said above, what you want to be doing is preventing any DOMS from occurring in the first place. If you have found yourself the next day in pain after doing too much activity/exercise(the dreaded DOMS), the best thing you can do is rest and wait for time to pass. as your muscles heal.
Relaxation and heat, for example in a hot bath, a hot shower or heat packs can help take the pain, temporarily, away.
If the pain is quite unbearable, speak to your doctor about a suitable analgesia.
Finally, know that this pain is temporary, and the next time you get back into the activity or exercise, it’s not going to be so bad. :)
- Mike
Challenging Balance and Leg Exercises For Seniors (18 Mins)
Here we have an 18-minute balance and leg exercise session for seniors. These balance exercises are a little more challenging! Do your best and stay consistent weekly!
Balance and leg exercises for seniors (challenging)
Here we have an 18-minute balance and leg exercise session for seniors. These balance exercises are a little more challenging! Do your best and stay consistent weekly!
Make sure you do the warm-up before beginning.
Standing Warm-Up: https://youtu.be/b2DYU7ZQgN0
Seated Warm-Up: https://youtu.be/nfGWaRoKr7k
And to help you on your journey to improved health and fitness, join the Facebook Support Community. Click here: https://www.facebook.com/groups/morelifehealth
For a 4-week senior's exercise eBook, plus seniors' health and exercise tips and much, much more. Sign up to More Life Health mailing list: Click Here: https://www.morelifehealth.com/join
To get straight into the workout go to 1:00.
Do your best and any questions ask below!
- Mike
The Best Neck Stretches For Seniors
The Best Neck Exercises For Seniors
STRETCH 1: NECK FLEXION STRETCH
HOW TO:
Sitting up tall in your chair with your shoulders back and down.
Bring your chin down to your chest as far as you feel comfortable. You will feel a stretch in the back of the neck.
To increase the stretch place your hands on the back of your head and apply a gentle pressure.
Hold for the set time.
HOLD FOR: 30-60 seconds
For Video Demonstration of This Exercise: Click here.
STRETCH 2: NECK EXTENSION STRETCH
HOW TO:
Sitting up tall in your chair with your shoulders back and down.
Bring your head straight back, looking up to the ceiling and going as far back as you feel comfortable. Do not push into any pain.
Hold for the set time.
HOLD FOR: 30-60 seconds
For Video Demonstration of This Exercise: Click here.
STRETCH 3: NECK SIDE FLEXION STRETCH
HOW TO:
Sitting up tall in your chair with your shoulders back and down.
Bring your ear down to your shoulder. Do not bring your shoulder up to your ear, leave your shoulder relaxed. Go as far as you feel comfortable.
To increase the stretch place your hand on the side of your head and apply a gentle pressure.
Hold for the set time and alternate sides.
HOLD FOR: 30-60 seconds
For Video Demonstration of This Exercise: Click here.
STRETCH 4: NECK ROTATION STRETCH
HOW TO:
Sitting up tall in your chair with your shoulders back and down
Look over to one side, as far as you feel comfortable.
Hold for the set time and repeat on the opposite side.
HOLD FOR: 30-60 seconds
For Video Demonstration of This Exercise: Click here.
STRETCH 5: LEVATOR SCAPULAR STRETCH
HOW TO:
Sitting up tall in your chair with your shoulders back and down.
Place the hand of the side you are stretching behind the shoulder to stabilise your shoulder blade. If unable to do this, just perform the exercise without placing one hand behind your shoulder.
Turn your head to roughly 45 degrees to one side and bring your head down as if you are looking at your knee on that side. You will feel a stretch on the opposite side you are looking behind the neck and shoulder. (This muscle is known as Levator Scapular)
To increase the stretch place your hand on the back of your head and apply a gentle pressure.
Hold for the set time and repeat on the opposite side.
HOLD FOR: 30-60 seconds
For Video Demonstration of This Exercise: Click here.
Flexibility Exercises For Seniors: A Comprehensive Guide to Regaining Flexibility
Flexibility is an essential component of good health and fitness, and is especially important for seniors.
I don’t mean the kind of flexibility of being able to do the splits, or turning oneself into a human-like-pretzel.
I mean being unrestricted in your movements, being able to move all your joints as they should be moved and getting about easily in your day-to-day life, without feeling the painful niggles that comes with tight muscles and inflexible joints.
In this article, we are going to be covering everything you need to know about regaining flexibility after 60. Read it all, learn it all, put in the effort by doing it all, stay consistent and watch yourself become more flexible. Just like your younger days!
Enjoy the guide and the journey to a flexible you!
HOW TO IMPROVE FLEXIBILITY AFTER 60
No matter our age, we all want to be flexible!
Flexibility is an essential component of good health and fitness and is especially vital for seniors.
I don’t mean the kind of flexibility of being able to do the splits or turning oneself into a human-like-pretzel.
I mean the type of flexibility of being unrestricted in your movements. Being able to move all your joints fluidly and getting about with ease in your daily life. All without feeling any painful niggles that come with tight muscles and stiff joints.
You may think back to your earlier days when you could touch your toes with ease. Maybe you were capable of doing the splits. Or, perhaps you even were a human-like-pretzel.
Nowadays, you might be noticing you’re just not as flexible as you once were.
The tasks in your daily life may be getting more difficult to do, like bending down to (or getting up off) the floor. Or, reaching high above, or behind your head.
Or maybe you’re just noticing your joints aren’t straightening or moving, in the way they once did.
Our bodies are going to age; it’s inevitable.
With an ageing body comes decreased flexibility, especially if we forget what’s necessary to keep ourselves flexible and moving well.
However, just like all components of fitness, regardless of our age and current physical capabilities, you CAN make BIG improvements…. You CAN regain your flexibility at ANY age!
By improving your flexibility, not only will you be improving the range of motion in each of your joints, but you’re going to find yourself moving around with greater ease. All those daily movements will seem so much easier, and you’ll feel yourself becoming free of painful niggles.
You’ll have improved posture, improved balance and also decrease your chances of picking up a future injury.
Not only this, we all know how good we feel after we stretch out our body.
Stretching can help in decreasing tension and stress, resulting in a positive mindset, relaxed body and feeling good!
In this article, we are going to be covering everything you need to know for regaining flexibility after the age of 60.
Read it all, learn it all, put in the effort by doing what’s contained within, stay consistent and watch yourself become more flexible. Just like your younger days!
Enjoy the guide and the journey to a flexible you!
Mike
WHAT THIS GUIDE WILL COVER:
1 - BECOMING A FLEXIBLE SENIOR
2 - THE SENIORS' STRETCHING PLAN
3 - START STRETCHING NOW - STRETCHING EXERCISES FOR SENIORS (WITH PICTURES + VIDEO DEMONSTRATIONS)
How Flexible Are You?
Quick, Functional Flexibility Tests For Seniors
To test your flexibility, here are a few simple at home tests you can do to determine how flexible you in areas important for everyday tasks.
Sit & Reach Test: This test measures the flexibility of the hamstrings and lower back. While sitting, extend one leg, and slide your hand down towards your foot. The closer your hand gets to your foot, the better your flexibility. This flexibility is vital for walking, balance, reducing back pain, and preventing falls.
Tying Shoelaces Test: This everyday task requires significant flexibility in the hips and lower back. There are three common positions for tying shoelaces: seated with the leg out in front, seated with one leg crossed over the other, or kneeling. Difficulty in performing this task in any of these positions indicates decreased flexibility in these areas, which can make the task challenging.
Scratch Your Back/Brush Your Hair Test: This tests the flexibility of the upper body and shoulders. Try reaching over your head with one hand and behind your back with the other, attempting to touch your fingers. The closer your fingers are, the better your shoulder flexibility. This is essential for reaching objects in high places, grooming, and dressing.
These tests help seniors understand their flexibility levels, important for daily functions. However, it's crucial to consult a doctor before starting any exercise regimen to improve flexibility. This guidance ensures safe and effective practices tailored to individual health conditions and needs.
1 - BECOMING A FLEXIBLE SENIOR
Why Are My joints Stiff?: Why We Lose Flexibility As We Age!
As with most of our physical capabilities, like our strength, balance and muscle size that decreases as we age, flexibility, unfortunately, is no exception.
Our once flexible and limber bodies are going to become more rigid and stiff with age. It’s inevitable, and the research shows this! [2, 3, 4].
So, why does this happen? Why do we lose flexibility as we age?
In simple terms, flexibility is having the full range of motion in the joints of our body.
For a joint to be flexible and move through its full range of motion, it is dependent on the soft tissues (the surrounding muscles, tendons, ligaments and even our skin) and the joint capsule.
Sometimes, certain factors get in the way impeding this movement, such as an abnormal condition in, or surrounding, the joint (For example, Osteoarthritis, Rheumatoid Arthritis, or Frozen Shoulder).
Or, in the majority of cases causing lack of flexibility, the joint can be completely healthy, but our muscles and the surrounding tissues become tighter, secondary to our lack of movement. [2, 4, 5, 6].
In technical terms, this immobility or lack of exercise/movement leads to cross-linking of the structural proteins (collagen) of our soft tissues, and a decrease in our strength and size or our muscles, which further decreases flexibility. (8)
As we get older, we tend to live less active lives. We substitute exercising with watching TV, outdoor excursions with indoor coffees and cakes, we can find all our entertainment within arms reach from our phone or tablet.
Everything we need and want takes much less effort to obtain. We simply sit more and move less.
Contrast the majority of the time you spend seated today to your younger days. Or, go back even further to how our ancestors lived, and you’ll find we spent a whole lot more time up and moving, and less time seated throughout our lives.
All of these changes impact our health and our bodies, and the more we persist in this sedentary lifestyle, the more consequences we will soon have to deal with.
However, the good news is……. We can do something about it!
With the loss of flexibility that comes with ageing being caused by lack of use, we can turn it around.
By becoming more active and doing the right exercises, we can regain our flexibility.
I have seen, and helped, this happen many times over my career as a Physiotherapist and the research shows that with the right exercise and activity, age-related LOSS OF FLEXIBILITY IS REVERSIBLE. (2,5,6,7).
Even in the presence of underlying abnormal joint conditions (such as the ones mentioned above), it’s usually the combination of this joint condition with lack of activity and exercise that affects the movement, decreasing flexibility.
Even in the presence of a joint condition, e.g. arthritis, we can still make significant improvements in our flexibility!
In simpler terms, and something I know you’ve heard many times before… WE HAVE TO ….. USE IT OR LOSE IT.
How Seniors Can Improve Flexibility
[Yoga, Pilates, Swimming, Tai Chi, Dancing, Massage, Foam Rolling, Stretching]
When most of us think about improving our flexibility, we usually think solely about stretching.
Yes, stretching is essential in improving your flexibility, and later in this article, I am going to show you exactly how to stretch all parts of your body (with pictures AND videos) which will help you regain your flexibility.
However, to improve your flexibility, there is a more important step we must do before we get stretching, and it is……
GET MOVING MORE
The first step in improving your flexibility is to get moving more each day.
Even just walking more is going to set those wheels in motion to improve your flexibility, as demonstrated in a study by Buccola & Stone. “An improvement of flexibility of the trunk and of the lower limbs was seen in people, between the age of 60 and 70, with their participation in a walking and jogging program that lasted 14 weeks."
Start spending more of your day on your feet, doing the activities you enjoy. Get outside, go swimming, do whatever it takes to ensure you are getting in more movement.
Activities that work your whole body. This can be anything from walking more, getting in the garden more, hiking, lawn bowls, golf, mix it up.
By doing this, you are going to be using your body in the ways they are meant to be used. You will be stretching out those hips and backs caused by tightened muscles from too much sitting and being in bad postures.
Some activities are going to be better than others to improve your flexibility, but the majority of us face daily willpower battles to move away from our sedentary, comfortable lifestyles.
So by doing activities you enjoy doing and find less of a chore to do, is the key to staying consistent and getting great results.
Here are other activities to consider which are great for flexibility and your health.
YOGA
Yoga is getting more and more popular, especially with older adults and for good reason.
Yoga is a gentle type of exercise, and that is great for flexibility, strength and mental wellbeing.
Yoga does not solely focus on specific body parts, but utilises movements which focus on the body as a whole, while targeting other aspects of our being. Emotional, spiritual and mental.
PILATES
Pilates is another form of exercise that can significantly help in improving one's flexibility levels. This type of gentle exercise has proven to be quite a useful tool for seniors looking to become more agile.
In Pilates gentle movements, low-impact poses, light stretches and the use of individual pieces of equipment are utilised, to improve physical capabilities.
SWIMMING
Swimming, or even just getting into a pool, moving around and doing exercises and stretching is a great way to improve flexibility.
Although it will not be as effective as doing set stretches, yoga or Pilates, swimming is a great way to lengthen the muscles.
Additionally, with swimming, we have the added advantage of less weight on our joints due to the buoyancy. This can be helpful with certain painful conditions placing less strain on the joints.
Another bonus of swimming is doing them in a heated pool. The heat has a relaxing effect on the soft tissues of our body, helping improve range of motion. Additionally, the heat can provide relief from painful conditions, which can also help with movement.
DANCING
Dancing is another great way to get you moving, which will help improve flexibility, get you stronger, fitter and help improve many other aspects of your health.
So dust off your old dancing shoes and get moving. There would be plenty of dancing classes around your area so keep an eye out for them
If a dancing class isn’t for you, put on your favourite music and dance around your house as if nobody is watching.
Dancing is not only great for the body but also great for the mind!
TAI CHI
Tai Chi is a gentle, slow and flowing form of exercise for both the body and the mind that originated in China many, many years ago.
This gentle form of exercise is great to not only improve flexibility but also to improve coordination, strength and decrease pain.
MASSAGE
Who doesn’t love a good massage? Massage can help with flexibility by releasing tight muscles and helping relieve tension.
Massage is also great to reduce stress, improve circulation and decrease pain.
Although I would not recommend massage to be used on its own to improve flexibility if you’ve got the luxury of being able to add in regular massages to your daily life, for the many health benefits, go for it!
USING A FOAM ROLLER.
As the name suggests, foam rollers are quite simply tubes of compressed foam that are used to self-massage certain areas of the body.
They are used by people of all ages and fitness levels as a way of improving blood circulation and relaxing contracted muscles, as well as providing other therapeutic benefits.
When massaging, the foam roller compresses the specific body area relieving tension in the process.
Foam rollers have been shown to improve overall flexibility and mobility.
STRETCHING
Along with getting moving more overall, by finding physical activities and exercise we enjoy doing, the next step to regaining our flexibility is stretching.
When most of us think about stretching, we usually think about holding our muscles in certain positions, which are usually uncomfortable, for a period of time (usually 20-60 seconds or more). This type of stretching is known as static stretching.
Along with static stretching, there is another type of stretching, known as dynamic stretching.
Dynamic stretching refers to active stretches; movements that are done repeatedly (for repetitions) in a short period of time, allowing your muscles to loosen up gradually.
Dynamic stretches are usually practiced prior to working out, as they’re a great way to warm up the muscles and prepare them for more challenging exercises.
They can also be completed in a set routine, consistently, to improve flexibility.
The third type of stretching I want to cover briefly is known as PNF stretching or Proprioceptive Neuromuscular Facilitation Stretching. (Long fancy words, I know!!)
This is basically just performing a stretch with a contraction of the muscle added in while doing it.
All these methods have shown to improve flexibility [10, 11, 12, 13]. However, PNF stretching requires a partner and does not increase flexibility any more so than static or dynamic stretching (14).
So in this article, we will be focusing on dynamic and static stretching.
While performing specific stretches, the muscles and tendons in your body become elongated, helping you increase your range of motion.
The body tends to adapt to the range of motion you frequently use, so if you only use your muscles for sitting on the couch, your muscles won’t have the need to bend differently.
This is why it’s important to focus on stretching the whole body and not just focusing on a single part of your body.
After a certain period of time of practising these stretches, you’ll start noticing the changes in your flexibility.
In order to regain flexibility, we must get stretching; however, before we do that, let’s get a rough idea of how flexible you are.
2 - THE SENIORS' STRETCHING PLAN
Now we can delve deeper into what exactly is required to regain flexibility.
Doing stretches every now and then isn’t going to get you the results you require, it involves knowledge on how long to hold stretches for, how often to stretch, how to stretch correctly and what to avoid when stretching in order to ensure you are performing them safely.
It also takes patience and a consistent effort.
So in this section, I will be covering all of this, and I’ll share some insights into how to maintain consistency with stretching.
How Long Do I hold Each Stretch?
For dynamic stretches, we perform the stretch for just a few seconds for each repetition as we feel the stretch. Aim for 8-12 repetitions with each area taking roughly 30-60 seconds.
For static stretching, there is no clear evidence for how long each stretch should be held for.
The general notion is that the more time you spend stretching the area, the more of a result you are going to get.
What I have found works best are 30-60 seconds and up to 2 minutes. If we are going to be stretching all areas of our body, and stay consistent, who has time to hold the stretches for longer than this?
By stretching for a number that isn’t going to overwhelm you each day, the more likely you are going to stick to it and the better results you will get. If you’re a keen bean and want to hold each stretch for longer, provided you don’t get any pain, go for it.
Always use your body as a guide on how you feel, and allow your muscles to adapt to the stretch gradually. Don’t overstretch and cause yourself pain.
Ease into the stretches by holding them for less time, to begin with, with less of a stretch of the muscle and build it up over time, by increasing the stretch and holding for a longer time.
How Often Should I Stretch?
To put things simply, unless you have a certain condition that makes stretching not such a good idea (E.g. hypermobile joints) there’s no limit to how frequently you stretch.
Stretching is always a good idea and can be done anytime and anywhere.
Now, if you haven’t made a habit of stretching so far as we do with all exercise including the time we hold each stretch, it’s a good idea to take things slow and start with doing some basic stretches at least 2-3 times a week.
Once you start feeling comfortable and ready to increase the amount of stretching you are doing, feel free to add additional stretches and perform them more frequently, to about 4-5 days per week and then even up to every day!
Basically, you can stretch how often you feel inclined.
If you’ve been sitting for an extended period of time and feel a bit stiff, simply do a few basic stretches to wake your muscles up.
Similarly, if you’re feeling tense or stressed, a few minutes of stretching can do wonders for your emotional and mental health.
What Should I Avoid When Stretching?
While stretching is an integral part of an active lifestyle and extremely beneficial to one’s health, it’s important each stretch is done correctly and safely.
In order to do, it’s a good idea to know what to avoid when stretching.
One of the most crucial things to remember is never to stretch an injured muscle.
Depending on the severity of the injury, you might cause an even more significant problem to the area, and/or delay tissue healing, which is why it’s necessary to always consult with your Doctor or Physiotherapist before undergoing any exercise.
This might seem obvious, but whatever you do never push a stretch to the point of pain. A stretching feeling is fine, but you should never experience any pain while stretching. You might be impatient and eager to improve your flexibility rapidly, but pushing into pain is not the answer. Be patient!
Same goes with something I commonly see, and that is bouncing at the end of a stretch, to increase the stretch.
This is known as ballistic stretching, and I do not recommend seniors perform ballistic stretching. Seniors should never bounce when stretching, as it increases your chance of injury. [15]
Another often overlooked aspect of stretching is breathing or - the lack of it.
Many people tend to hold their breath while stretching and exercising, and while this might seem easier or more convenient, the truth is that your muscles need oxygen to function correctly.
So, relax into each stretch with a nice relaxed breath and remember not to hold your breath.
Finally, Never perform stretches cold and always ease into each stretch. Make sure you perform some movements, or a warm-up, to ensure you are ready before performing your stretches.
Why Can't I Stay Consistent With My Stretching?
Have you noticed that every time you make a habit of stretching regularly, somehow you end up slacking off until you eventually stop stretching altogether?
Or, do you know it’s a good idea to stretch regularly to avoid injury, but you rarely do it?
We are aware that if we focus mainly on cardio routines that we’ll burn more calories, lose weight and increase our endurance. In the same way, we know that if our exercises consist of mostly strength exercises, we’ll tone up and become stronger.
But what do we know about flexibility?
We have learned, throughout the years, that flexibility, like a good night’s sleep and a plate full of veggies, is good for us.
We have also learned that maintaining good flexibility is an essential part of life and that we should implement different stretches into our daily routines.
But how many of us do this? How many of us prioritise stretching over other forms of exercise?
The truth is that we don’t put a big emphasis on flexibility as we don’t see immediate results from it.
It’s here where a paradigm shift is necessary.
We have to start thinking about flexibility in a much broader sense. We have to start thinking about our health in the long run.
No, flexibility won’t show on your body with stronger arms or a toned stomach. And no, you’re not going to get that feeling like you’ve had a really good workout.
But good flexibility from a consistent stretching routine will grant you the ability to use your body in ways you could never before and keep you moving well for life.
What we should also remember is that good flexibility is an asset just as valuable as any other kind of training. It’s with flexibility where our journey to a better, fitter, healthier, and injury/pain-free self begins.
So know the importance of good flexibility and start by putting ‘improving your flexibility’ up your list of priorities.
3 - START STRETCHING NOW - STRETCHING EXERCISES FOR SENIORS
If you complete my usual workouts, we do perform some dynamic stretches throughout and in the warm up videos (Standing Warm-Up Video and Seated Warm-Up Video).
I have also created other stretch videos you can follow to help improve your flexibility. Here is an Upper Body Stretch Video (click to access) and here is a Lower Body Stretch Video (click to access).
The Best Neck Stretches For Seniors
STRETCH 1: NECK FLEXION STRETCH
HOW TO:
Sitting up tall in your chair with your shoulders back and down.
Bring your chin down to your chest as far as you feel comfortable. You will feel a stretch in the back of the neck.
To increase the stretch place your hands on the back of your head and apply a gentle pressure.
Hold for the set time.
HOLD FOR: 30-60 seconds
For Video Demonstration of This Exercise: Click here.
STRETCH 2: NECK EXTENSION STRETCH
HOW TO:
Sitting up tall in your chair with your shoulders back and down.
Bring your head straight back, looking up to the ceiling and going as far back as you feel comfortable. Do not push into any pain.
Hold for the set time.
HOLD FOR: 30-60 seconds
For Video Demonstration of This Exercise: Click here.
STRETCH 3: NECK SIDE FLEXION STRETCH
HOW TO:
Sitting up tall in your chair with your shoulders back and down.
Bring your ear down to your shoulder. Do not bring your shoulder up to your ear, leave your shoulder relaxed. Go as far as you feel comfortable.
To increase the stretch place your hand on the side of your head and apply a gentle pressure.
Hold for the set time and alternate sides.
HOLD FOR: 30-60 seconds
For Video Demonstration of This Exercise: Click here.
STRETCH 4: NECK ROTATION STRETCH
HOW TO:
Sitting up tall in your chair with your shoulders back and down
Look over to one side, as far as you feel comfortable.
Hold for the set time and repeat on the opposite side.
HOLD FOR: 30-60 seconds
For Video Demonstration of This Exercise: Click here.
STRETCH 5: LEVATOR SCAPULAR STRETCH
HOW TO:
Sitting up tall in your chair with your shoulders back and down.
Place the hand of the side you are stretching behind the shoulder to stabilise your shoulder blade. If unable to do this, just perform the exercise without placing one hand behind your shoulder.
Turn your head to roughly 45 degrees to one side and bring your head down as if you are looking at your knee on that side. You will feel a stretch on the opposite side you are looking behind the neck and shoulder. (This muscle is known as Levator Scapular)
To increase the stretch place your hand on the back of your head and apply a gentle pressure.
Hold for the set time and repeat on the opposite side.
HOLD FOR: 30-60 seconds
For Video Demonstration of This Exercise: Click here.
The Best Shoulder & Arm Stretches For Seniors
STRETCH 1: UPPER ARM & SHOULDER STRETCH
HOW TO:
Sitting up tall in your chair with your shoulders back and down.
Place one arm straight in front of your body and use your other hand to hug the straight arm to your body. This will increase the stretch.
Hold for the set time and repeat on the opposite side.
HOLD FOR: 30-60 seconds
For Video Demonstration of This Exercise: Click here.
STRETCH 2: SHOULDER & ARM OVERHEAD STRETCH
HOW TO:
Sitting up tall in your chair with your shoulders back and down.
Interlace your fingers and bring your arms up above your head.
Now turn your palms away from you, towards the ceiling and push up as far as you can.
Hold this movement for the set time, feeling the stretch in your shoulders and your sides.
HOLD FOR: 30-60 seconds
For Video Demonstration of This Exercise: Click here.
STRETCH 3: WRIST FLEXION (FOREARM) STRETCH
HOW TO:
Sitting up tall in your chair with your shoulders back and down.
Place one arm straight in front of your body with your palm facing down and your fingers facing up.
Drop your wrist, allowing it to become weak.
Using your other hand bend your wrist by applying a gentle pressure, on the back of the hand, pulling the hand and fingers towards the elbow. Ensure you maintain a straight am throughout the stretch.
Hold for the set time and repeat on the opposite side.
HOLD FOR: 30-60 seconds
For Video Demonstration of This Exercise: Click here.
STRETCH 4: WRIST EXTENSION (FOREARM) STRETCH
HOW TO:
Sitting up tall in your chair with your shoulders back and down.
Place one arm straight in front of your body with your palm facing down and your fingers facing up.
Using your other hand bend your wrist by applying a gentle pressure, towards the elbow on the fingers. Ensure you maintain a straight am throughout the stretch.
Hold for the set time and repeat on the opposite side.
HOLD FOR: 30-60 seconds
For Video Demonstration of This Exercise: Click here.
The Best Back Stretches For Seniors
STRETCH 1: LUMBAR FLEXION STRETCH (SEATED TOE TOUCH)
HOW TO:
Sitting up tall in your chair with your shoulders back and down.
Place your feet slightly out in front of you and place your hands on your knees. Slowly slide your hands down your legs all the way to your feet.
Hold for the set time and slowly slide your hands back up.
HOLD FOR: 30-60 seconds
For Video Demonstration of This Exercise: Click here.
STRETCH 2: LUMBAR SIDE FLEXION STRETCH
HOW TO:
Sitting up tall in your chair with your shoulders back and down.
Place one hand behind your head, and your other hand straight beside you. Slowly lean down to the side with the straight arm until you can feel a stretch on the opposite side. (If you have difficulty placing your hand behind your head, just keep it on your lap).
Hold for the set time and repeat on the opposite side.
HOLD FOR: 30-60 seconds
For Video Demonstration of This Exercise: Click here.
STRETCH 3: LUMBAR EXTENSION STRETCH
HOW TO:
Sitting up tall in the middle of your chair with your shoulders back and down.
Place the palms of your hands in the small of your back and lean your lower back into your hands, feeling a stretch in your lower back. (If you have difficulty getting your palms around to the small of your back, use the backs of your hands).
Hold for the set time.
HOLD FOR: 30-60 seconds
For Video Demonstration of This Exercise: Click here.
STRETCH 4: RHOMBOIDS (UPPER BACK) STRETCH
HOW TO:
Sitting up tall in your chair with your shoulders back and down.
Interlace your fingers and push your palms out away from you.
Now bring your arms up to 90 degrees (or parallel to the floor) and push your hands out as far as possible, whilst maintaining that upright posture. feeling your shoulder blades stretch apart.
Hold for the set time and return to the start position.
HOLD FOR: 30-60 seconds
For Video Demonstration of This Exercise: Click here.
STETCH 5: THORACIC EXTENSION (UPPER BACK) STRETCH
HOW TO:
Sitting up tall in your chair with your shoulders back and down.
Now place your hands behind your head, maintain an upright posture and extend your upper back over the chair. (If you have difficulty placing your arms behind your head, place them across your chest).
Hold for the set time.
HOLD FOR: 30-60 seconds
For Video Demonstration of This Exercise: Click here.
STRETCH 6: THORACIC ROTATION (UPPER BACK) STRETCH
HOW TO:
Sitting up tall in your chair with your shoulders back and down.
Cross your arms over your chest, and leading with your arms rotate around until you feel a stretch in your upper back.
Hold for the set time and repeat on the opposite side.
HOLD FOR: 30-60 seconds
For Video Demonstration of This Exercise: Click here.
The Best Leg (Hip & Knee) Stretches For Seniors
STRETCH 1: SEATED HAMSTRING (BACK OF THIGH) STRETCH
HOW TO:
Sitting up tall in your chair, shuffle to the front of your chair
Keeping your hands on the opposite leg, place one leg out in front of you
Now keep your leg straight and point your toes towards the ceiling
Ensure you remain upright with a straight back and lean forward at the hips
Hold for the set time and change legs.
HOLD FOR: 30-60 seconds
For Video Demonstration of This Exercise: Click here.
For Video Demonstration of This Exercise in Standing Position: Click here.
STRETCH 2: SEATED GROIN (HIP ADDUCTOR) STRETCH
HOW TO:
Sitting up tall in your chair, shuffle to the front of your chair
Place one leg out straight to the side, keeping your toes, on both feet firmly on the ground and facing towards the front.
You will feel a stretch on the inner thigh of your straight leg, to increase the stretch you can lean forward slightly
Ensure you remain upright with a straight back throughout the exercise.
Hold for the set time and change legs.
HOLD FOR: 30-60 seconds
For Video Demonstration of This Exercise: Click here.
For Video Demonstration of This Exercise in Standing Position: Click here.
STRETCH 3: SEATED LATERAL ROTATION (HIPS, BUTTOCKS) STRETCH
HOW TO:
Sitting up tall, shuffle forward to the front of your chair.
Whilst continuing to hold onto the chair, extend your legs out and cross one leg over the other leg.
In a slow and controlled way, slide your heel up your shin until over the knee cap.
Now bend your opposite leg up, keeping your back straight and placing your hands on your shins.
Stay in this position and to add a little more stretch you can lean forward keeping your chest up and your shoulders parallel to the floor.
Hold for the set time and change legs.
HOLD FOR: 30-60 seconds
For Video Demonstration of This Exercise: Click here.
STRETCH 4: HIP FLEXION (BUTTOCKS) STRETCH
HOW TO:
Sitting up tall with your shoulders back and down.
Lift one leg up to your chest, bending at the knee, and hug the leg.
Hold for the set time and change legs.
Ensure your shoulders are back and down throughout the exercise.
Hold for the set time and change legs.
HOLD FOR: 30-60 seconds
For Video Demonstration of This Exercise: Click here.
STRETCH 5: STANDING QUADRICEPS (FRONT OF THIGH) STRETCH
HOW TO:
Standing up tall next to your chair, holding onto your chair with one arm.
Bring one leg behind you, holding onto your foot.
Ensure you maintain your straight posture throughout the exercise and try to keep your knees next to each other
Hold for the set time and change legs.
HOLD FOR: 30-60 seconds
For Video Demonstration of This Exercise: Click here.
STRETCH 6: STANDING CALF (BACK OF LOWER LEG) STRETCH
HOW TO:
Standing tall, holding on to your chair with both hands.
Step one foot back making sure your toes are facing forward throughout the exercise.
Now bring your front knee towards the chair ensuring that your heels remain in contact with the floor at all times.
Hold for the set time and change legs.
HOLD FOR: 30-60 seconds
For Video Demonstration of This Exercise: Click here.
The 10 Best Flexibility Exercises For Seniors - The Best Stretches For Seniors (With Pictures)
To make it easy for you to follow a simple routine to stretch out your muscles, I have compiled what I feel are the best stretches for seniors.
Follow along consistently, to start improving that whole body flexibility.
STRETCH 1: NECK EXTENSION STRETCH
HOW TO:
Sitting up tall in your chair with your shoulders back and down.
Bring your head straight back, looking up to the ceiling and going as far back as you feel comfortable. Do not push into any pain.
Hold for the set time.
HOLD FOR: 30-60 seconds
WHY THIS IS A GREAT STRETCH FOR SENIORS: All of us spend a lot of our time in a head down tilt, looking at our phones, the ground, a computer screen etc. We don’t spend much time looking up, stretching out the front neck muscles and keeping the neck moving well.
For Video Demonstration of This Exercise: Click here.
2. STRETCH 2: CHEST (+ POSTURE) STRETCH
HOW TO:
Sitting up tall in your chair with your shoulders back and down.
Place your arms up straight up in front of you, parallel to the floor.
Now bring your arms out to the side, pulling as farm back as you can and squeezing your shoulder blades together, whilst maintaining that upright posture.
If you have difficulty holding your arms at 90 degrees (or parallel to the floor) you can hold your arms lower (45 degrees).
Hold for the set time.
HOLD FOR: 30-60 seconds
WHY THIS IS A GREAT STRETCH FOR SENIORS: A great stretch to help open up the chest and improve posture.
For Video Demonstration of This Exercise: Click here.
STRETCH 3: THORACIC EXTENSION (UPPER BACK) STRETCH
HOW TO:
Sitting up tall in your chair with your shoulders back and down.
Now place your hands behind your head, maintain an upright posture and extend your upper back over the chair. (If you have difficulty placing your arms behind your head, place them across your chest).
Hold for the set time.
HOLD FOR: 30-60 seconds
WHY THIS IS A GREAT STRETCH FOR SENIORS: A great stretch for the upper back which also helps with rounded shoulders, improving posture.
For Video Demonstration of This Exercise: Click here.
STRETCH 4: SHOULDER & ARM OVERHEAD STRETCH
HOW TO:
Sitting up tall in your chair with your shoulders back and down.
Interlace your fingers and bring your arms up above your head.
Now turn your palms away from you, towards the ceiling and push up as far as you can.
Hold this movement for the set time, feeling the stretch in your shoulders and your sides.
HOLD FOR: 30-60 seconds
WHY THIS IS A GREAT STRETCH FOR SENIORS: A great stretch that utilises the full range of motion in the shoulders, helping to keep them healthy. Also, this stretch, stretches the arms and muscles of the back surrounding the spine.
For Video Demonstration of This Exercise: Click here.
STRETCH 5: LUMBAR EXTENSION (LOWER BACK) STRETCH
HOW TO:
Sitting up tall in the middle of your chair with your shoulders back and down.
Place the palms of your hands in the small of your back and lean your lower back into your hands, feeling a stretch in your lower back. (If you have difficulty getting your palms around to the small of your back, use the backs of your hands).
Hold for the set time.
HOLD FOR: 30-60 seconds
WHY THIS IS A GREAT STRETCH FOR SENIORS: We spend a lot of time in our day in a forward position and also a slouched position when seated. This stretch helps stretch out the lower back in a way we usually don’t. Which helps relieve tension in the lower back.
For Video Demonstration of This Exercise: Click here.
STRETCH 6: STANDING QUADRICEPS (FRONT OF THIGH) STRETCH
HOW TO:
Standing up tall next to your chair, holding onto your chair with one hand.
Bring one leg behind you, holding onto your foot.
Ensure you maintain your straight posture throughout the exercise and try to keep your knees next to each other
Hold for the set time and change legs.
HOLD FOR: 30-60 seconds
WHY THIS IS A GREAT STRETCH FOR SENIORS: Although a more difficult stretch, this is a great stretch to stretch out the large muscles at the front of the thighs which commonly become tight. This exercise can also be done in side-lying, on a firm bed, if standing is too difficult.
For Video Demonstration of This Exercise: Click here.
STRETCH 7: HIP FLEXION (BUTTOCKS) STRETCH
HOW TO:
Sitting up tall with your shoulders back and down.
Lift one leg up to your chest, bending at the knee, and hug the leg.
Hold for the set time and change legs.
Ensure your shoulders are back and down throughout the exercise.
Hold for the set time and change legs.
HOLD FOR: 30-60 seconds
WHY THIS IS A GREAT STRETCH FOR SENIORS: A simple stretch to stretch out our buttocks, which can hold a lot of tension.
For Video Demonstration of This Exercise: Click here.
STRETCH 8: STANDING (OR SEATED) HAMSTRING (BACK OF LEGS) STRETCH
HOW TO:
Sitting up tall in your chair, shuffle to the front of your chair
Keeping your hands on the opposite leg, place one leg out in front of you
Now keep your leg straight and point your toes towards the ceiling
Ensure you remain upright with a straight back and lean forward at the hips
Hold for the set time and change legs.
HOLD FOR: 30-60 seconds
WHY THIS IS A GREAT STRETCH FOR SENIORS:
For Video Demonstration of This Exercise: Click here.
For Video Demonstration of This Exercise in Standing Position: Click here.
STRETCH 9: STANDING ADDUCTOR (GROIN) STRETCH
HOW TO
Standing tall, take one large step out to the side and face your toes outwards.
Shift your weight to one side, bending that knee.
You will feel a stretch on the inner thigh of the straight leg.
Keep a chair in front of you when performing this exercise.
Hold for the set time and repeat on the opposite leg.
HOLD FOR: 30-60 seconds
WHY THIS IS A GREAT STRETCH FOR SENIORS:
For Video Demonstration of This Exercise: Click here.
STRETCH 10: STANDING CALF (BACK OF LOWER LEG) STRETCH
HOW TO:
Standing tall holding on to your chair with both hands, step one foot back making sure your toes are facing forward throughout the exercise.
Now bring your front knee towards the chair ensuring that your heels remain in contact with the floor at all times.
Hold for the set time and change legs.
HOLD FOR: 30-60 seconds
WHY THIS IS A GREAT STRETCH FOR SENIORS:
For Video Demonstration of This Exercise: Click here.
Stretching Routine For Seniors | A Complete Program
Here is a static stretching routine with the best dynamic stretches to help you improve your flexibility.
I have also created other stretch videos you can follow to help improve your flexibility. Here is an Upper Body Stretch Video (click to access) and here is a Lower Body Stretch Video (click to access).
The Best Dynamic Stretches For Seniors - Dynamic Stretche Routine For Seniors
Here is a dynamic stretching routine with the best dynamic stretches to help you improve your flexibility.
Stretching Exercise Videos
For more stretching videos click each video below or here for more.
4 - OTHER FACTORS TO CONSIDER
Mindfulness and Improving Flexibility.
Before we finish up this guide, there is another important, and often neglected, part of improving flexibility (and our health) which I wanted to touch on.
That part is working on our mental health! Or, in simpler terms decreasing the stress, we are under.
Our mental health has a great impact on our physical self. There is a strong connection between our bodies and our minds, and more and more people are starting to recognise this!
Scientific studies clearly show a strong correlation between stress and inflammation.
Conditions such as anxiety and depression, which generate high levels of stress are known to cause a biological response, elevating stress hormones and causing inflammation in our bodies.
Muscle tension causes the joints to stiffen up, making it more difficult to stretch, exercise and move altogether.
Working on minimising our stress levels by avoiding high-stress environments and taking time out daily to work on mental well-being, can do a great deal in improving your health and flexibility.
Through my continual learning of health and practice as a Physiotherapist, the more I see of the importance of eradicating stress for good health, through whichever way possible.
I also believe every one of us should practice a form of mindfulness to get on top of our stress levels and into good health.
Even something as simple as spending an hour a day doing the things you love, or spending time with people that make you feel good, can greatly affect your mood and help with reducing stress.
Once you manage to keep the stress levels under control or find a way to eradicate it, you’re going to be causing much less tension in your body.
With less tension comes that feeling of lightness, greater ease of movement, greater flexibility and the many other health benefits that come along with this.
As with the exercise, start incorporating a mindfulness practice into your life, and stay consistent. :)
ENDING NOTE
You now have ALL the tools to regain your flexibility.
There is a lot here to take in and do, but keep it simple, stay consistent and always keep progressing. These are the keys to success.
Don’t overcomplicate it, or overwhelm yourself by doing all the stretches you can in the thought of “more is better”! It’s not!!
Choose one of the full-body stretching videos and add it into your regular exercise routine.
Or, start by choosing the area you want to improve first and work on that.
Remember, movement is medicine. So when you get moving more and add in 10-20 minutes of stretching each day, (or at least three days a week), it won’t be long before you start seeing big improvements in your flexibility.
You’ll feel yourself moving around much easier in your day to day life and any pain you had easing up.
You’ll be able to reach for items in those hard to reach places.
You’ll start to see all of the many benefits that come with improved flexibility.
You’ll start feeling like a younger version of you!
Stay positive on the journey to a fitter, healthier and more flexible you.
Stay happy!
And keep on moving and stretching!
It won’t be long until you’ve regained your flexibility, and more!
Further references:
4. Smith, E.L. Exercise in the elderly to prolong and improve the quality of life. In: Future Directions in Exercise and Sport Science Research.J.S. Skinner, Et Al. Champaign, IL: Kinetics, 1989. pp. 259–266. 5. Adrian, M.J. Et Al Flexibility in the Aging Adult. In: Exercise and Aging: The Scientific Basis., eds. Hillside, NJ: Enslow, 1981. pp. 45–47. 6. Anderson, B., J.E. Beaulieu, W.L. Cornelius, R.H. Dominguez, W.E. Prentice, and L. Wallace. Flexibility. Natl. Strength Cond. Assoc. J. 10–22, 71–73. 1984.7. Heyward, V.H. Advanced Fitness Assessment and Exercise Prescription. (2nd ed.). Champaign, IL: Human Kinetics, 1984.9. Buccola, V.A., and W.J. Stone. Effects of jogging and cycling programs on physio- logical and personality vari- ables in aged men. Res. Q. Exerc. Sport. 46(2):134–139. 1975. 15. Medicine ACoS ACSM's guidelines for exercise testing and prescription. 7th ed. Baltimore: Lippincot Williams Wilkins; 2006 Healthy Chocolate Protein Balls For Seniors!
This recipe is an absolute favourite of mine for those times when I am trying really hard to be healthy but have a chocolate craving. I reckon they are a great substitute for chocolate, in fact, I think I prefer them to chocolate. They are sweet and chocolately, rich and filling BUT they are healthy- full of good fats, and protein and healthy vitamins and mineral antioxidants.
Beat sugar cravings with this healthy protein snack!
[This was originally posted in the More Life Health Seniors Community (click to Join), by my sister Lexie].
How are you all? For those who don't know me, I'm Michael's big sister. I've been a bit quiet on here of late because my son, Lachlan, started school this year and my younger son, Joshua, started pre-school and I picked up extra hours at work. So life has been busier but all is going well. I hope you are all well too and keeping as active as possible.
Earlier in the week, Mike said I would post a recipe and here it is:
CHOCOLATE PROTEIN BALLS
PREP TIME
Prep | 10 m
Cook | 0 m
Ready in | 30 m
Duration | Fridge - 3 days, Freezer - 3 months
INGREDIENTS
16 pitted Medjool dates
1 tablespoon desiccated coconut
2 tablespoons coconut oil
3 tablespoons almond (or other nut) butter
2 tablespoons cocoa
1 tablespoon cacao nibs
2 tablespoons collagen/protein powder
Extra desiccated coconut for decorating
PROCEDURE:
Combine all of the ingredients in a food processor until smooth-ish.
Roll mixture into smaller balls, using hands, and roll in the extra coconut. (Get Dirty)!
Refrigerate, or freeze, until set.
Sit back and enjoy this guilt free snack with a cuppa!
Makes 24 Balls
And that’s all there is to it!
It's an absolute favourite of mine for those times when I am trying really hard to be healthy but have a chocolate craving.
I reckon they are a great substitute for chocolate, in fact, I think I prefer them to chocolate. They are sweet and chocolately, rich and filling BUT they are healthy-full of good fats, protein and healthy vitamins and mineral antioxidants.
I make a batch and freeze them. Then, when I have a craving for something sweet, I pull one (or 2 😆) out of the freezer to have with a cup of tea.
You can play around with the recipe, for example- you don't need to add cacao nibs or you can use any nut or nut butter/spread of your choice etc.
Enjoy! 😊
Lettuce Cup, Ginger & Basil Beef
This is a favourite dinner in my household. It's full of flavour, packed full of veggies, is high in protein and super easy to prepare.
A big hello to all here in the MLHS community.
I have another recipe for you all to try. This is a favourite in my household. It's full of flavour, packed full of veggies, and is high in protein and super easy to prepare.
ginger & basil beef lettuce cup
PREP TIME
Prep | 15 m
Cook | 30 m
INGREDIENTS
1 tsp macadamia oil
1 small red onion, thinly sliced
2 garlic cloves, crushed
4cm piece ginger, julienned (cut into matchstick shape)
500g beef mince (or lamb or chicken or pork mince)
150ml liquid chicken stock
1/4 cup oyster sauce
1 tbs coconut sugar (optional)
1 small head of broccoli washed & cut into small florets
75g mushrooms finely diced
1 small zucchini grated
1 small carrot grated
1 handful of green beans, chopped
1/2 cup fresh basil leaves, washed and torn
OR 1/2 teaspoon dried basil
1 iceberg lettuce (or any green lettuce shaped like a cup, Cos lettuce works well too)
PROCEDURE:
Heat oil in a wok or large frying pan. Add onion, garlic and ginger. Stir fry until onion has softened.
Add mince, breaking it up with a spoon and cook until browned. Drain off any fatty liquid.
Stir in stock, oyster sauce and sugar & cook for a further 5 minutes. Liquid should reduce by half. Add all vegetables & cook until just tender. Drain any liquid that remains.
Season with pepper and stir in basil.
Separate lettuce leaves and wash under water. Drain and pat dry with a clean tea towel (or use a salad spinner).
Spoon meat mixture into lettuce cups and enjoy!
Serves 4. (3 Lettuce Cups Each)
MACRONUTRIENTS
Per Serve: 3 Lettuce Cups
Calories: 377
Protein: 28g
Fat: 17g
Carbohydrates: 14g
Please note, the macronutrients shown may vary depending on exact ingredients used. Please also keep in mind that the fat content reduces significantly depending on the type of meat you use and if you drain off all the fat as per the method.
Enjoy!
Lexie (Mike's Sister) xo
