

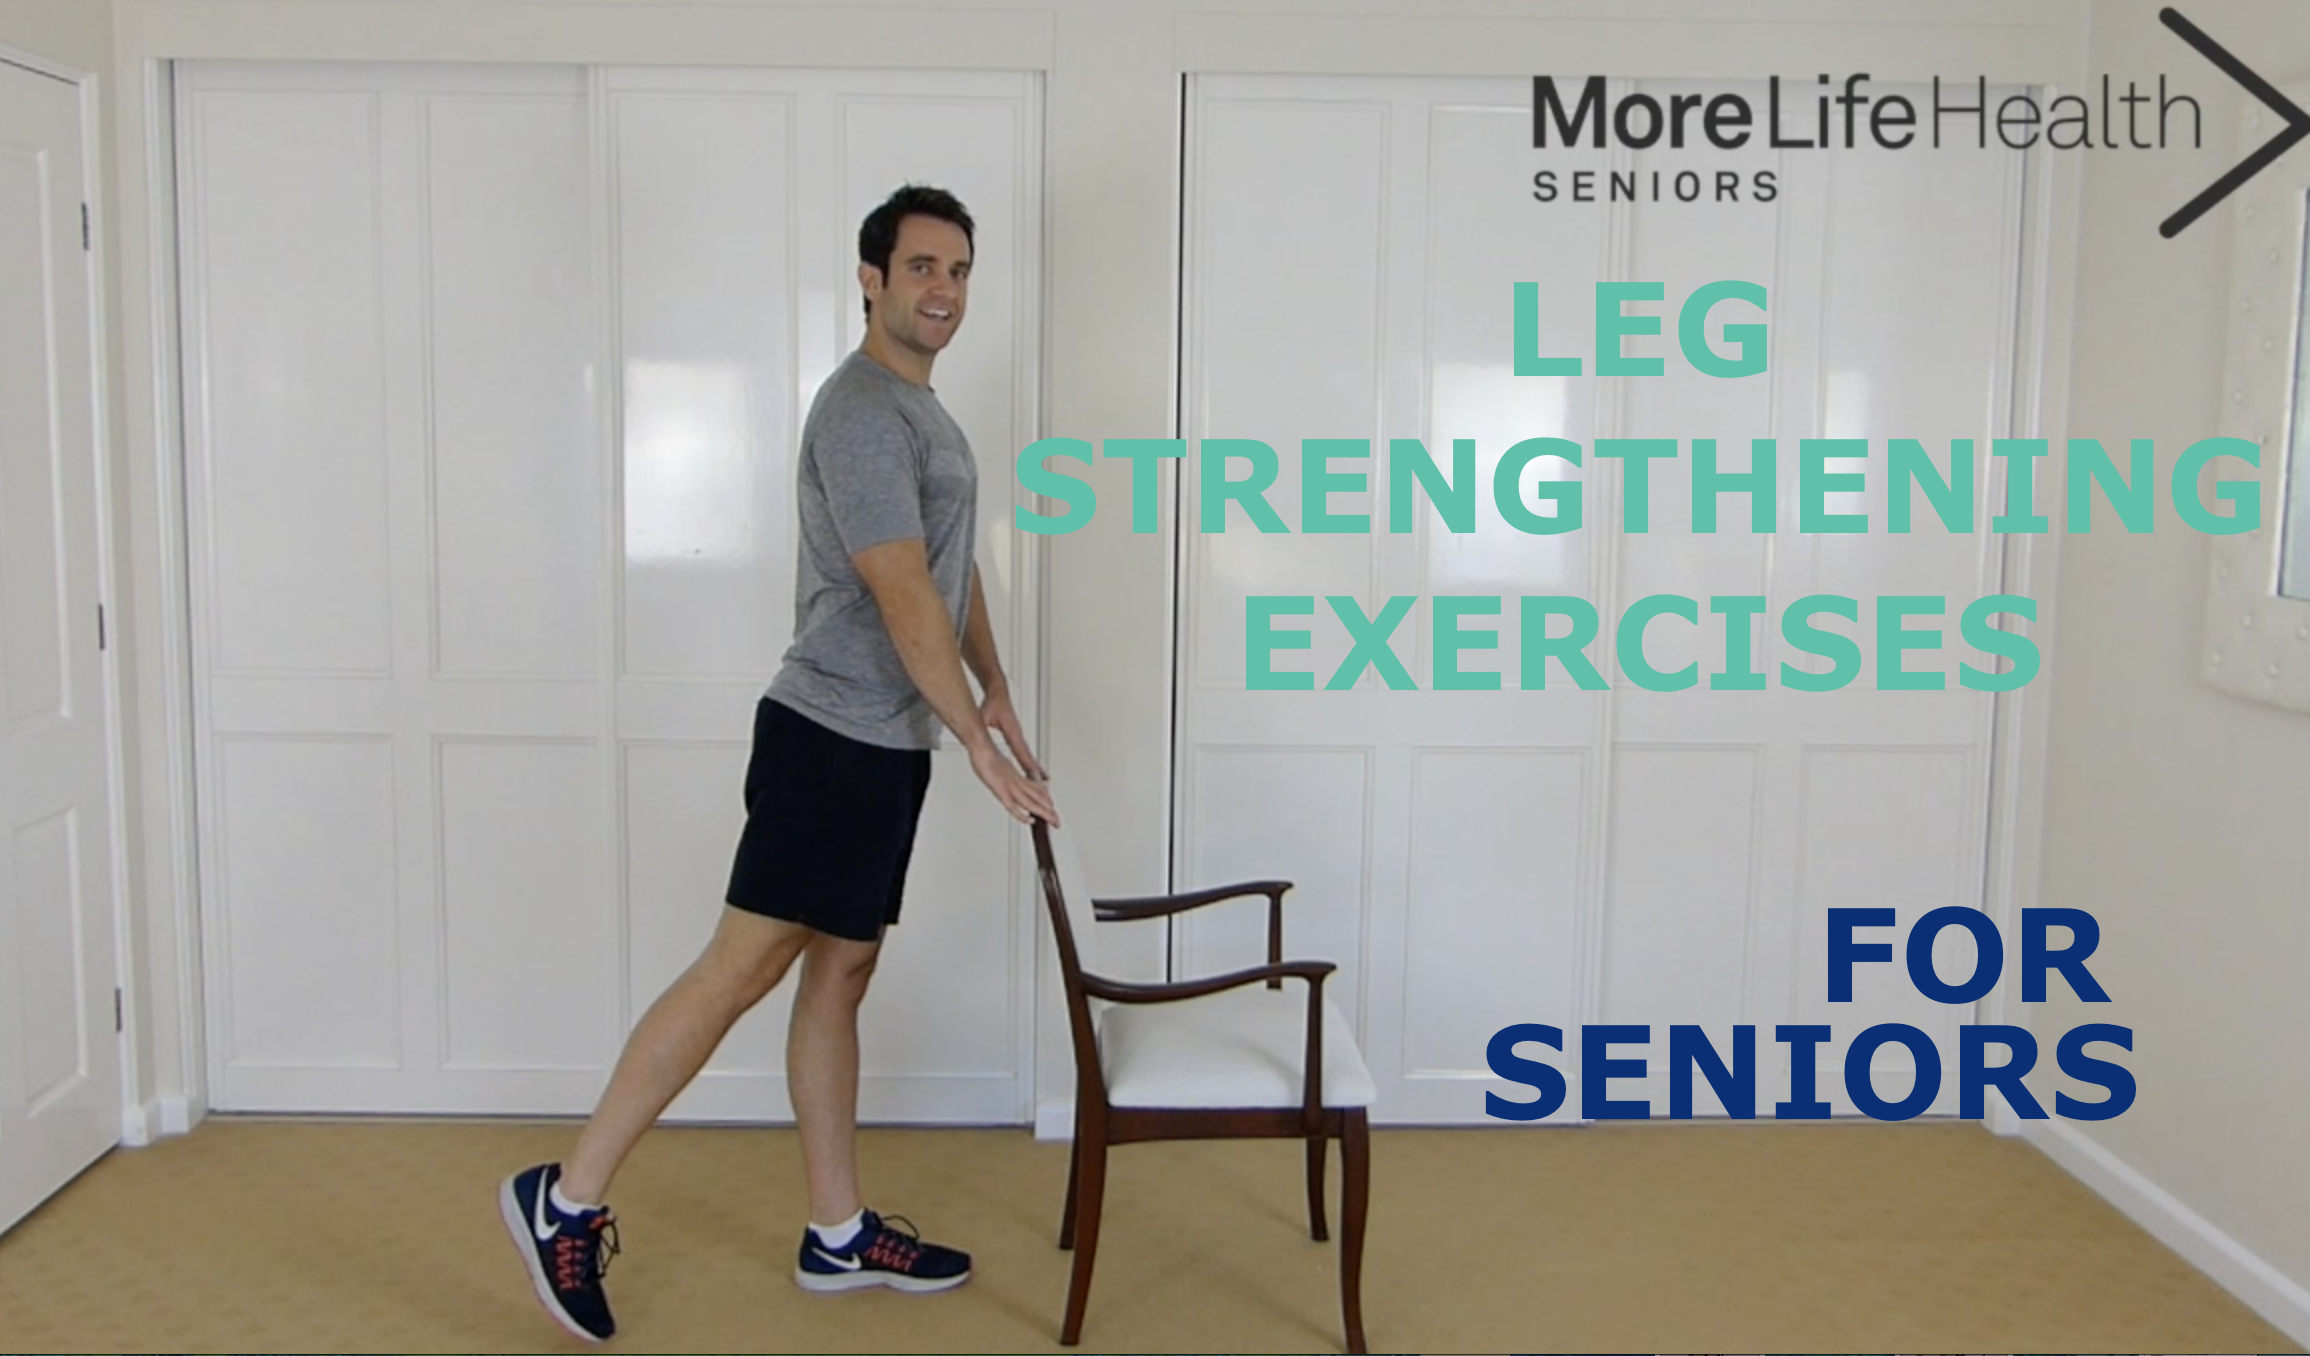
The Guide to Stronger Legs For Seniors
(INCLUDES : THE BEST LEG STRENGTHENING EXERCISES AND STRONGER LEGS WORKOUT VIDEO)
With stronger legs comes many benefits; we move well and effortlessly, we can decrease or prevent pain in our knees and our hips and we can help prevent falls.
In this article, we will cover why it's possible to increase leg strength regardless of age, how all of us should be moving to keep our knees healthy and how you can strengthen your legs to keep yourself moving as you should and by doing this decreasing or preventing knee pain!
(Includes: The Best Leg Strengthening Exercises and STRONGER Legs Workout Video)
With stronger legs comes many benefits; we move well and effortlessly, we can decrease or prevent pain in our knees and our hips, and we can help prevent falls.
Regardless of your current physical capabilities, keeping your legs strong and moving as well as you can is essential.
When our legs start getting weaker, life is much, much harder.
Whether you feel your legs are fine with no strength loss and are doing everything you have always done but want to keep it that way or improve your strength even further. Or, you're in the opposite situation, can feel yourself getting weaker, and even the simplest of tasks are causing you trouble. Either way, this article will be of great help to you.
In this article, we will cover why it's possible to increase leg strength regardless of age, how all of us should be moving to keep our knees healthy and how you can strengthen your legs to keep yourself moving as you should and by doing this decreasing or preventing knee pain!
CONTENTS
WHY IT'S POSSIBLE TO IMPROVE LEG STRENGTH AT ANY AGE & DECREASE PAIN
Most of the changes (losing muscle bulk and/or reduced strength) are NOT caused just by our bodies undergoing the natural ageing process. The majority of change occurs due to lack of use.
We do less physical activity, and we stop using the muscles in the way we used to. The activities that keep our muscles strong. Leading to smaller and weaker muscles.
2) Pain in the knees, with or without osteoarthritis, can be helped and prevented by changing the way we move and by strengthening our legs.
If you are feeling down because you have been told you have osteoarthritis, I want you to put this diagnosis aside for a while.
Although osteoarthritis and pain usually come together. Osteoarthritis is NOT the cause of pain. You can have osteoarthritis and be pain-free, many, many people are.
So, let’s not focus on what we can’t change (the arthritis diagnosis) and focus and correct what we can change (the way we move and our leg strength).
Changing these factors has been proven to decrease strain on the knees, preventing the worsening of joint wear and tear and helping and/or reducing pain symptoms. [1]
So, what if we focused on correcting your movement patterns, allowing the body to move as it should? And, what if we also strengthened weak muscles in our legs?
We'd decrease the strain on our knees, preventing any further pain or preventing pain altogether! We would also find knee exercises much easier and less painful! We'd also strengthen our legs, decreasing the strain on our knees and making everything we do in life much easier.
There are other factors we can change to decrease knee pain symptoms, such as: losing weight, choosing softer surfaces over harder surfaces when walking (to decrease shock absorption through the knees), wearing better shoes (with shock-absorbing soles) and wearing knee supports (to provide warmth and give confidence).
But to make real, lasting changes, we must move correctly and strengthen our legs! This goes for everyone. Even if you have no pain, by learning the techniques in this article, you will learn how to improve your movement and increase your leg strength, preventing any pain that could occur.
The first step:
MOVING CORRECTLY TO DECREASE OR PREVENT PAIN
In our day-to-day lives, we perform certain movements but give little to no thought to how we perform them. This is fine. This is how movement should be.
But when we perform the movements incorrectly, over time problems can arise.
Bad postures, awkward, repetitive, and incorrect movements put a strain on our muscles and joints, the knee being a joint which can take on the brunt of the excess strain.
Common incorrectly performed movements that place excess strain through the knees are kneeling, squatting or even the simple task of standing up!
We can improve these movements by making a few changes. By doing this, you'll be minimising the strain placed through the knees each day which will relieve pain or prevent pain and allow you to perform exercises as they should to strengthen the legs.
AVOID THESE MISTAKES WHEN STANDING UP
We stand up and sit down many, many times during the day and therefore throughout our life. From the couch, from a chair, from the toilet, and so on.
Standing seems like such a simple task, and it should be. However, it's commonly performed in a way that puts a lot of stress through the knees.
The most common mistake seen when standing is incorrect knee alignment (knees moving in). Like this:

Incorrect Standing 1: Sitting with knees facing in.

Incorrect Standing 2 - Knees coming inward when standing, not inline with toes.
What we see above is usually the result of weak hips and glutes (buttocks).
Knees coming in is more common in women. Women have a wider pelvis and are usually told from an early age to sit with their knees together, "sit like a lady". This sitting pattern is repeated day in, and day out for life, to the point it becomes the normal way to sit and stand.
With these factors combined, we see an imbalance in our inner and outer thigh muscles. Our inner thigh muscles become overactive with weaker outer thigh muscles (hip and buttocks).
The above way of standing puts a whole lot of strain on our knees because we are not moving our bodies in their natural alignment.
This is not only the case when standing up, because of these muscle imbalances, we are putting excess strain on our knees repetitively in different amounts when we walk upstairs, jog, kneel and even walk on the flat.
There is less force through our knees when walking on the flat over jogging or walking upstairs, but small repetitive forces over a lifetime add up!
CHECK YOUR STAND
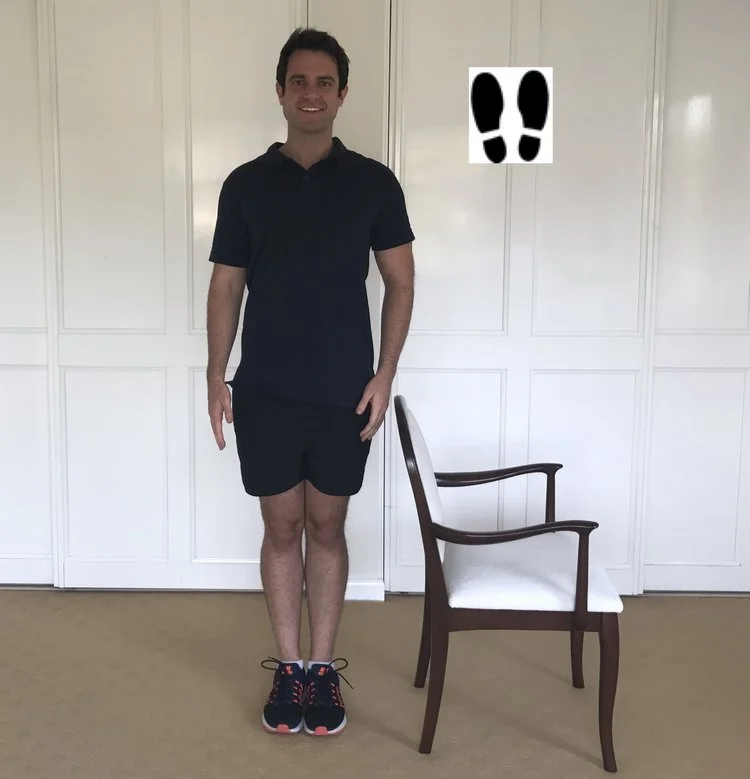
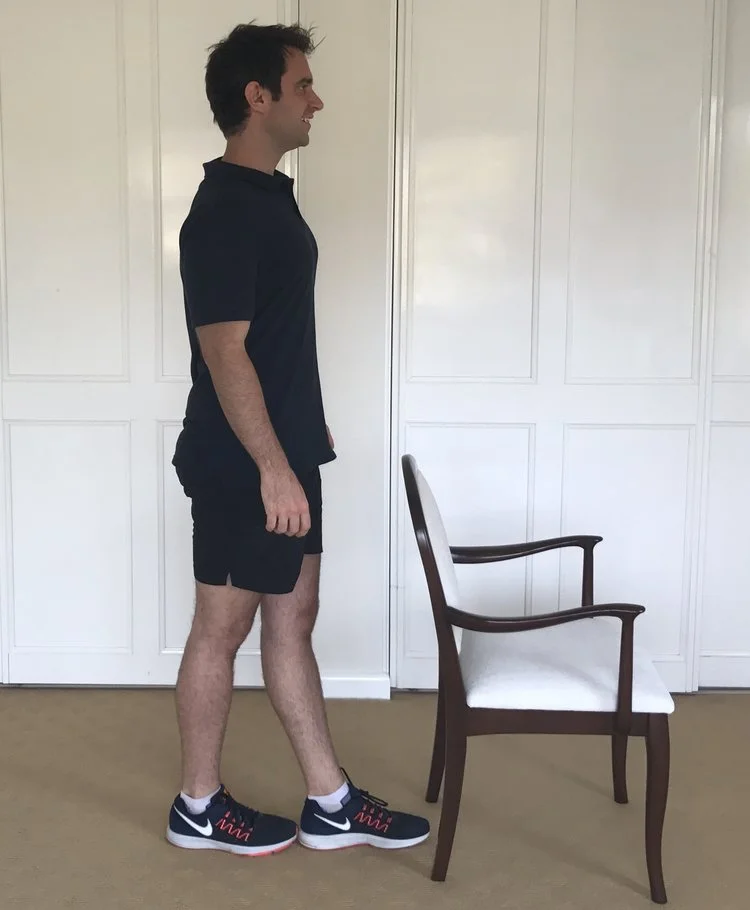
Before we check if we stand with our knees coming in, let’s see what normal standing looks like. Knees should be in line with toes and remain like this throughout the stand. (See pictures below).

Correct Standing 1: Knees inline with toes.

Correct Standing 2: Correct knee alignment. Knees in line with toes.
STAND TEST
Let’s take the stand test and see if we have a natural tendency for our knees to come together when standing. Do not try to perform it correctly, just sit down and stand as you usually would. Yep, it’s that simple! :)
Do you find your knees come in when you are just sitting there and/or do you find they move in when you stand up?
If your knees are moving together, then you are not utilising your lower body muscles correctly and putting excess strain on the knees.
Now we are aware, We must correct this.
HOW TO STAND UP CORRECTLY (VIDEO)
The first step is bringing awareness to this issue when sitting. Do your best to avoid sitting with your knees together. Sit with your knees in line with your toes and your feet flat on the floor. This will be uncomfortable at first but stick to it. To continue to "sit like a lady" without your knees together, you can use a towel or blanket to cover up.
The next step is the awareness of keeping the knees in line with the toes when we stand up. When they start to come in, correct it.
When you continue to stand correctly, you can decrease the strain you put through your knees and then work on strengthening your muscles correctly.
We must strengthen the muscles NOT ONLY surrounding the knee, which is what most people only do to improve their knees but by strengthening ALL MUSCLES in our legs, especially our hips and buttocks.
When we strengthen all muscles in our legs, we can start and keep moving as we should.
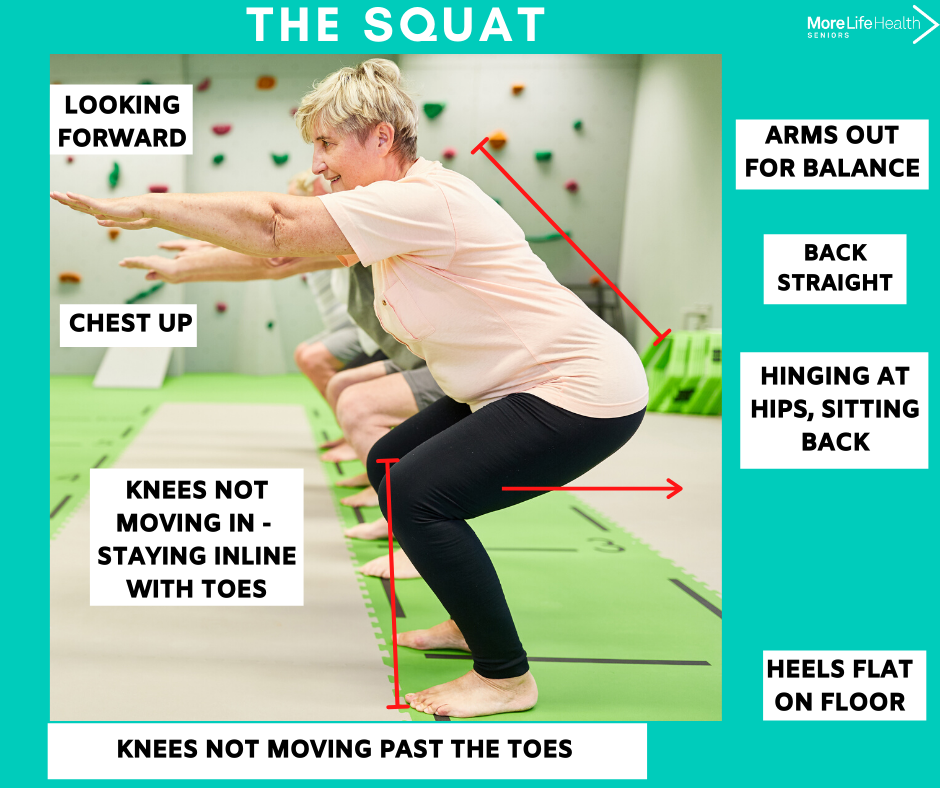
AVOID THESE SQUAT MISTAKES
Another important movement is the squat.
It is good to be able to squat correctly so we can place less strain on our backs when we do specific tasks like lifting objects off the floor. However, squatting is also an important exercise to perform to strengthen our legs.
I love the squat for seniors because it works every muscle in the lower body and activates the core.
However, like the sit-to-stand, it is usually performed incorrectly and when performed incorrectly, can INCREASE knee strain.
The two most common mistakes I see when people squat putting added strain on the knees are:
1) Knees coming inwards (as below) - just like what happens when we stand up.
and
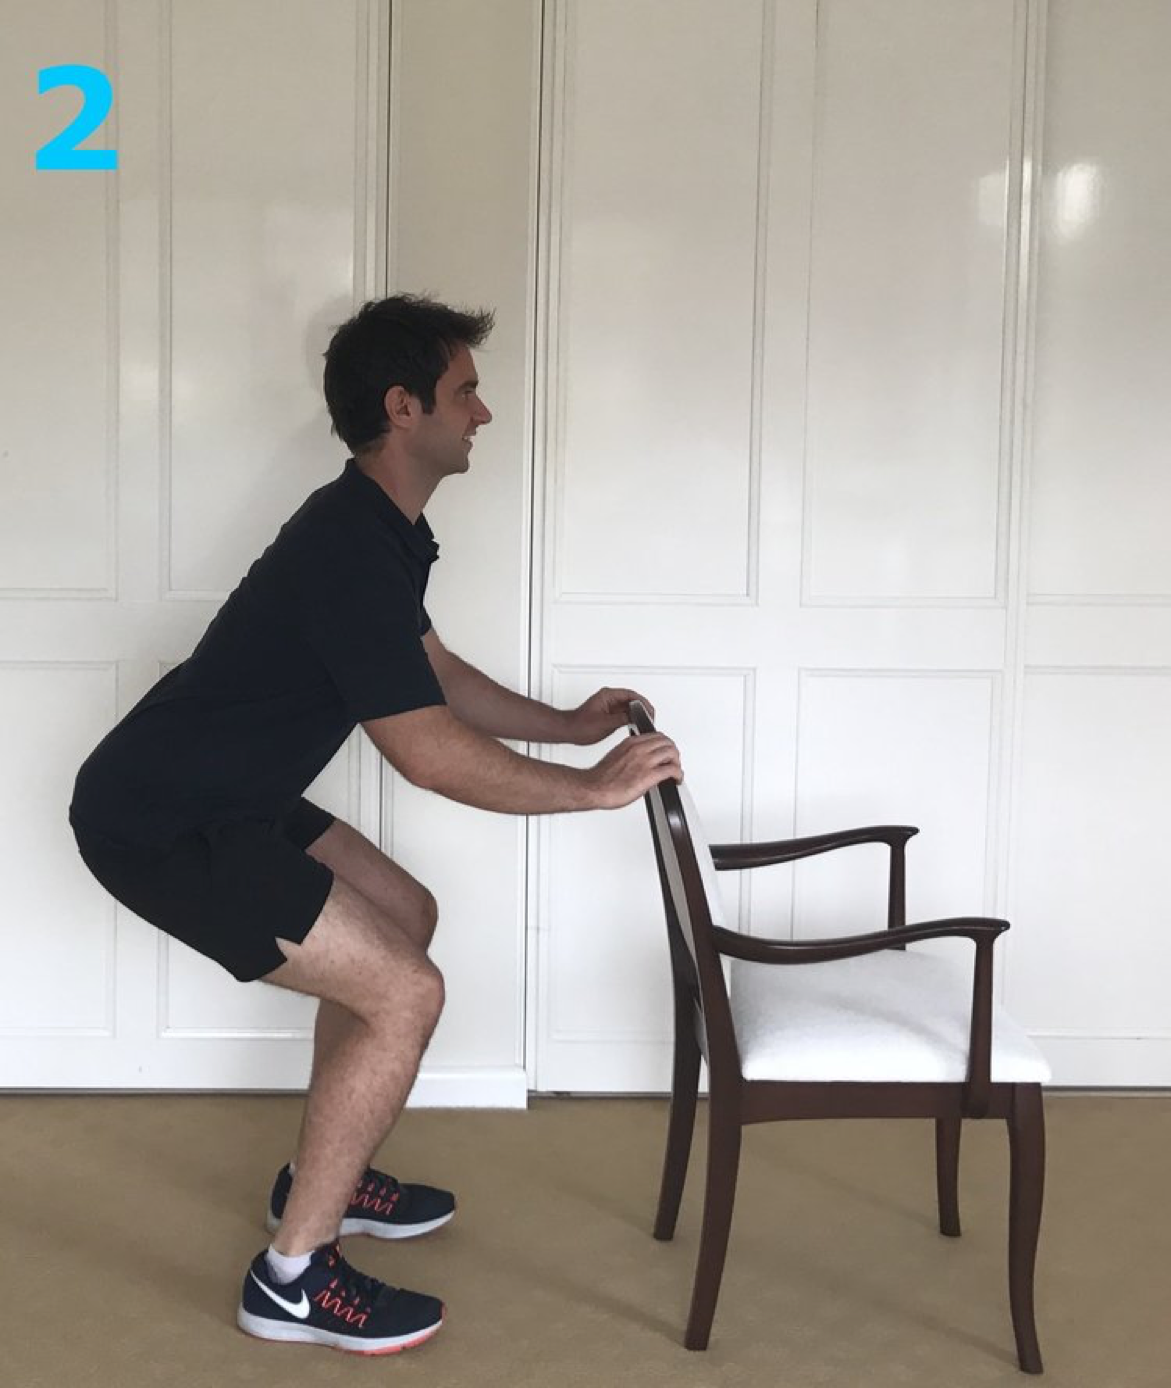
2) Coming forward from the knees (as below) making our knees come forward over the toes. (This isn’t an issue when sitting from standing because people know to hinge at the hips and stick their bottom out when having to find the chair).

Incorrect Squat:
Lady in Yellow Shirt: Squatting from knees, although this would be passable for a partial squat, if this lady was to squat down further, her knees would come past the line of her toes. I would like to see this lady sitting back more into the squat.
Lady in White Shirt: Again, coming forward from the knees, knees moving inward.
HOW TO SQUAT CORRECTLY (VIDEO)
To perform the squat with correct technique, watch these videos:
By squatting correctly, you will be moving as you should and when for exercise, you will be targeting and strengthening the muscles effectively without putting strain on the knees.

STRENGTHENING THE LEGS FOR SENIORS
HOW TO MAKE LEG EXERCISES EASIER OR PERFORM THEM WITH PAIN
If having difficulty with the sit-to-stand or the squat, there are many things you can do to make it easier until you are performing these exercises with ease.
For the Sit to Stand:
1) Use Arm Rests:
Using the armrests to help assist with your standing is fine. By doing this, you are still getting the benefits of the exercise for the stage you are at, but just using your arms to provide a little assistance to help you perform the exercise correctly.
As you start to get stronger, you can decrease the amount of assistance you are using over time. (i.e. move from two hands to one hand, to no hands).
Concentrate on using your legs more than your arms for each stand.
2) Change Seat Height:
Standing from a higher seat height or taller chair will make it easier for you to stand and, again, still give the benefits of the exercise, challenging your strength for the stage you are at.
Find a chair that is taller, or place a phone book or cushion on the chair to raise the height. As you start to get stronger, you can lower the height to continue challenging yourself and improving your strength.
When you slowly decrease the chair height as you get stronger, you'll continue to improve your strength and eventually be strong enough to stand in those times when you're seated at a low height (e.g. deep, low or soft couch)
For the Squat:
1) Hold Onto A Chair, Rail or Bench:
Use your arms to assist with the squat, and use your arms to assist as required. (Make sure your bench is sturdy and your chair does not have wheels).
2) Perform a Partial Squat:
By only squatting down a partial distance (picture 2 of squat exercise below) will still challenge your strength, making you stronger for the stage you are at. As you get stronger, you can go a little deeper into the squat, but never deeper than parallel
We all have different capabilities and strength, and this is fine. With time, practice and consistency, what was once considered hard will become a whole lot easier.
Be patient, don't compare yourself to anyone else; only compare you to you.
The 10 Best leg Strengthening Exercises For Seniors
So now we’ve established the sit to stand and the squat are important movements to do each day and when performed correctly are very important to get stronger legs so we move better and decrease pain.
Here are additional exercises, which are best for seniors to improve leg strength.
CLICK HERE FOR THE 10 BEST STRENGTHENING EXERCISES FOR SENIORS
Once performed and performed consistently you'll notice big differences in your leg strength, many of your everyday activities feeling a whole lot easier with your newly strengthened legs.
SENIORS LEG STRENTHENING WORKOUT VIDEO
To make it easier here is a leg exercises workout video you can follow along to whenever you want to help get your legs stronger. It includes a warm up, all exercises above and a stretch.
Video: The Best Leg Strengthening Exercises for Seniors
CLICK HERE FOR MORE LEG STRENGTHENING EXERCISE VIDEOS
So there you have it. The best way to improve your leg strength so you can decrease and prevent pain, prevent falls, move better, feel better and even improve the way you look.
With stronger legs we are more confident and we can continue to do the things we love that keep us happy.
To keep your legs strong and yourself in physical shape and healthy, I send regular workouts and tips to mailing list subscribers and for those on my Facebook. Make sure you follow along to both!

THE 10 BEST BALANCE EXERCISES FOR SENIORS
THE BEST BALANCE EXERCISES TO IMPROVE BALANCE IN LESS TIME
Balance CAN be trained.. You can become a whole lot steadier on your feet by incorporating some simple balance exercises into your life. The exercises that will give us the greatest improvements with less time spent working out.
In this article we go through the 1o best balance exercises that will give you GREAT RESULTS in less time.
BALANCE EXERCISES ALL SENIORS SHOULD BE DOING!
Becoming unsteady on your feet is NOT a normal part of ageing. Balance CAN be kept and improved at any age.
I recently wrote an article, The Complete Guide To Great Balance For Seniors, which is an in-depth guide to improving balance. This guide gives you everything required to learn, test and improve your balance. So check it out for more.
For now, however, we will go through the best balance exercises that will give you GREAT RESULTS in less time.
Spending 5-10 minutes at least three times a week doing these exercises and you WILL see improvements over time. BIG improvements!
Incorporating some short, simple sessions of great balance exercises into your life each week is all you need for improvement.
Don't get caught up in the hype that more is better. Do these exercises, give it ALL your focus, progress slowly as you improve and aim to keep consistent.
This is the key to improving your balance. Short sessions take away any exercise burden, making them easier to stick to. All your focus each session to ensure you are getting the most out of yourself and slowly progressing the exercises over time to keep challenging yourself, leading to continued results.
Now, let's get into it.
How To Get The Most out of Your Balance Sessions:
Safety First. Always!
Get the all-clear from your doctor before undertaking any of these balance exercises.
Ensure you have something sturdy to hold on to — a chair (without wheels), a rail, a kitchen bench or something similar. To improve our balance, we have to challenge ourselves by practising more challenging positions. When we challenge ourselves, we may lose our balance; this is why the chair (or something sturdy) is very, very important.
Do Not Over Do It!
Take it slow and steady and always perform the exercises safely, utilising proper exercise technique at all times.
Ensure you give your body adequate rest between exercises and after each workout. If you feel tired, rest. Remember, as we age, our bodies do not recover like they used to, so give it time.
Warm Up!
Always perform a warm-up.
Perform a warm-up before the exercises below. Or I like marching on the spot or a brisk walk. Or you can do one of my warm-up videos. This is to wake up our joints and muscles and get everything ready for the exercises. By warming up, you'll get more out of each workout and decrease your chances of injury.
Get Started. Stay Focused and Give It Your All!
Once warmed up, perform 4-5 of the ten exercises below and perform the amount I recommend as listed below.
Stay focused throughout the exercises, and don't become distracted. Give it your all for the short time you are performing the exercises.
Continue to Challenge Yourself and Keep Notes!
Try and hold positions for longer, do extra repetitions or sets, and perform another workout if you're feeling good.
Change up exercises every couple of weeks to make it different and to be challenging yourself.
Take notes of the progress you are making to track progress. It's also good for motivation to look back and see how far you have come.
To follow videos of me doing exercises similar to these, make sure you're signed up to the mailing list (enter your email below) and subscribe to the More Life Health YouTube channel.
TOP TEN BALANCE EXERCISES FOR OLDER ADULTS
1) STANDING FEET TOGETHER
Standing with your feet together.
Have a chair by your side or in front for safety reasons.
Hold this position for the set time.
How Long To Perform: Perform for 2 minutes
Mike’s added note: This exercise is relatively easy. However, there are many ways to challenge your balance by making this exercise, and all the others, more challenging, to find out how to do this, click HERE.
2) TANDEM STANCE
How To:
Standing tall with an upright posture.
Have a chair by your side or in front for safety reasons.
Keep your big toe of one foot touching the heel of your other foot. Keep your feet straight and not splayed.
Perform for the desired time.
Alternate legs.
How Long To Perform: Hold for 1 minute on each leg. Perform 2-3 times.
3) SINGLE-LEG STANCE
How To:
Standing tall with an upright posture.
Chair by your side or in front for safety reasons.
Shift your weight on to your right foot and lift your left knee up, bringing your left foot off the ground. Hold this position for the time specified.
Return to the start position.
Now shift your weight on to your left foot and lift your right knee up, bringing your right foot off the ground. Hold this position for the time specified.
How Long To Perform: Hold for 1 minute on each leg. Perform 2-3 times.

4) HIP EXTENSIONS (LEG LIFTS BACKWARDS)


How To:
Standing with your feet together, with a chair by your side or in front for safety reasons.
Raise one foot off the floor slightly behind you or with your toes touching the floor. Keep your knee straight throughout.
Return to start position. Repeat for the set repetitions.
Alternate legs
How Many To Perform: Perform 10-15 repetitions on each leg.
5) HIP ABDUCTIONS (LEG LIFTS SIDEWAYS)


How To:
Standing with your feet together, with a chair by your side or in front for safety reasons.
Raise one foot off the floor and lift it out, away from the body, 20-30cm off floor.
Keep your toes facing forward throughout lifting your leg (not out to the side).
Aim for 10-15cm off floor.
Return to start position. Repeat and alternate legs.
How Many To Perform: Perform 10-15 repetitions on each leg.
6) CALF RAISES


How To:
Standing tall with your feet together and knees straight.
Have a chair in front for safety reasons.
Lift straight up onto your toes, bringing your heels off the floor.
Hold for 1 second, then lower back to start position.
Repeat for the set repetitions.
How Many To Perform: Perform 10-15 repetitions.
7) SIT TO STAND


How To:
Siting in a chair in an upright position.
Place your hands on opposite shoulders and keep your feet flat on the floor.
Keep your back straight and your stomach tight.
Rise to full standing, ensuring the back of your legs are not touching the chair.
Sit down in a slow and controlled motion.
Use the armrests of the chair to assist standing if required.
How Many To Perform: Perform 10-15 repetitions.
Mike’s added note: If you cannot stand with your arms across your chest, attempt using one arm on the chair or use both if required.
8) SQUATS

How To:
Standing with your feet roughly shoulder-width apart.
Have a chair in front for safety reasons.
Hold your stomach tight and ensure your back is straight.
Bend your knees and sit back as if pretending to sit on a chair.
Ensure your knees are in line with your toes, and do not let your knees push forward in front of your toes.
Return to the start position (standing).
Repeat for the set repetitions.
How Many To Perform: Perform 10-15 repetitions.
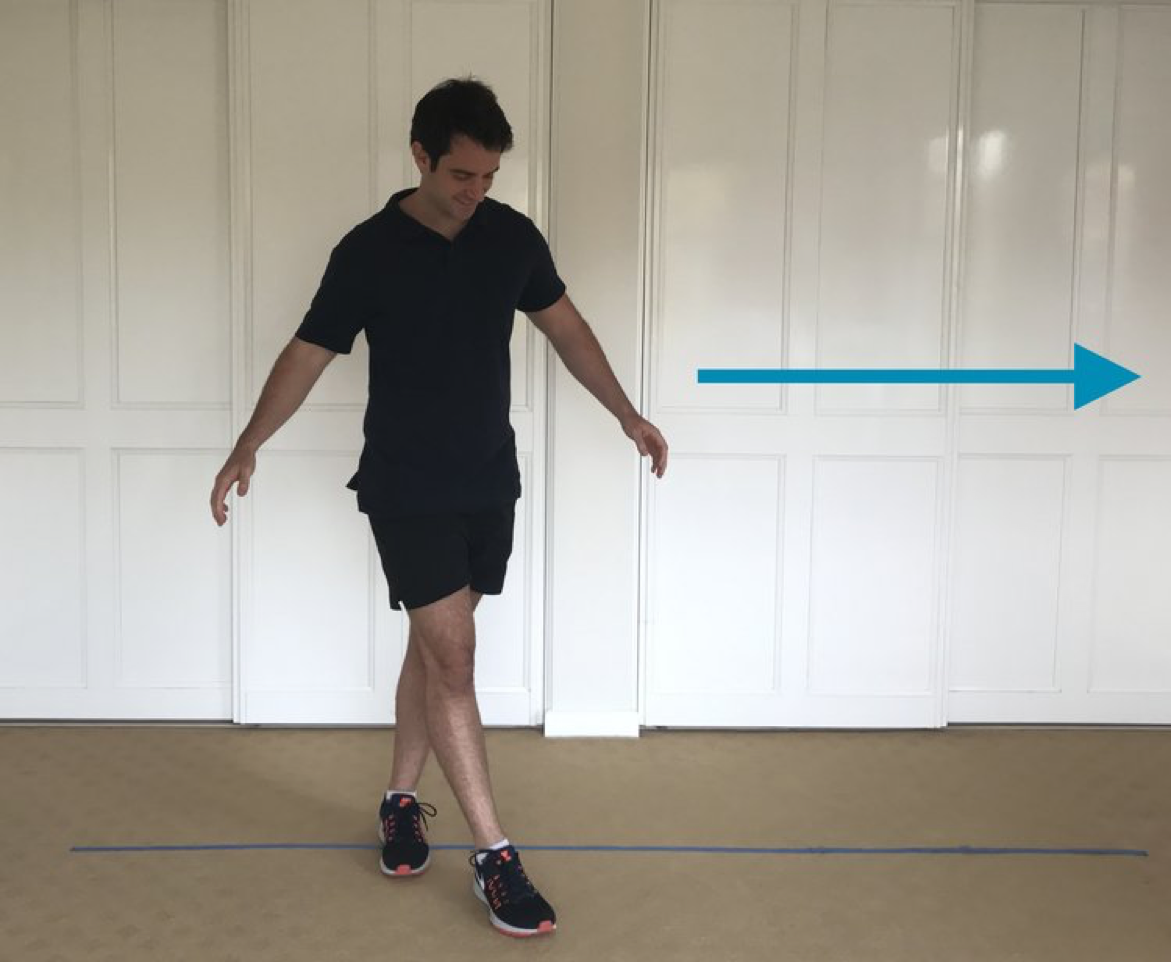
9) TANDEM WALKING

How To:
Standing perpendicular to a kitchen bench, a rail (if available), or the back of a lounge, or place 3- 4 chairs in a line.
You can apply masking tape on the floor for a line to follow (see diagram), but this is not required.
Walk heel to toe for the length of the bench/rail/lounge/tape (2 - 5 metres).
Ensure your toes are facing forward.
Repeat.
How Many To Perform: Perform 6 - 12 lengths.
10) GRAPEVINES
How To:
Standing perpendicular to a kitchen bench, a rail (if available), or the back of a lounge, or place 3- 4 chairs in a line.
You can apply masking tape on the floor for a line to follow (see diagram), but this is not required.
Walk sideways with your opposite leg crossing in front of your leading leg for the length of the bench/rail/tape (2-5 metres).
Ensure your toes are facing forward.
Return back to the start position.
Repeat.
How Many to Perform: 6 - 12 lengths.
HOW OFTEN SHOULD TO PERFORM BALANCE EXERCISES FOR IMPROVED BALANCE
And there we have it! Ten balance exercises every senior should be doing.
Choose 4-5 exercises after a warm-up and perform as above at least 3 x a week.
Example Balance Program:
Monday (Warm-Up - Exercise 1, 2, 5, 6, 7),
Wednesday (Warm-Up - Exercise 2, 3, 4, 9)
Friday (Warm-Up - 2, 3, 5, 8, 10)
Stay consistent, and enjoy it.
The results will come.
If you would rather follow along to a balance exercise video to help improve your balance. Here is an exercise video for good balance and leg strength. Both are important in preventing falls. Follow along by clicking below.
BALANCE EXERCISES FOR SENIORS VIDEO

SIMPLE BALANCE EXERCISES FOR OLDER ADULTS: Follow along to this balance exercise video to improve your balance, and get stronger legs.
For more balance exercise videos, click HERE:
Leave the workouts up to me, by signing up to the More Life Health Mailing List here (click to join). You'll receive a FREE exercise eBook and all your seniors' health and fitness tips and extra workouts covering balance, posture, strength, fitness and flexibility, and much more.
How did you go with these exercises? I’d love to know! You can let me know in the comments below.