Using Your New Therapy Balls
Welcome to the More Life Health Therapy Balls Support page!
Your new therapy balls (also known as stress balls) provide resistance to strengthen the muscles in your hands, wrists, fingers, and forearms. They come in various sizes and resistance levels, allowing for customisation to suit individual needs and abilities. Incorporating therapy balls into hand strengthening exercises offers additional benefits, including improved grip strength, increased range of motion, and enhanced coordination. These portable balls are easy to use anywhere you go.
On This Page, You Will Find:
- Printable exercise demonstrations you can take anywhere
- Exercise videos to guide you through workouts with your therapy balls
- 10 simple exercise demonstrations targeting different muscles so you can focus on specific areas of improvement.
So, let’s get started!
THERAPY BALLS WORKOUT (PRINTABLE)
Print out this workout and pack it in your suitcase with your therapy balls the next time you're traveling or don't have internet access, so you can always stay active.
DOWNLOAD YOUR FREE PRINTABLE PDF OF THE EXERCISES BY CLICKING THE BUTTON BELOW.
HOW TO USE YOUR NEW THERAPY BALLS
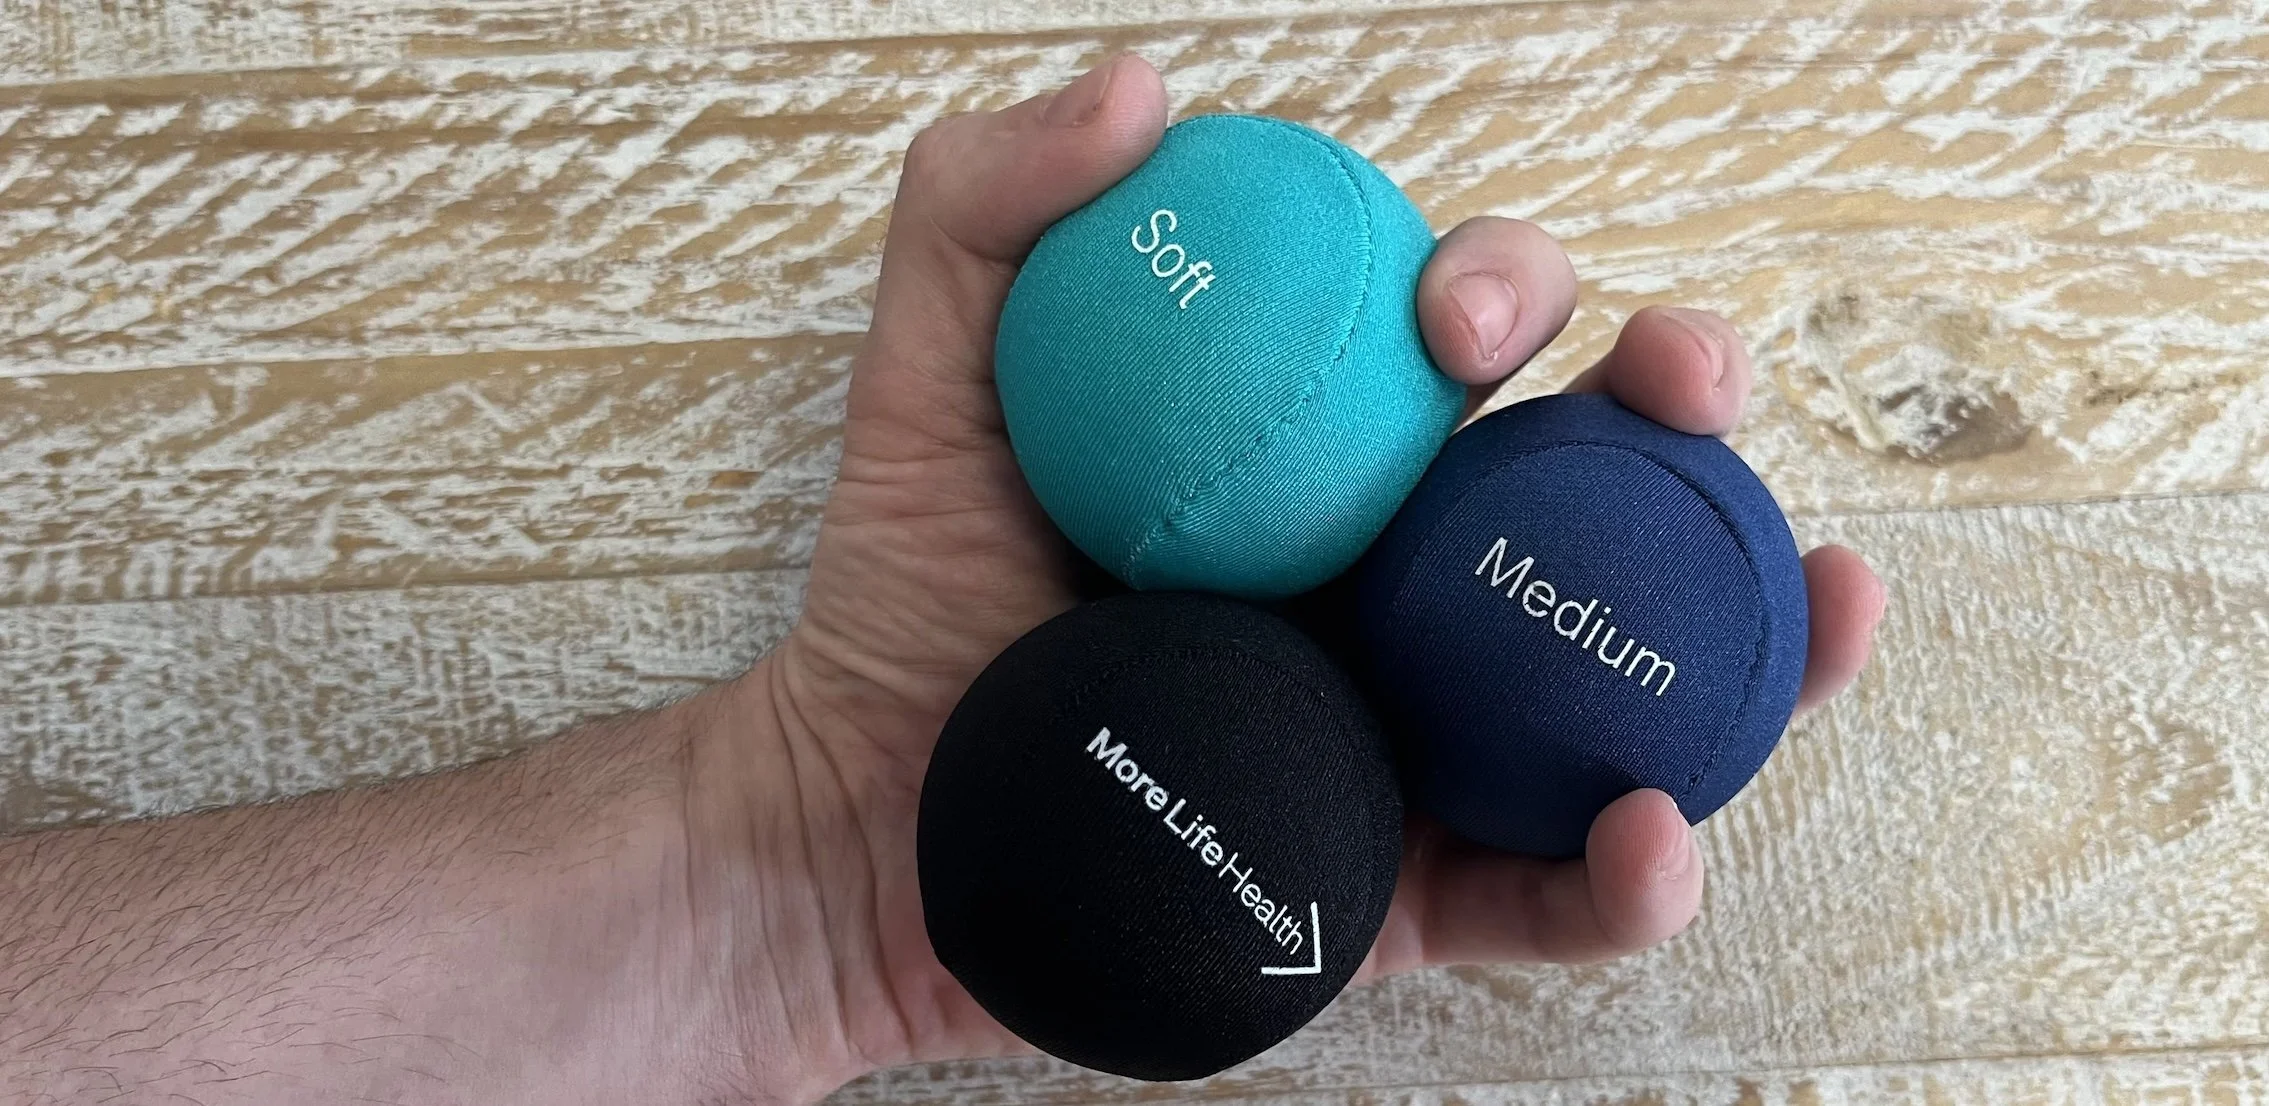
Your new More Life Health therapy balls come in three resistances: soft (green), medium (blue), and heavy (black). This allows you to progress as your strength improves.
Start with the green ball and remain consistent with your exercises using this resistance. As you get stronger, the exercises will start to feel easier. When this happens, and you’re ready for more of a challenge, it’s time to move on to the next resistance level (the blue ball).
Continue with this progression, and when you’re ready, progress to the black ball.
The exercises may feel a bit awkward or difficult at first, but with consistent effort, they will become easier, and you will build strength!
10 HAND/FINGER EXERCISES THAT YOU CAN DO WITH YOUR THERAPY BALLS
These exercises are designed to help improve the strength and dexterity of your hands, forearms, and fingers. Remember to perform the exercises slowly and deliberately, focusing on squeezing with as much strength as you can without causing pain or discomfort. Choose a resistance level (soft, medium, or hard) that suits your current strength, and progress the exercises as you get stronger.
Make sure to perform the exercises on both hands.
EXERCISE 1:
BALL GRIP SQUEEZES (WRIST UP)
This exercise targets the muscles of the fingers, hand, and forearms, helping to improve grip strength.
Hold the therapy ball in your hand with your wrist facing up. Squeeze the ball as tightly as you can for 5 seconds, then release.
Repeat 5 times.
EXERCISE 2:
BALL GRIP SQUEEZES (WRIST DOWN)
This exercise targets the muscles of the fingers, hand, and forearms, helping to improve grip strength.
Hold the therapy ball in your hand with your wrist facing down.
Squeeze the ball as tightly as you can for 5 seconds, then release.
Repeat 5 times.
EXERCISE 3:
TWO-FINGER BALL SQUEEZE
This exercise is particularly helpful for strengthening the grip for tasks such as turning a tap on or off, or using a can opener.
Hold the therapy ball in one hand with your palm facing up and your fingers slightly bent.
Position your index and middle fingers on one side of the ball, with your thumb underneath, as shown in the picture below.
Squeeze the ball between your two fingers and thumb as tightly as you can, hold for 5 seconds, then release.
Repeat 5 times.
EXERCISE 4:
BALL PINCHES – ALL FINGERS
Hold the therapy ball between your thumb and index finger.
Pinch the ball as tightly as you can, hold for 5 seconds, then release.
Repeat this process for each finger.
Repeat 5 times.
EXERCISE 5:
FINGER SIDE SQUEEZES – ALL FINGERS
Hold the therapy ball between the side of your index finger and your thumb.
Squeeze the ball as tightly as you can, hold for 5 seconds, then release.
Repeat the same process between your index and middle fingers.
Repeat 5 times.
EXERCISE 6:
THUMB FLEXION SQUEEZE
Hold the therapy ball between your thumb and fingers.
Squeeze your thumb into the ball as tightly as you can, hold for 5 seconds, then release.
Repeat 5 times.
EXERCISE 7:
FINGER BALL ROLL OUTS
Place your fingers on top of the therapy ball, with the ball resting on a table.
Roll your fingers over the top of the ball and back.
Repeat 5 times.
EXERCISE 8:
BALL ROTATIONS (PALM/BALL UP)
Start by holding the therapy ball in your palm, with your fingers wrapped around it and your palm/ball facing up.
Use your thumb and fingers to gently rotate the ball in a circular motion, as if you’re trying to "roll" it around your palm.
Continue rotating the ball for several seconds, then switch directions and rotate it the opposite way.
Repeat the exercise for 30 seconds to a minute, or for as long as you can comfortably maintain good form.
EXERCISE 9:
BALL ROTATIONS (PALM/BALL DOWN)
Start by holding the therapy ball in your palm, with your fingers wrapped around it and your palm/ball facing down. This position is more difficult, as you need to hold the ball in place to prevent it from dropping.
Use your thumb and fingers to rotate the ball in a circular motion, as if you’re trying to "roll" it around your palm. Go at a speed that you can comfortably manage.
Continue rotating the ball for several seconds, then switch directions and rotate it the opposite way.
Repeat the exercise for 30 seconds to a minute, or for as long as you can comfortably maintain good form.
EXERCISE 10:
BALL TOSSES
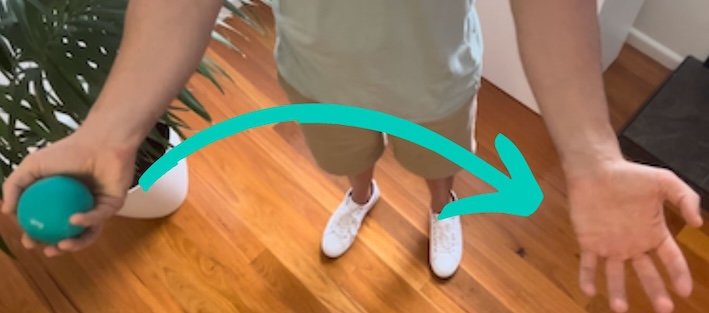
Start by holding your therapy ball in one hand, with your fingers wrapped around it.
Gently toss the ball to your other hand, catching it with your fingers and palm.
Immediately toss the ball back to the first hand, again catching it with your fingers and palm.
Repeat this gentle back-and-forth tossing motion for 30 seconds to a minute, or for as long as you can maintain good form.
BONUS EXERCISE:
ROLLING BALL MASSAGES
Place the therapy ball on a table and roll your hand over it, applying pressure to your palm and fingers as you go.
Continue for several minutes, focusing on any areas of tension or discomfort.
TIPS FOR INCORPORATING HAND EXERCISES INTO YOUR ROUTINE
Start slowly and gradually increase the number of exercises, repetitions, or resistance as your strength improves. Also, aim to hold the exercises for longer periods.
- Start with 5 repetitions and work your way up to 10-15.
- Start with 5-second holds and work up to 10-15 seconds.
Perform these hand-strengthening exercises 2-3 times per week, allowing rest days in between.
Use proper form and avoid straining your hands or fingers to prevent injury.
If you use your hands frequently - for example, in a job that requires heavy use of your hands or in a hobby that demands the same - rest your hands until they feel better. Gradually incorporate these exercises into your routine and balance them with the tasks you're doing.
Listen to your body and stop if you experience pain or discomfort.
Clean your therapy ball with a damp cloth or sanitising wipes after each use.


